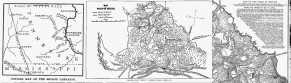
 Shiloh, 6-7 April 1862
|
|
 Short Aircraft Gallery (40 pictures)
Short Sunderland (13 pictures)
 Solomon Islands Campaign
(6 Maps)
Solomon Islands Campaign
(6 Maps)
 Stalingrad (12 maps)
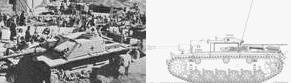 StuG III, StuG IV and StuH Gallery
 Supermarine Spitfire and Seafire Gallery
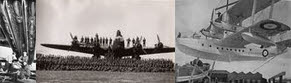
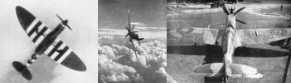
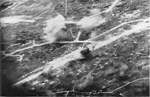 Sakishima Gunto, airfield on, being bombed by Fleet Air Arm, May 1945
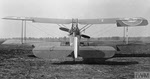
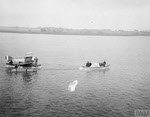
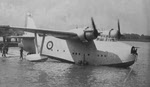 Saro Lerwick L7250 on the water
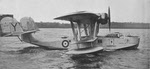 Saro London K5257 on the water
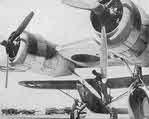
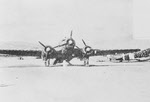 Front view of Savoia Marchetti SM.79
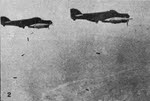 Savoia Marchetti SM.79 dropping bombs
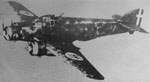 Savoia-Marchetti SM.79 from the left
![]() Savoia-Marchetti SM.79B from the front
Savoia-Marchetti SM.79B from the front
 Scarborough Coastguard Station, 16 December 1914
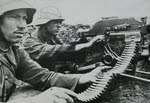 Hungarians with Schwarzlose MG, Eastern Front, 1944
![]() Scimitar varient of the Scorpion Combat Reconnaissance Vehicle
Scimitar varient of the Scorpion Combat Reconnaissance Vehicle
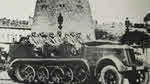 Sd.Kfz 7 Half Track in Paris 1940
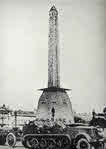 Sd.Kfz 7 Half Track in Paris 1940
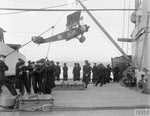
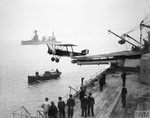
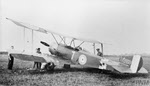
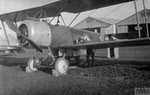
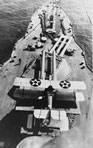
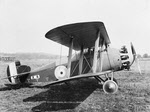
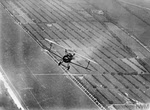
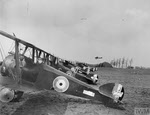
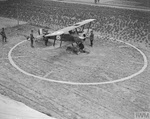
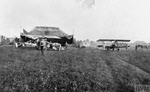
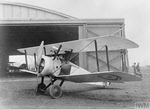
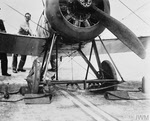
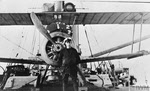
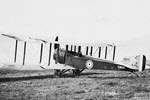
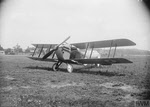
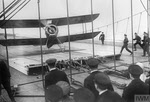
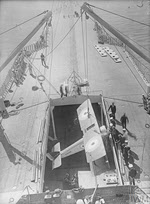
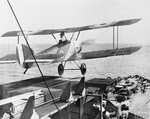
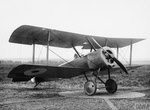
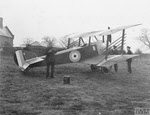
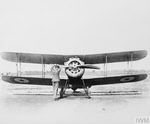
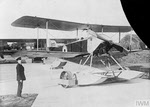
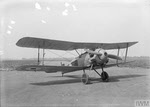
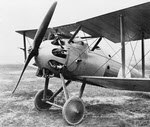
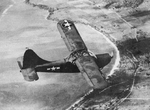
 S.E.5a on USS Mississippi (BB-41)
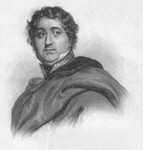
![]() Semmes, Rear-Admiral Raphael, captain of the C.S.S. Alabama
Semmes, Rear-Admiral Raphael, captain of the C.S.S. Alabama
![]() Seven Pines or Fair Oaks , 31 May-1 June 1862, showing the positions before the battle.
Seven Pines or Fair Oaks , 31 May-1 June 1862, showing the positions before the battle.
![]() Seven Pines or Fair Oaks, 31 May-1 June 1862, the battle.
Seven Pines or Fair Oaks, 31 May-1 June 1862, the battle.
 Seven Years War 1756-64: Battles, Central Europe
![]() Shenandoah Valley in 1862 showing Stonewall Jackson's movements
Shenandoah Valley in 1862 showing Stonewall Jackson's movements
![]() Shenandoah Valley in 1862 showing Stonewall Jackson's movements - detail
Shenandoah Valley in 1862 showing Stonewall Jackson's movements - detail
![]() Sherman's March through Georgia, part one
Sherman's March through Georgia, part one
![]() Sherman's March through Georgia, part two
Sherman's March through Georgia, part two
![]() Sherman's March through South Carolina, part one
Sherman's March through South Carolina, part one
![]() Sherman's March through South Carolina, part two
Sherman's March through South Carolina, part two
![]() Sherman's March through North Carolina, part one
Sherman's March through North Carolina, part one
![]() Sherman's March through North Carolina, part two
Sherman's March through North Carolina, part two
![]() Sherman, William Tecumseh, at Atlanta
Sherman, William Tecumseh, at Atlanta
![]() Sherman, William Tecumseh, portrait
Sherman, William Tecumseh, portrait
![]() Sherman, William Tecumseh, at Atlanta with Staff
Sherman, William Tecumseh, at Atlanta with Staff
 Nakajima B5N 'Kate'
taking off from Shokaku to attack Pearl Harbor
Nakajima B5N 'Kate'
taking off from Shokaku to attack Pearl Harbor
![]() Short Land Musket, India Pattern
Short Land Musket, India Pattern
![]() Short Land Carbine, India Pattern
Short Land Carbine, India Pattern
![]() Sikorski and Anders in Moscow, 1 December 1941
Sikorski and Anders in Moscow, 1 December 1941
![]() Sikorski and Anders in the Middle East, Summer 1943
Sikorski and Anders in the Middle East, Summer 1943
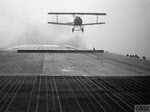
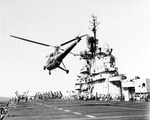 Sikorsky HO3S-1 lands on USS Boxer (CV-21)
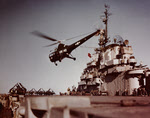 Sikorsky HO3S-1 over USS Kearsarge (CV-33)
 Sikorsky S-42 'Samoan Clipper'
![]() Skua, Blackburn: Front view in flight
Skua, Blackburn: Front view in flight
 Blackburn Skua Mk IIs of No.803 Squadron
![]() Skua, Blackburn: Aftermath of attack on German shipping at Haugesund, Norway, 1941
Skua, Blackburn: Aftermath of attack on German shipping at Haugesund, Norway, 1941
![]() Smith-Dorrien, Sir Horace Lockwood
Smith-Dorrien, Sir Horace Lockwood
 'Sniffer' magnetic runway clearer
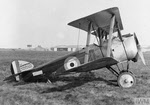
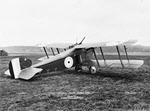
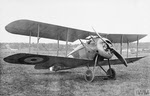
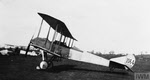
Sopwith 1/2 Strutter Fighter
 Sopwith 1 1/2 Strutter hoisted on HMAS Australia
 Sopwith 1 1/2 Strutter launched from HMAS Australia
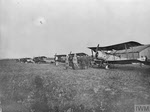
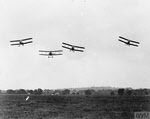
 Sopwith 1 1/2 Strutters, No.3 Wing, RNAS
 Sopwith 1 1/2 Strutter at Valdahon
 Sopwith 1 1/2 Strutter of No.78 Squadron
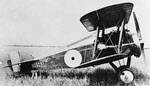
 Sopwith 1 1/2 Strutter from the left
 Sopwith 1 1/2 Strutter from the rear-left
 General Louis Franchet d'Espèrey inspects Sopwith 1 1/2 Strutters and Nieuports
 Home Defence Sopwith 1 1/2 Strutter
Sopwith 1/2 Strutter Bomber
 Sopwith 1 1/2 Strutter Bomber N5116
 Sopwith 1 1/2 Strutter Bomber from the right
Sopwith Ship Strutter
 Sopwith 1 1/2 Strutter on USS Nevada (BB-36)
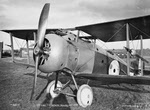
Sopwith B.1
Sopwith Baby
 Sopwith Baby N-2071 from the left
Sopwith Bee
 Harry Hawker by his Sopwith Bee
Sopwith Buffalo
Sopwith Bulldog
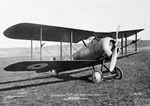
 Sopwith Bulldog X-4 from the right
 Second prototype of Sopwith Bulldog
 Second prototype of Sopwith Bulldog from the right
Sopwith F.1 Camel
 Home Defence Sopwith F.1 Camel of No.51 Squadron
 Major W G Barker' Sopwith F.1 Camel in Flight
 Sopwith F.1 Camel of Major William George Barker
 Camouflaged Wing of Sopwith F.1 Camel
 Cadets rigging Sopwith F.1 Camel
 Sopwith F.1 Camels, Not of No.32 Squadron
 Adjusting Compass on Sopwith F.1 Camel
 Raymond Collishaw in Sopwith F.1 Camel
 Major William George Barker and his Sopwith Camel
 Rear view of Sopwith F.1 Camel Cockpit
 Sopwith F.1 Camels of No.28 Squadron, Italy
 Sopwith F.1 Camels of No.45 Squadron
 Sopwith F.1 Camel from the right
 Sopwith F.1 Camel on Lighter H3
 Sopwith F.1 Camel outside Hanger
Sopwith 2F.2 Camel
 Sopwith 2.F1 Camel under Rigid Airship R.23
 Sopwith 2F.1 Camel of Lieutenant Stuart Culley
 Sopwith 2F.1 Camel taking off from HMS Vindex
 Sopwith 2F.1 Camel landing on HMS Argus
 Arrestor Gear on Sopwith 2F.1 Camel
 Sopwith 2F.1 Camel on Home Defence Duties
 Sopwith 2F.1 Camel landing on HMS Eagle
 Sopwith 2F.1 Camel on HMS Inflexible
Sopwith T.1 Cuckoo
 Sopwith T.1 Cuckoo N74 from the left
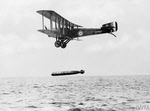 Sopwith T.1 Cuckoo drops torpedo at East Fortune
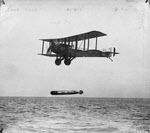 Sopwith T.1 Cuckoo drops torpedo
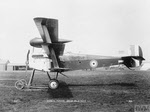
Sopwith Dolphin
 Sopwith Dolphin from the Front
 Sopwith Dolphin showing clear view panels
 Sopwith Dolphin from the right
 Sopwith Dolphin II from the front-left
Sopwith Dragon
Sopwith Gordon Bennett Racer
Sopwith Hippo
Sopwith L.R.T.Tr
 Sopwith L.R.T.Tr from the left
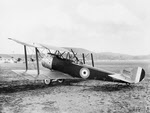
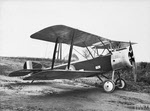
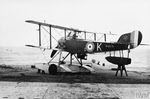
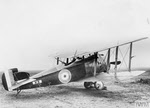
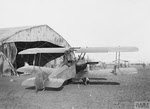
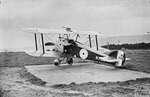
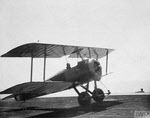
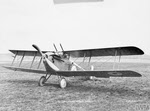
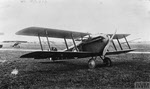
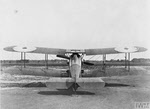
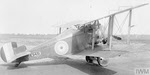
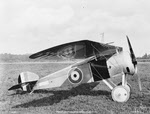
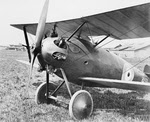
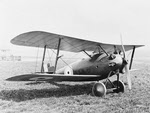
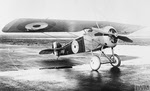
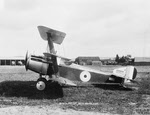
Sopwith Pup
 Sopwith Pup landing on HMS Furious
 Sopwith Pup hoisted from hanger, HMS Furious
 Sopwith Pup taking off from HMS Yarmouth
 Setting Compass on Sopwith Pup
Setting Compass on Sopwith Pup
 Sopwith Pup towed towards HMS Vindex
 Sopwith Pup hoisted onto HMS Vindex
 Sopwith Pup armed with rockets
 Sopwith Pup preparing to take off, HMS Furious
Sopwith Rhino
Sopwith Salamander
 Sopwith Salamander from the front
 Sopwith Salamander from the front right
 Sopwith Salamander from the rear
 Third prototype of Sopwith Salamander
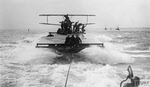
Sopwith Schneider
 Sopwith Schneider from the front
Sopwith Scooter
 Sopwith Scooter from the Right
Sopwith Snail
 Monococque Sopwith Snail from the left
 Monococque Sopwith Snail from the right
Sopwith Snapper
 Sopwith Snapper from the Front
Sopwith Snark
Sopwith Snipe
 Sopwith Snipes of No.29 Squadron
 First prototype of Sopwith Snipe
 Uncovered Nose of Sopwith Snipe
 Sopwith Snipe from the Front Right
 Sopwith Snipe as Dragon Prototype
Sopwith Swallow
 Sopwith Swallow from the Front
Sopwith Tabloid
Sopwith Triplane
 Sopwith Triplane with 150hp Hispano-Suiza engine
 Sopwith Triplane with 200hp Hispano-Suiza engine
 Sopwith Triplane from the front
Sopwith Type 807 Folder
Sopwith Type 860
Sopwith Type 880 'Spinning Jenny'
 Sopwith Type 880 'Spinning Jenny'
 Soult, Marshal Nicholas Jean-de-Dieu
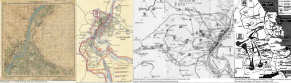
![]() South Mills, battle of, 19 April 1862
South Mills, battle of, 19 April 1862
![]() Spain and Portugal during the Peninsular War
Spain and Portugal during the Peninsular War
![]()
![]() Spectre Gunship, Lockheed AC-130 (nine pictures)
Spectre Gunship, Lockheed AC-130 (nine pictures)
![]() Spee, Maximilian Reichsgraf von, 1861-1914
Spee, Maximilian Reichsgraf von, 1861-1914
![]() Spion Kop and Vaal Krantz, Boer War
Spion Kop and Vaal Krantz, Boer War
![]() Spotsylvania and the Wilderness, 1864
Spotsylvania and the Wilderness, 1864
Springfield Rifle
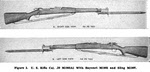 M1903A1 Springfield Rifle with Bayonet M1905
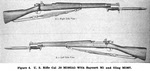 M1903A3 Springfield Rifle with Bayonet M1
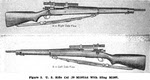 M1903A4 Springfield Rifle with Sling M1907
 Loading operation, M1903 Springfield Rifle
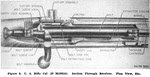 Plan view of receiver, M1903A1 Springfield Rifle
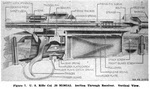 Side plan of receiver for M1903A3 Springfield Rifle
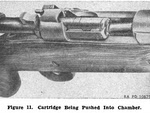 Cartidge being pushed into chamber, M1903 Springfield Rifle
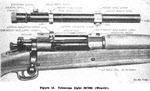 Telescopic Scope M73B1 for M1903 Springfield Rifle
![]() Bolt Group Parts for M1903M3 Springfield Rifle
Bolt Group Parts for M1903M3 Springfield Rifle
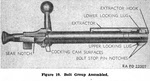 Bolt Group Assembled, M1903 Springfield Rifle
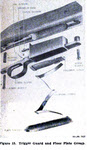 Trigger Guard and Floor Plate Group, M1903 Springfield Rifle
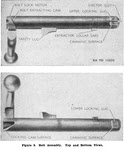 Bolt Assembly, M1903 Springfield Rifle
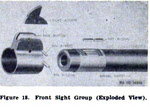 Front Sight Group, M1903 Springfield Rifle
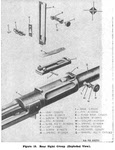 Rear Sight Group, M1903 Springfield Rifle
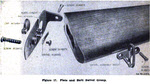 Plate and Butt Swivel Group, M1903 Springfield Rifle
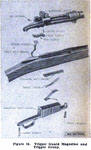 Trigger Guard Magazine and Trigger Group, M1903 Springfield Rifle
 Staghound Armoured Car in Damascus, 1945
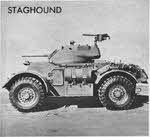 Staghound Armoured Car Mk.I from the left
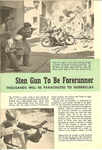 Sten Gun in Popular Science (1 of 2)
 Sten Gun in Popular Science (2 of 2)
![]() Stereo or Scissors Telescope, used on artillery observation ladder, 1914
Stereo or Scissors Telescope, used on artillery observation ladder, 1914
![]() Stereo or Scissors Telescope, detail, 1914
Stereo or Scissors Telescope, detail, 1914
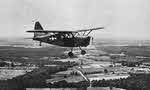
 Stinson L-1 Vigilant from below
 Stinson L-1 Vigilant dropping supplies over Burma
 Stinson L-1 Vigilant over Burma
 Stinson L-5 Sentinel under wing of Consolidated PB4Y-2 Privateer
 Stinson L-5 Sentinel over Saipan
 Stinson L-5 Sentinel from above
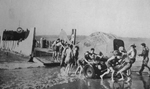 Unloading a Stinson L-5 Sentinel, Burma
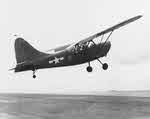
 Stinson L-5 Sentinel from the right
 Comparison of Stinson L-5 and L-5B
 Stinson OY-1 Sentinel over Okinawa
 Stinson OY-1 takes off from USS White Plains (CVE-66)
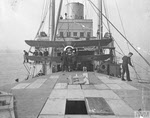
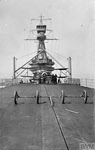
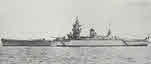 Side view of battleship Strasbourg
![]() Swordfish, Fairey, returning from an attack on the Bismarck
Swordfish, Fairey, returning from an attack on the Bismarck
![]() Swordfish, Fairey, being launched by catapult
Swordfish, Fairey, being launched by catapult
![]() Swordfish, Fairey, of the Fleet Air Arm
Swordfish, Fairey, of the Fleet Air Arm
 Battle of the Somme
 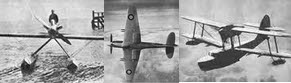 Supermarine Aircraft Galley
 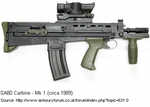 SA80 Carbine Mk 1
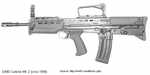 SA80 Carbine Mk 2
 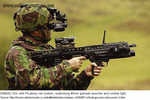 SA80A2 UGL
 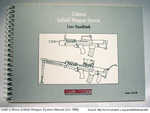 SA80 User Handbook
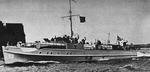 S-Boat S-13 from left
 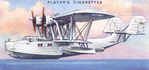 Saro London
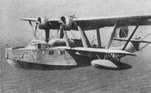 Saro London II Flying Boat
 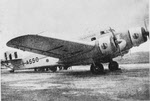 Savoia-Marchetti SM.83 I-ASSO
 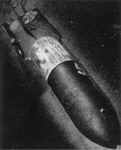 SC 50 German HE bomb
 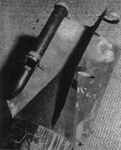 SC 50 HE bomb - tail fins
  SC 100 HE bomb in bomb rack
 SC 1800 Satan German HE bomb
  Siebel Si 204s at Klagenfurt
  Sopwith 1 1/2 Strutter A1924
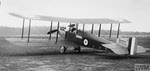 Sopwith B.1 from the left
 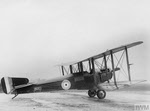 Sopwith B.1 from the right
 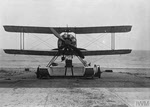 Sopwith Baby from the front
 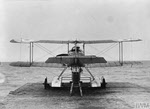 Sopwith Baby from the rear
 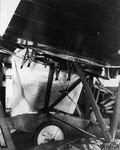 Bomb gear under Sopwith Baby
 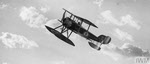 Sopwith Baby in Flight
 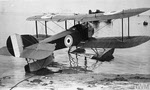 Sopwith Baby in the Water
 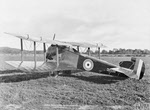 Sopwith Buffalo H5892
  Sopwith Buffalo H5893
 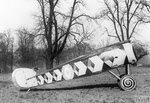 Camouflaged Sopwith F.1 Camel
 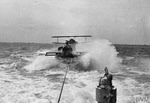 Sopwith F.1 Camel on Lighter
  Sopwith F.1 Camel N6332
 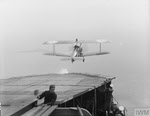 Sopwith 2F.1 Camel taking off
 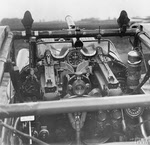 Controls of Sopwith Dolphin
 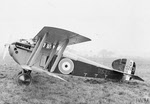 Sopwith Dolphin D5263
 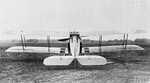 Sopwith Dolphin from the rear
 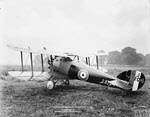 Sopwith Dragon J3704
 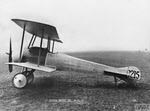 Sopwith Gordon Bennett Racer
 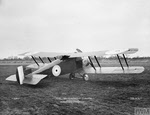 Sopwith Hippo from the rear
 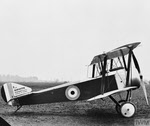 Prototype of Sopwith Pup
  Sopwith Pup A7302
 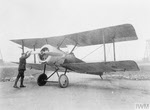 Sopwith Pup at Waddington
 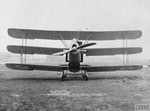 Sopwith Rhino from the Front
 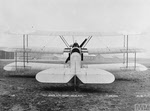 Sopwith Rhino from the Rear
 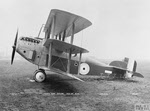 Sopwith Rhino from the left
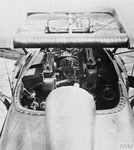 Cockpit of Sopwith Salamander
 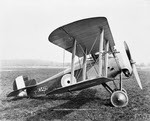 Sopwith Salamander E5429
 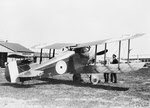 Sopwith Salamander, May 1918
 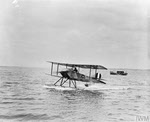 Sopwith Schneider 3734
 Sopwith Schneider 3713
 Sopwith Schneider 3804
  Fabric covered Sopwith Snail
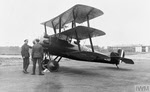 Sopwith Snark from the left
 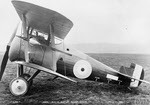 Sopwith Snipe from the left
 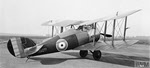 Sopwith Snipe from right-rear
  Sopwith Snipe over the Rhine
 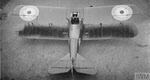 Sopwith Snipe from Above
 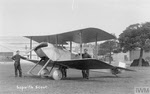 Sopwith Tabloid from the left
 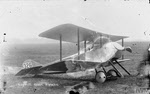 Sopwith Tabloid 326
 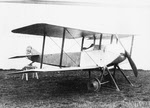 Sopwith Tabloid 394
 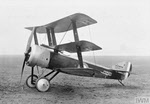 Sopwith Triplane N5438
 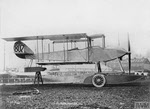 Sopwith Type 807 'Folder'
 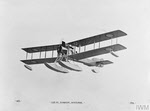 Sopwith Type 860 in Flight
 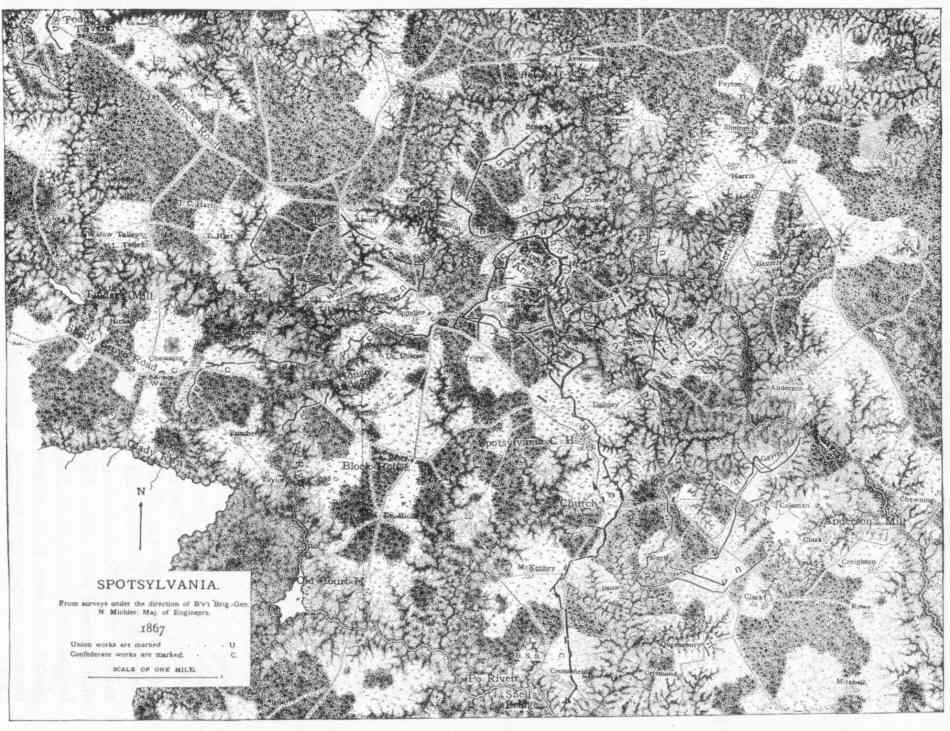 Spotsylvania area
 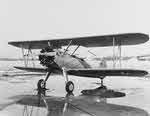 Stearman N2S-3, 11 March 1941
 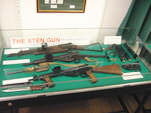 Sten Guns Mk.1, 2 and 5
 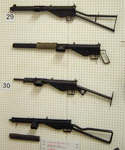 Sten Guns Mk.1, 2 and 3
  Sten Guns Mk.4 and 5
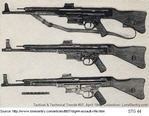
 Sturmgewehr (StG) 44
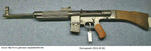
 Sukhoi Su-2 from the left
 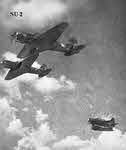 Sukhoi Su-2 from below