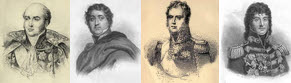
 Napoleonic and Revolutionary Wars Portraits Gallery
 |
|
Napoleonic and Revolutionary Wars Portraits Gallery
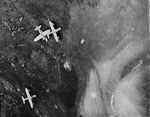
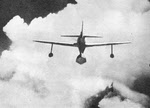
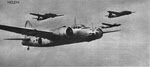
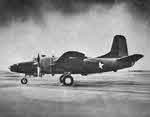
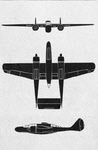
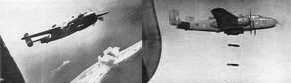 North American B-25B Mitchell Picture Gallery
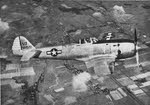
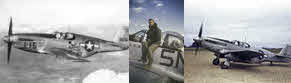 North American P-51 Mustang Picture Gallery
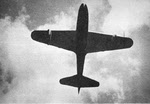
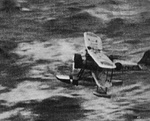
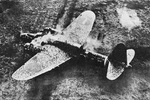
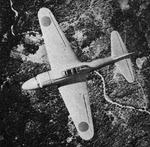 Nakajima A6M2-N 'Rufe' from above
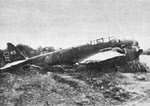
 Nakajima A6M2-N 'Rufe' on Attu
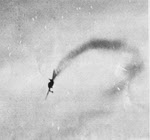
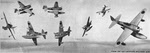 Figure of Eight of Nakajima A6M2-N 'Rufe'
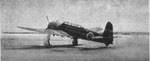
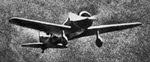
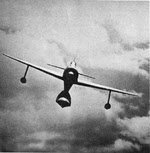 Nakajima A6M2-N 'Rufe' from the front
 Nakajima A6M2-N 'Rufe' from below
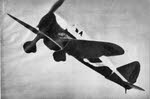
 Nakajima A6M2-N 'Rufe' from behind
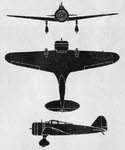
 Plans of Nakajima A6M2-N 'Rufe'
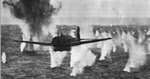
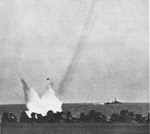
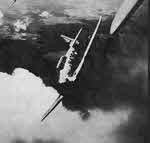
 Nakajima B5N 'Kate' dropping torpedo
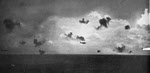
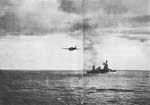
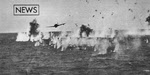
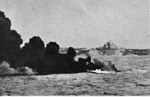
 Nakajima B5N 'Kate' attacking USS South Dakota
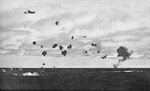
 Nakajima B5N 'Kate' attacking USS Hornet
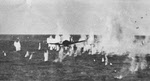
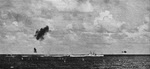 Nakajima B5N 'Kate' attacking US warship
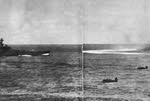
 Nakajima B5N 'Kates' at Midway
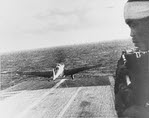 Nakajima B5N 'Kate'
taking off from Shokaku
to attack Pearl Harbor
Nakajima B5N 'Kate'
taking off from Shokaku
to attack Pearl Harbor
 Nakajima B5N 'Kate' in torpedo attack (1 of 2)
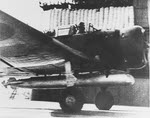 Nakajima B5N1 'Kate' taking off from Akagi
 Nakajima B5N 'Kate' in torpedo attack (2 of 2)
 Nakajima B5N 'Kate' from below
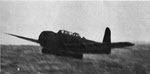
 Nakajima B6N 'Jill' from the front
 Nakajima B6N 'Jill' from the left
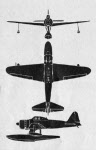
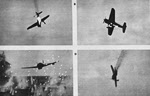 Four views of Nakajima B6N 'Jill'
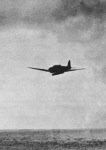
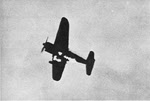
 Nakajima B6N 'Jill' at start of attack run (1 of 11)
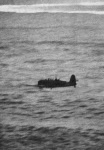
 Nakajima B6N 'Jill' approaching target (2 of 11)
 Nakajima B6N 'Jill' almost at target (3 of 11)
 Nakajima B6N 'Jill' pulling up over target (4 of 11)
 Nakajima B6N 'Jill' attempting to escape (5 of 11)
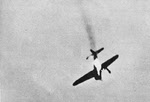
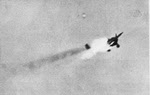 Nakajima B6N 'Jill' on fire (6 of 11)
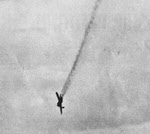
 Nakajima B6N 'Jill' plunging towards sea (7 of 11)
 Nakajima B6N 'Jill' crashed into sea (8 of 11)
 Nakajima B6N 'Jill' hit before attack run (9 of 11)
 Nakajima B6N 'Jill' plunging towards sea (10 of 11)
 Nakajima B6N 'Jill' explodes after hitting sea (11 of 11)
 Plans of Nakajima C6N Saiun 'Myrt'
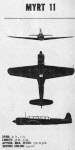
 Four views of Nakajima C6N Saiun 'Myrt'
 Nakajima C6N Saiun 'Myrt' from the front-left
 Nakajima C6N Saiun 'Myrt' from the left
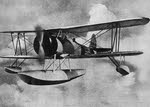 Front view of Nakajima E8N 'Dave'
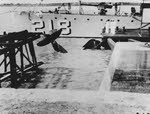 Crashed Nakajima E8N1 alongside USS Parrott (DD-218), Shangai, 1937
 Nakajima E8N 'Dave' from below
 Nakajima E8N 'Dave' flying low
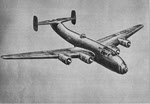 Drawing of Nakajima G5N Shinzen 'Liz'
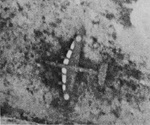 Nakajima G5N Shinzen 'Liz' from above
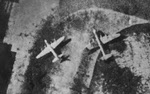 Nakajima G8N 'Rita' and Nakajima G5N 'Liz'
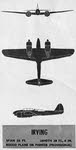 Plans of Nakajima J1N 'Irving'
 Nakajima J1N1-S Gekko from the right
 Plans of Nakajima Ki-27 'Nate'
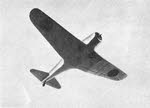
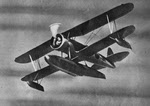
 Nakajima Ki-27 'Nate' Climbing
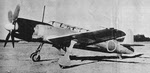
 Front view of Nakajima Ki-27 'Nate'
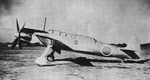
 Rear view of Nakajima Ki-27 'Nate'
 Nakajima Ki-27 'Nate' in China
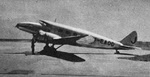 Nakajima Ki-34 Army Type 97 Transport from the left
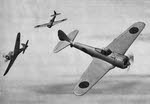
 Plans of Nakajima Ki-43 'Oscar'
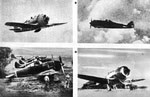
 Drawings of Nakajima Ki-43 'Oscar'
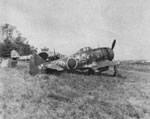
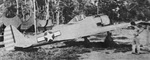 Nakajima Ki-43-II Oscar on Hollandia
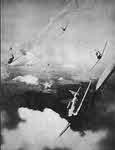
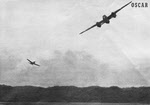 Nakajima Ki-43 attacking North American B-25 Mitchell
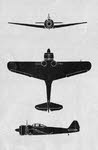
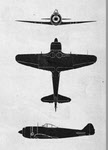
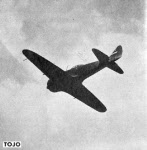
 Four views of Nakajima Ki-44 Shoki (Demon) 'Tojo'
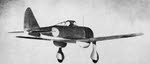
 Nakajima Ki-44 Shoki (Demon) 'Tojo' from the front
 Plans of Nakajima Ki-44 Shoki 'Tojo'
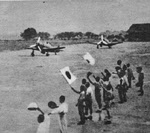 Nakajima Ki-44 Shoki 'Tojo' being waved off
 Nakajima Ki-44 Shoki 'Tojo' warming up
 Nakajima Ki-44 Shoki 'Tojo' in formation
 Nakajima Ki-44 Shoki 'Tojo' from below
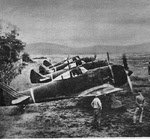
 Nakajima Ki-44 Shoki 'Tojo' on edge of airfield
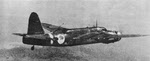
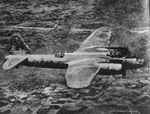 Nakajima Ki-49 Donryu (Storm Dragon) 'Helen' from the right
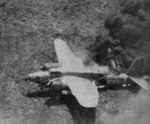 Nakajima Ki-49 Donryu (Storm Dragon) 'Helen' on fire
 Formation of Nakajima Ki-49 Donryu (Storm Dragon) 'Helens'
 Nakajima Ki-49 Donryu (Storm Dragon) 'Helen' in flight
 Nakajima Ki-49 Donryu (Storm Dragon) 'Helen' from above
 Plans of Nakajima Ki-49 Donryu (Storm Dragon) 'Helen'
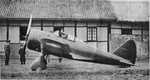
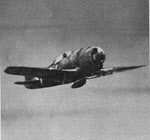
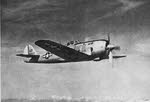
 Nakajima Ki-84 Hayate (Gale) 'Frank' from the right
 Nakajima Ki-84 Hayate (Gale) 'Frank' from below-right
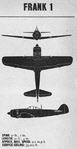 Plans of Nakajima Ki-84 Hayate 'Frank'
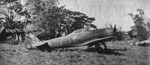 Nakajima Ki-84 Hayate 'Frank' from the right
 Nakajima Ki-84 Hayate 'Frank' from the front
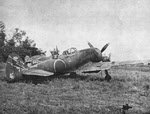 Nakajima Ki-84 Hayate 'Frank' from the right-rear
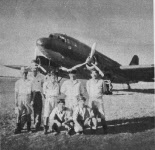 Crew standing in front of Nakajima L2D 'Tabby'
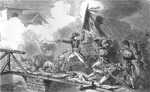 Napoleon at the Bridge of Arcola, 15 November 1796
![]() Napoleonic Wars: Europe in 1812
Napoleonic Wars: Europe in 1812
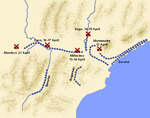 Napoleon's entry into Italy, 1796
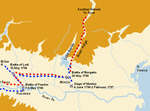 Napoleon's crossing of the Po, 1796
 Nato Map Symbols: Regiments and smaller
![]() Nato Map Symbols: Brigades and above
Nato Map Symbols: Brigades and above
![]() Nato Map Symbols: Units by type
Nato Map Symbols: Units by type
 Nato Map Symbols: Units by equipment
 Nato Map Symbols: German 16th Division
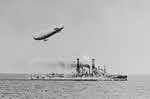 Navy Airship C-7 over USS Arkansas (BB-33)
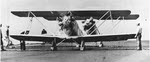
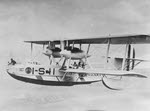 Naval Aircraft Factory PN-7 in flight, 1925
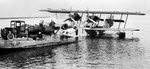
 Naval Aircraft Factory PN-9 after sailing to Hawaii
 Naval Aircraft Factory PN-10 taking on fuel
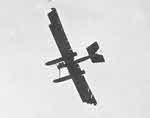 Naval Aircraft Factory PT-1 from Below
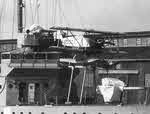 Naval Aircraft Factory TS-1 Floatplane on USS Charles Ausburn (DD-294)
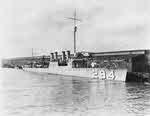 USS Charles Ausburn (DD-294) carrying a Naval Aircraft Factory TS-1 Floatplane
 Navy TS-1 of VF-1, USS Langley (CV-1), 1923
 Navy TS-1 Scout Aircraft in Formation, 1920s
![]() New Berne, 14 March 1862 - the area
New Berne, 14 March 1862 - the area
![]() New Berne, 14 March 1862 - the battlefield
New Berne, 14 March 1862 - the battlefield
![]() New Mexico and Arizona: Confederate invasion of
New Mexico and Arizona: Confederate invasion of
![]() New Orleans 1: The defences of the Mississippi and the Mortar fleet
New Orleans 1: The defences of the Mississippi and the Mortar fleet
![]() New Orleans 2: The course of the U.S.S. Mississippi
New Orleans 2: The course of the U.S.S. Mississippi
![]() New Orleans 3: The course of the U.S.S. Brooklyn
New Orleans 3: The course of the U.S.S. Brooklyn
![]() New Orleans 4: The Confederate fleet above the forts
New Orleans 4: The Confederate fleet above the forts
![]() Nieuport, British troops at, 1940
Nieuport, British troops at, 1940
 Naval Aircraft Factory PBN Nomad from below
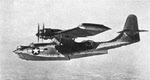 Naval Aircraft Factory PBN Nomad from the left
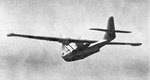 Naval Aircraft Factory PBN Nomad from the rear
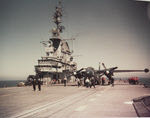 North American AJ-1 Savage on USS Oriskany (CV-34), 1952
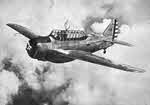
 North American T-6 Texan in a dive
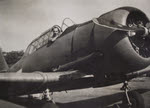 Nose view of North American Harvard II or III
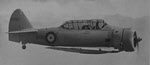
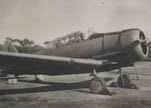 Side view of North American Harvard II or III
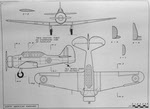 Plans of North American Harvard
 North American Harvard N7001 in flight
 North American O-47 from the left
 Formation of North American T-6 Texans
 Prototype of North American XB-28 Dragon
![]() North Carolina coastline, c. 1861-86
North Carolina coastline, c. 1861-86
![]() North Carolina coastline, operations early in the war
North Carolina coastline, operations early in the war
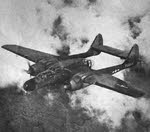
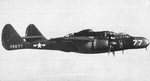 Northrop YP-61 Black Widow from the right
 Northrop YP-61 Black Widow from below-front
 Northrop YP-61 Black Widow from the below-right
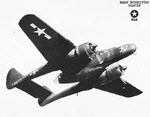
 Northrop YP-61 Black Widow from the front-right
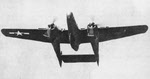
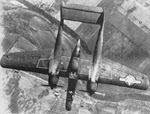 Northrop YP-61 Black Widow from above
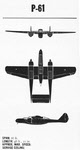 Plans of Northrop P-61 Black Widow
 Northrop P-61A Black Widow of 422nd Night Fighter Squadron
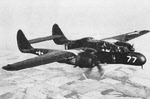
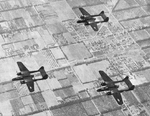 Formation of three Northrop P-61 Black Widows
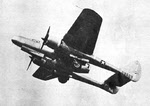 Northrop P-61 Black Widow taking off
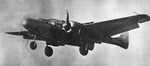 Northrop P-61 Black Widow Landing
 Northrop P-61 Black Widow from the front
 Plans of Northrop P-61 Black Widow
 Northrop P-61 Black Widow from the Right
![]() North Anna and Cold Harbor
: Confederate position
North Anna and Cold Harbor
: Confederate position
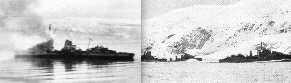 Narvik, April 1940
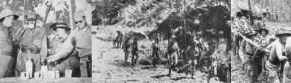 New Guinea, 1942-45
 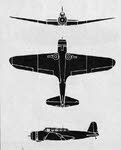 Plans of Nakajima B5N 'Kate'
 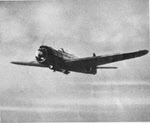 Nakajima B6N 'Jill' in flight
  Plans of Nakajima B6N 'Jill'
 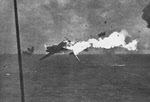 Nakajima B6N 'Jill' In Flames
 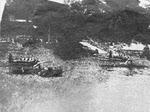 Nakajima B6N 'Jill' on ground
 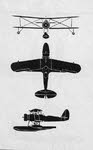 Plans of Nakajima E8N 'Dave'
 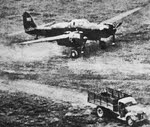 Nakajima J1N 'Irving'
 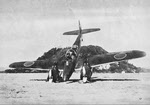 Crashed Nakajima J1N1
 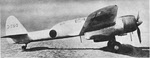 Nakajima J1N1 from the Right
 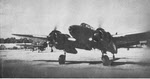 Nakajima J1N1 from the front
 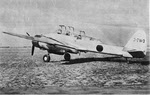 Nakajima J1N1 from the left
  Four views of Nakajima J1N1
 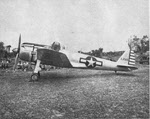 Nakajima Ki-43-II
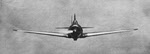 Nakajima Ki-43 from the front
 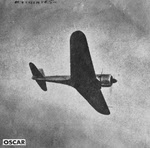 Nakajima Ki-43 from below
 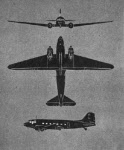 Plans of Nakajima L2D 'Tabby'
  North African Theatre
 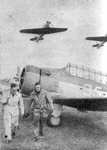 North American Harvard I
  Northrop A-17A in Flight
 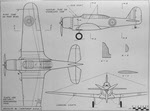 Plans of Northrop Model 8A-3P
  Northrop P-61 Black Widow
 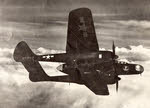 Northrop YP-61 from below