 Market Garden, 17-27 September 1944 - Picture and Map Gallery
 |
|
Market Garden, 17-27 September 1944 - Picture and Map Gallery
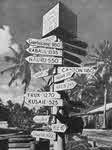 Signpost on Majuro Atoll, Marshall Islands
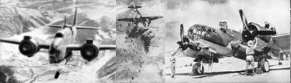
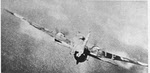
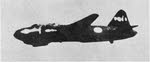
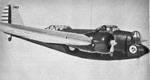
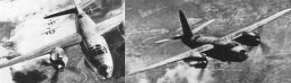 Martin B-26 Marauder (13 pictures)
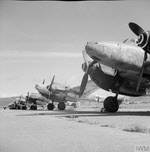
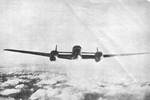
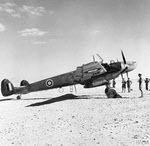
 Martin Maryland and Baltimore
(12 pictures)
Martin Maryland and Baltimore
(12 pictures)
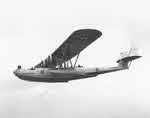 Martin P3M-1 at New York Fleet Review, 1934
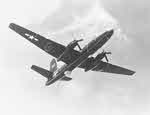 Martin P4M-1 Mercator from below, 1961
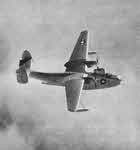
 Martin PBM-3 with Radar Radome
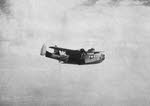
 Martin PBM Mariner from the Right
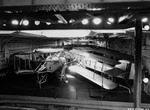 Martin T3M-3 in hanger, USS Lexington (CV-2), 1928
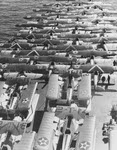
 Martin T4M on USS Saratoga (CV-3)
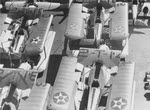
 Martin T4M, Boeing F2B-1 and Boeing F3B-1 on USS Saratoga (CV-3)
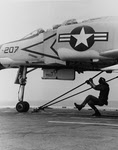 F-4B Phantom II readied for launch, USS Coral Sea (CVA-43)
 McDonnel Douglas FA-18 Hornet on USS Coral Sea (CVA-43), 1988
 Messerschmitt Bf 109 Picture Gallery
 Messerschmitt Me 262 Picture Gallery
 Midway, 3 - 7 June 1942 - Picture and Map Gallery
 Mitchell, North American B-25 Picture Gallery
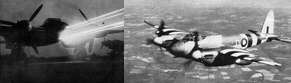 Mosquito, de Havilland, Picture Gallery
 M1 Garand, M1 and M1A1 Carbines
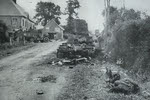 M3 Half Track on the road to Avranches
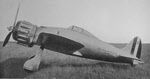 Macchi M.C.200 Saetta from the left
![]() Madagascar, invasions of, 5 May 1942
Madagascar, invasions of, 5 May 1942
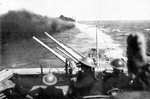 Malta: British Cruisers make smoke during Malta Convoy
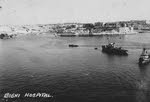 Malta: Royal Naval Hospital, Bighi
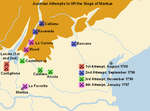 Mantua,
Austrian attempts to lift siege, 1796-97
Mantua,
Austrian attempts to lift siege, 1796-97
![]() Martlet descending into the hanger deck
Martlet descending into the hanger deck
![]() Martlet showing the folding wings
Martlet showing the folding wings
 USS Lake Champlain (CV-39) catapults two McDonnell F2H Banshees
![]() McDowell, battle of: 8 May 1862
McDowell, battle of: 8 May 1862
![]() Medellin, battle of, 28 March 1809, phase one
Medellin, battle of, 28 March 1809, phase one
![]() Medellin, battle of, 28 March 1809, phase two
Medellin, battle of, 28 March 1809, phase two
![]() Medellin, battle of, 28 March 1809, phase three
Medellin, battle of, 28 March 1809, phase three
![]() Medellin, battle of, 28 March 1809, phase four
Medellin, battle of, 28 March 1809, phase four
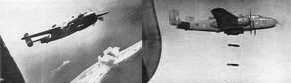
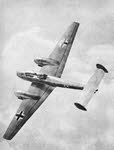
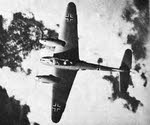
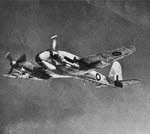
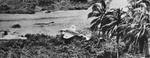
![]() Messerschmitt Bf 110 - Bombing
Messerschmitt Bf 110 - Bombing
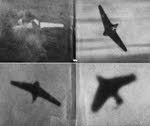
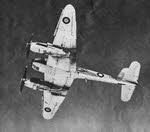
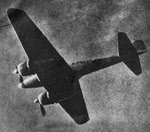
![]() Messerschmitt Bf 110 seen from below
Messerschmitt Bf 110 seen from below
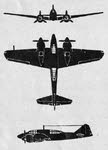
 Messerschmitt Bf 110 from above
 Messerschmitt Bf 110 from below
 Messerschmitt Bf 110 from the left
 Messerschmitt Bf 110 night fighters, Stavanger
 Messerschmitt Bf 110 from the front
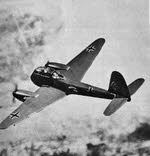
 Messerschmitt Bf 110C from the left
![]() Messerschmitt Bf 110C-4 top plan
Messerschmitt Bf 110C-4 top plan
![]() Messerschmitt Bf 110C-4 side plan
Messerschmitt Bf 110C-4 side plan
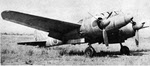
 Messerschmitt Bf 110D 'Belle of Berlin'
 Messerschmitt Bf 110G with SN2 radar
 Blurred pictures of Messerschmitt Me 163
 Eighth Prototype of Messerschmitt Me 163B
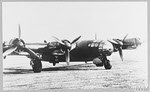
 Messerschmitt Me 210 from above
 Messerschmitt Me 210 from the left
 Messerschmitt Me 210 from below
![]() Messerschmitt Me 210A from the front
Messerschmitt Me 210A from the front
 Messerschmitt Me 210A from below
 Messerschmitt Me 210A from the left
 Messerschmitt Me 210 from the rear
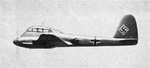
 Messerschmitt Me 261 from the left
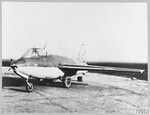 Messerschmitt Me 263 from the front
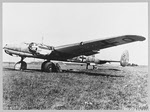
 Messerschmitt Me 264 from the front
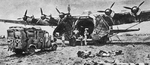
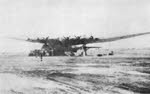 Unloading a Messerschmitt Me 323
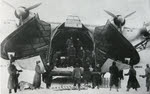 Open Nose Doors on Messerschmitt Me 323
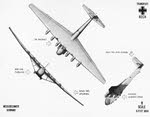 Plans of Messerschmitt Me 323 (1)
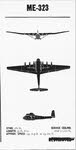 Plans of Messerschmitt Me 323 (2)
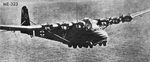
 Messerschmitt Me 323 from above
 Loading the Messerschmitt Me 323
 Messerschmitt Me 323 from the front
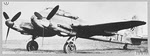 Messerschmitt Me 410 from the left
 Messerschmitt Me 410A-3 from from the back-right
 Messerschmitt Me 410A-3 from the front-left
 Messerschmitt Me 410A-3 from below
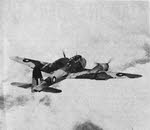
 Messerschmitt Me 410A1/U4 peeling off
 Messerschmitt Me 410A3 from the front
 Messerschmitt Me 410A3 from the right
![]() Methuen, Lieutenant-General Lord
Methuen, Lieutenant-General Lord
![]() Mig-29: Side View
Mig-29: Side View
![]() Mig-29: Nose View
Mig-29: Nose View
![]() Mig-29: two aircraft side by side
Mig-29: two aircraft side by side
![]() Mig-29 : Front View
Mig-29 : Front View
![]() Mig-29 : Front View
Mig-29 : Front View
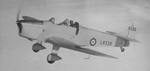 Miles Magister L8338 in Flight
![]() Mill Springs (or Logan's Cross Roads), battle of, 19 January 1862
Mill Springs (or Logan's Cross Roads), battle of, 19 January 1862
![]() Missionary Ridge, battle of, 25 November 1863
Missionary Ridge, battle of, 25 November 1863
![]() Mississippi, Ohio, Tennessee and Cumberland Rivers, 1861-2
Mississippi, Ohio, Tennessee and Cumberland Rivers, 1861-2
![]() Mississippi (north), west Tennessee and east Missouri
Mississippi (north), west Tennessee and east Missouri
 Destroyed Zero on Admiralty Islands
 Front view of Mitsubishi A6M2 Zero
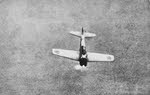
 Mitsubishi A6M2 Zero from above
 Side view of Mitsubishi A6M2 Zero
 Mitsubishi A6M2 Model 21 as Decoy
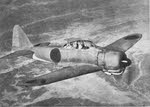
 Mitsubishi A6M2 from the front
 Mitsubishi A6M2 from the right
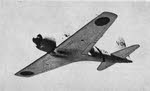
 Mitsubishi A6M3 Zero from above
 Mitsubishi A6M3 Zero from the side
 Mitsubishi A6M3 Zero from Below
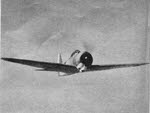
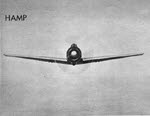 Mitsubishi A6M3 Zero from the front
 Mitsubishi A6M3 Zero from the right
 Mitsubishi A6M5 from the front
 Front view of Mitsubishi A6M5 on Saipan
 Mitsubishi A6M5 on Saipan from the right
 Mitsubishi A6M5 on US Escort Carrier
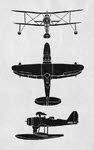 Plans of Mitsubishi F1M 'Pete'
 Sketch of Mitsubishi F1M 'Pete'
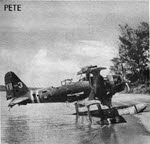 Mitsubishi F1M 'Pete' from the right
 Mitsubishi F1M 'Pete' from the left
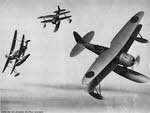
 Mitsubishi F1M 'Pete' and Aichi E13A 'Jake' attacked on Truk
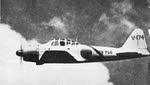
 Mitsubishi G3M over icy landscape
 Mitsubishi G3M 'Nell' from above
 Mitsubishi G3M 'Nell' from below
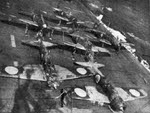
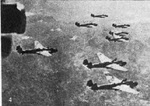 Formation of Mitsubishi G3M 'Nell' bombers
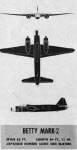 Plans of Mitsubishi G4M Model 22 'Betty'
 Mitsubishi G4M 'Betty' being bombed, Rabaul
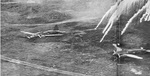
 Mitsubishi G4M1 at Munda Airfield
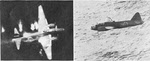
 Mitsubishi G4M1 Model 11 'Betty' going down in flames
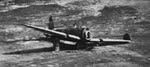
 Mitsubishi G4M1 Model 11 and G4M2 Model 22
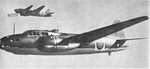 Mitsubishi G4M1 Model 11 'Betty' from the left
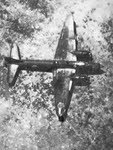 Mitsubishi G4M2 'Betty' from above
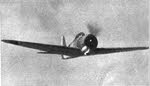
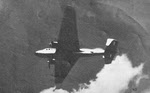
 Mitsubishi G4M2 Model 22 'Betty' in flight
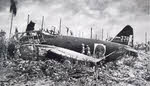
 Damaged Mitsubishi G4M2 Model 24 'Betty'
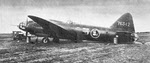 Mitsubishi G4M2 Model 24 'Betty' from the left
 Mitsubishi G4M2 'Betty' carrying Yokosuka MXY-7 Ohka
 Plan of Mitsubishi G4M 'Betty'
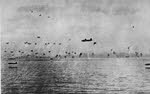 Mitsubishi G4M Betties attack at Guadalcanal
 Side view of Mitsubishi G4M 'Betty'
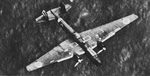
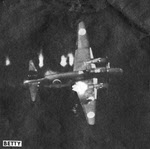
 Mitsubishi G4M 'Betty' shot down attacking US fleet
 Plans of Mitsubishi J2M2 Model 11
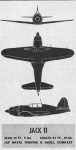
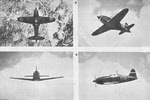 Four views of Mitsubishi J2M Raiden 'Jack'
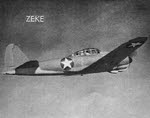
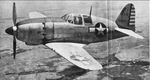 Mitsubishi J2M3 Model 21 in US colours from the left
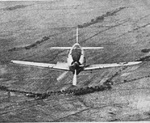 Mitsubishi J2M3 Model 21 in US colours from the front
 Mitsubishi J2M3 Model 21 in US colours from below
 Abandoned Mitsubishi J2M3 Model 21 from the right
 Abandoned Mitsubishi J2M3 Model 21 from the front
 Abandoned Mitsubishi J2M3 Model 21 from the left
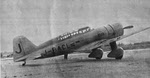 Mitsubishi Ki-15 from the right
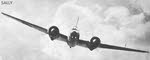
 Plans of Mitsubishi Ki-21 'Sally 1'
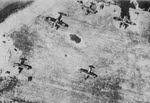
 Formation of Mitsubishi Ki-21 'Sally' bombers
 Rear view of Mitsubishi Ki-21 'Sally 1'
 Side view of Mitsubishi Ki-21 'Sally 1'
 Mitsubishi Ki-21 'Sally 3' from above
 Side view of Mitsubishi Ki-21 'Sally 3'
 Front view of Mitsubishi Ki-21 'Sally 1'
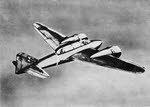
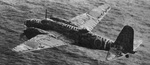 Mitsubishi Ki-21-IIb 'Sally' in flight
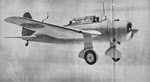 Mitsubishi Ki-30 'Ann' from the right
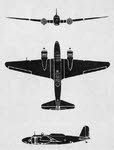
 Sketch of Mitsubishi Ki-46 'Dinah'
![]() Side Sketch of Mitsubishi Ki-46 'Dinah'
Side Sketch of Mitsubishi Ki-46 'Dinah'
 Plans of Mitsubishi Ki-46 'Dinah'
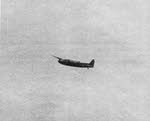
 Mitsubishi Ki-46 'Dinah' from below
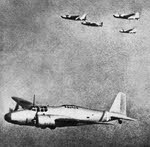
 Mitsubishi Ki-46-II 'Dinah on airfield
 Mitsubishi Ki-46-II 'Dinah of Technical Air Intelligence Centre
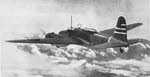
 Mitsubishi Ki-46-III 'Dinah' from the right
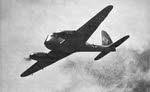
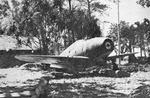
 Mitsubishi Ki-51 from the left
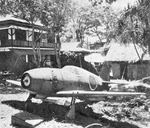
 Mitsubishi Ki-51 on the ground
 Plans of Mitsubishi Ki-57 'Topsy' (1 of 2)
 Plans of Mitsubishi Ki-57 'Topsy' (2 of 2)
 Kawasaki Ki-48 'Lilly' and Mitsubishi Ki-57 'Topsy' on airfield
 Side view of Plans of Mitsubishi Ki-57 'Topsy'
 Front view of Plans of Mitsubishi Ki-57 'Topsy'
 Two landed Mitsubishi Ki-57 'Topsies'
 Baka and Ki-67 Peggy on USS Core (CVE-13)
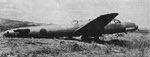
 Mitsubishi Ki-67 'To-Go' Army Special Attack Aircraft (possibly)
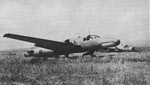
 Mitsubishi Ki-67-I 'Peggy' from the left
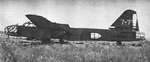
 Mitsibishi Ki-67 'Peggy' from the right
 Plans of Mitsubishi Ki-67-I 'Peggy'
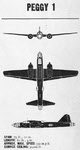
 Four views of Mitsubishi Ki-67-I
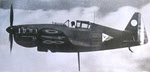 Morane Saulnier MS.406 from the left
 Morane Saulnier M.S. 406 of GC I/3
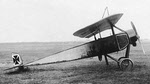 Morane Saulnier Type L in German colours
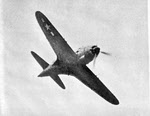
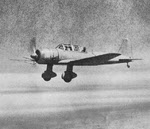
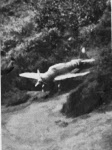
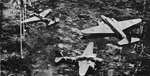
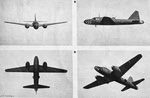
 Martin B-10 in Flight
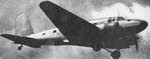
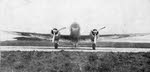
 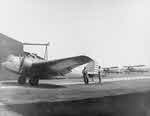 Martin B-10 at Manila, 1937
 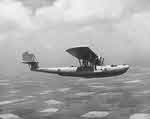 Martin P3M-2 in the 1930s
 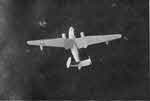 Martin PBM Mariner on the sea
 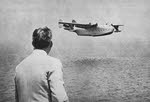 Martin PB2M-1R Mars in Flight
  Muldownie, Charles
 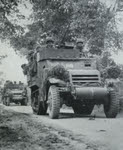 M3 Half Track in Normandy
 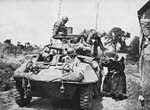 Front view of M8 Armoured Car
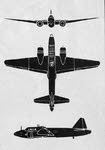
 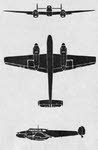 Plans of Messerschmitt Bf 110
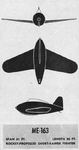 Plans of Messerschmitt Me 163
 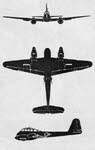 Plans of Messerschmitt Me 210
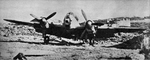
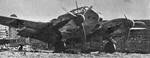
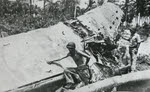
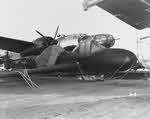
  Wrecked Messerschmitt Me 323
 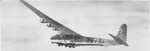 Messerschmitt Me 323 W9+SA
 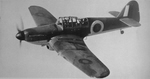 Miles Master from the left
 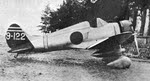 Mitsubishi A5M from the right
 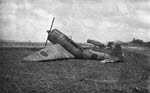 Dummy Mitsubishi A6M Zeroes
 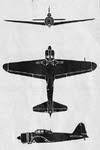 Plans of Mitsubishi A6M2 Zero
 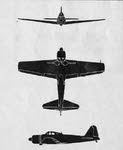 Plans of Mitsubishi A6M3 Zero
 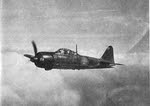 Mitsubishi A6M5 from the left
 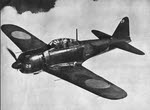 Mitsubishi A6M5 from above
 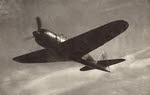 Mitsubishi A6M5 from below
 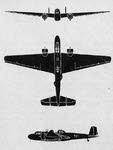 Plans of Mitsubishi G3M
  Mitsubishi G3M1 from above
 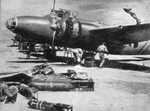 Mitsubishi Ki-21 'Sally'
 Morane Saulnier MS 405
 Murat, Marshal Joachim