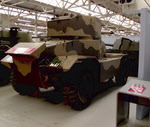
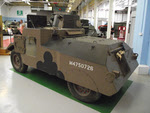
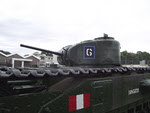
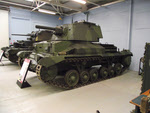
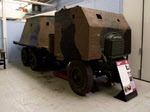
 A.E.C. Armoured Car Mk II from the right-rear
 |
|
Armoured Cars
A.E.C. Armoured Car Mk II from the right-rear
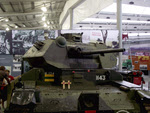
 AEC Armoured Car Mk.II from the left
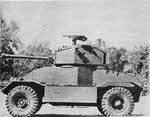
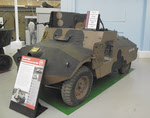
 AEC Armoured Car Mk.II from the right
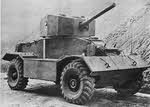
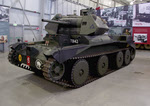
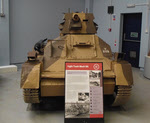
 Front view of AEC Armoured Car Mk.I
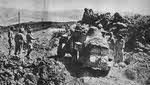
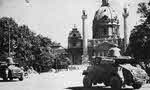
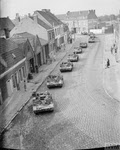
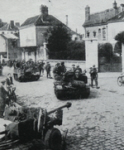
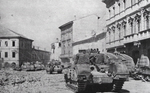
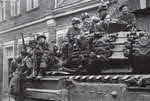
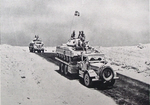
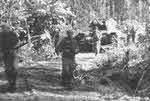
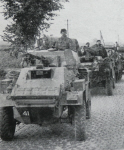 Humber Armoured Cars near Lille, 1944
 Morris Light Reconnaissance Car from the left-rear
 Morris Light Reconnaissance Car from the front
 Machine Gun on Morris Light Reconnaissance Car
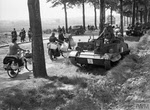
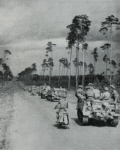
 Otter Light Reconnaissance Car on Sicily
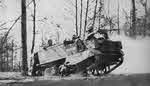
 Otter Light Reconnaissance Car in Rough Ground
 Otter Light Reconnaissance Cars in Vienna
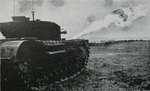
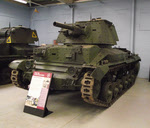
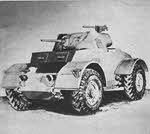 Staghound Armoured Car Mk.I from the front
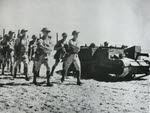
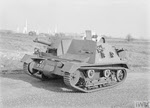
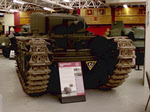
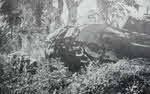
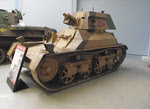
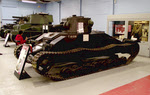
Bishop
 Bishop self propelled gun, Sicily 1943
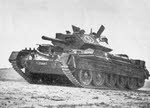
Black Prince
 Black Prince Infantry Tank (A43) from the right
 Black Prince Infantry Tank (A43) from the front
Carriers
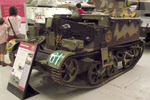
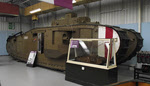
3in Mortar Carrier
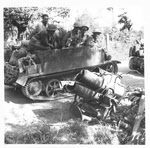 3in Mortar Carrier from the right
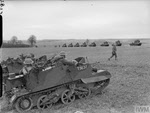
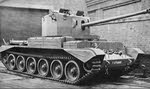
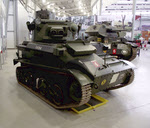
Bren Gun Carrier
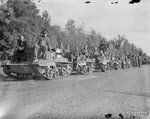
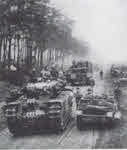
 Bren Gun Carriers at Orchies, 1939
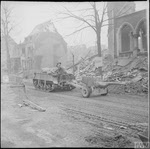
 Bren Gun Carriers pass refugees, Belgium, 1940
 Bren Gun Carriers of Highland Light Infantry
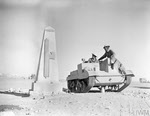 Bren Gun Carrier passing Italian monument, Sidi Barrani
 Bren Gun Carrier, London Irish Rifles, 1939/40
 Bren Gun Carrier near Arras, 1939
Loyd Carrier
 Loyd Carrier towing 6-pounder anti-tank gun
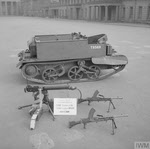
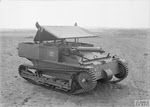
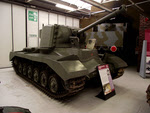
Scout Gun Carrier
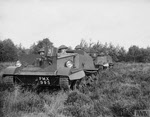
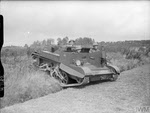
 Scout Carriers of 51st Highland Division
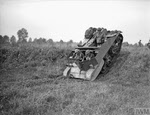
 Scout Carriers of 13/18th Royal Hussars
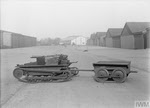
T-16 Carriers
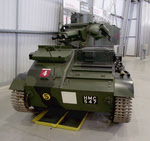
Universal Carrier
 Universal Carrier in Holland, 1945
 Universal Carrier in Australia
 6-pdr anti-tank gun and Universal Carriers across the Seine
 Universal Carriers in Southern England, summer 1944
 Universal Carrier crossing canal on way to Nijmegen
 Universal Carrier from the left
 Universal Carrier from the front left
 Universal Carrier donated by people of Benin, Nigeria
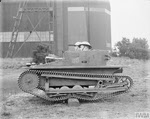
Carden Loyd Tankette
 Carden-Loyd Mk VI India Pattern
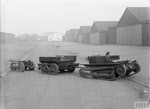
 Carden-Loyd Mk VI with trailer
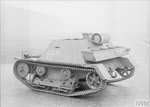
 Carden-Loyd Mk VI from the left
 Carden-Loyd Mk VI Mortar Carrier towing 1-pounder anti-tank gun
 Carden-Loyd Mk VI Mortar Carrier towing 3.7in Howitzer
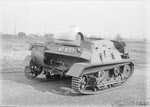
 Carden-Loyd Mk VIA from the left
 Carden-Loyd Mk VIB from the rear
 Carden-Loyd Mk VIB from the front
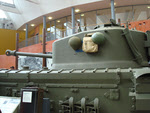
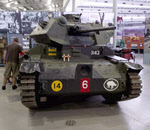
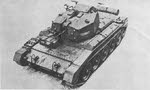
Centaur
Centurion
 Centurion Crocodile from the front-left
 Centurion Crocodile from the front
 Centurion Crocodile from the front-right
 Centurion Crocodile from above-right
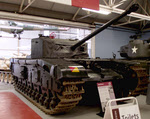
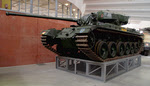
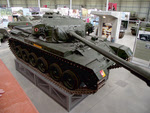
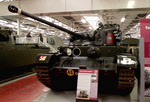
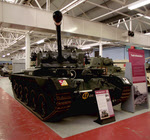
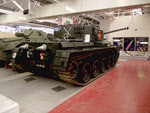
Challenger A30
 Cruiser Mk VIII Challenger A30 from the right
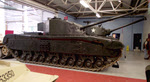
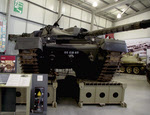
Challenger 1
Challenger 2
![]() Challenger 2 Tank on active service in Bosnia
Challenger 2 Tank on active service in Bosnia
![]() Challenger 2 Tank on a training exercise in Poland
Challenger 2 Tank on a training exercise in Poland
Chieftain
 Chieftain Mk 11 from the front
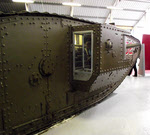
Churchill
 Churchill I Tracks from the Front
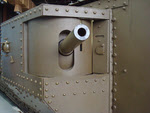
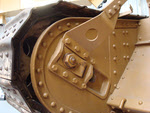
 Churchill I Turret from the left
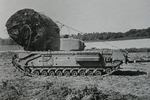
 Churchill Mk.I or Mk.II climbing
 Front view of Churchill Mk.III
 Churchill Mk.III with crew visible
 Churchill III AVRE from the front
 Churchill IV at Portomaggiore, April 1945
 Churchill VI approaching the Siegfried Line
 Churchill VII Turret from the Left
 Fuel Tank for Churchill VII Crocodile
 75mm Armed Churchill Tanks as Artillery, Italy, 1945
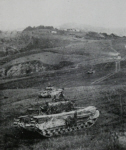
 Churchill tanks of 6th Armoured Division, 1943
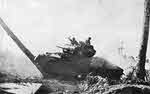
 Churchill Crocodiles in Action
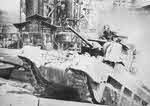
 Churchill Crocodile at the Senio, Spring 1945
 Churchill Crocodile and Infantry, Senio, April 1945
 Demonstration of Churchill Crocodile
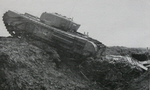
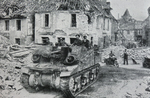
 Churchill Tank at Tilly-sur-Seulles
 US airborne troops advance east of Rhine on Churchill Tank
 Churchill tanks preparing to attack Gothic Line
Churchill AVRE
 Churchill AVRE carrying fascine
 Churchill AVRE crossing fascine
 Fascine release mechanism on Churchill AVRE
Comet
 Cruiser Comet I (A34) from the left
 Cruiser Comet I (A34) from the left-rear
 Cruiser Tank Comet (A34) from the front
 Cruiser Tank Comet (A34) from the front right
 Cruiser Tank Comet (A34) from the right-rear
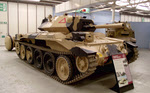
Covenanter
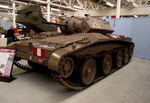 Covenanter from the front-left
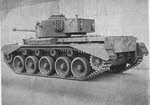
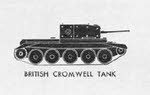
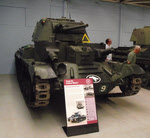
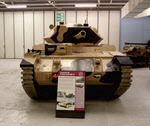
Cromwell
 Side plan of Cromwell with 6-pounder
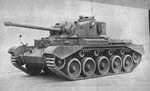
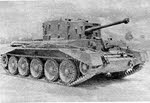 Front-right view of Cromwell Mk.I
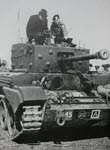 Churchill inspects a Cromwell V
Cruiser Mk I
 Cruiser Tank Mk I (A9) from the front
Cruiser Mk II
 Cruiser Tank Mk IIA CS from the left
 Cruiser Tank Mk IIA CS (A10) from the front
Cruiser Mk III
 Cruiser Tank Mk III (A13) from the front left
 Cruiser Tank Mk III (A13) turret
 Cruiser Tank Mk III (A13) from the front
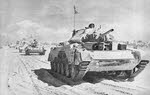
Crusader
 Crusader I cruiser tank on tank transport, North Africa, 1942
 Crusader I or Crusader II, North Africa, 1942
 Front view of Crusader Mk.IICS
 Front-left view of Crusader Mk.III
 Crusader Mk.III AA Mk.II or Mk.III
 Crusader Mk III from the front-right
 Crusader Mk III from the front
FV432
![]() FV432 Armoured Personnel Carrier (Alvis Vehicles)
FV432 Armoured Personnel Carrier (Alvis Vehicles)
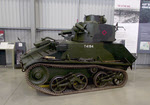
Light Tank Mk II
 Light Tank Mark IIA from the front
 Light Tank Mark IIA from the left
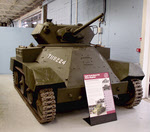
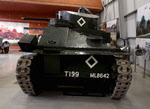
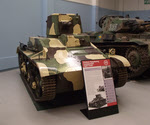
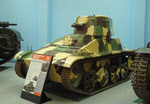
Light Tank Mk VIB
 Light Tank Mark VIB from the right
 Light Tank Mark VIB from the front
 Light Tank Mark VIB from the left
Light Tank Mk
 Light Tank Mk VIII Harry Hopkins from the front
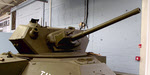 Light Tank Mk VIII Harry Hopkins turret
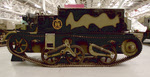
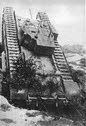
Little Willie
Matilda I
 Matilda I Infantry Tank Mk I (A11) from the rear
 Matilda I Infantry Tank Mk I (A11) from the left
Matilda II
 Australian Matilda tank at Wewak
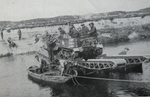
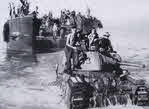
 Matilda II Tank lands at Toko Beach, Bougainville
 Matilda II crossing Puriata River, Bougainville
 Australian Matilda Tank leaves US LCT
 Australian Matilda Tank at Balikpapan
 Australian Matilda escaping tank trap
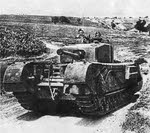
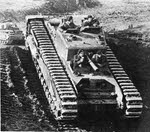
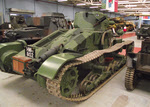
Medium Mark A Whippet
 Medium Mark A Whippet from above
 Medium Mark A Whippet from the Left
 Medium Mark A Whippet from the rear
Mk II
 Mark II (Female) Heavy Tank from the left
Mk IV
 Mk IV Tank 'Hyacinth' Ditched at Cambrai, 20 November 1917
 Mark IV Male Tank from the right
 Left sponson of Mark IV Male Tank
 Mark IV Male Tank from the back-right
 Right Sponson of Mark IV Heavy Tank
Mk V
 Front Idler Wheel, Mark V Male
 Mark V** Female from the front
Mk VIII International
 Mark VIII International Tank from the Right
Mk IX
 Engine Compartment, Mark IX Tank
 Fighting Compartment, Mark IX Tank
Praying Mantiss Carrier
Ram Kangeroo
 Ram Kangaroo Armoured Personnel Carrier
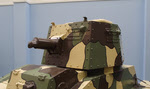
Scimitar
![]() Scimitar varient of the Scorpion Combat Reconnaissance Vehicle
Scimitar varient of the Scorpion Combat Reconnaissance Vehicle
Sexton
 Sexton Mk I at Ecouche, August 1944
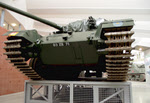
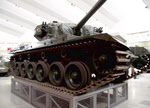
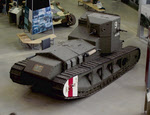
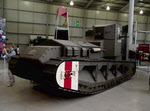
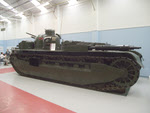
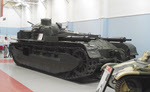
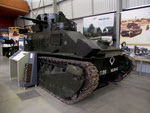
Tortoise
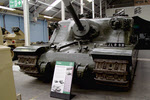 Tortoise Heavy Assault Tank from the front
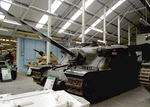 Tortoise Heavy Assault Tank from the left
Valentine
Valiant
 Infantry Tank, Valiant, A38 from the front
Vickers A1E1 Independent
 Vickers A1E1 Independent from the front
 Vickers A1E1 Independent from the left
 Vickers A1E1 Independent from the back-left
Vickers Medium
 Vickers Medium Tank Mk II* from the front-right
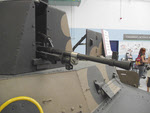
 Hull Machine Gun on Vickers Medium Tank Mk II*
 Vickers Medium Tank Mk II* from the front
Vickers Model 1936 Light Tank
 Turret of Vickers Model 1936 Light Tank
 Vickers Model 1936 Light Tank from the front
 Vickers Model 1936 Light Tank from the front-left
Warrior
![]() Warrior Infantry Fighting Vehicle
Warrior Infantry Fighting Vehicle
 Type 2 Bison
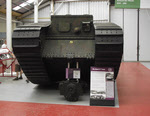
 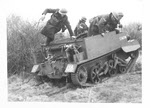 Rear of 3in Mortar Carrier
 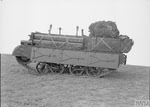 Loyd Carrier from the left
  Scout Carrier being Washed
 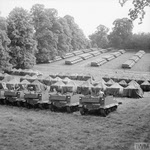 T-16 Carriers at Bromsgrove
 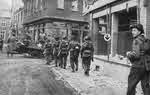 British infantry in Lingen
 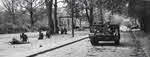 Universal Carrier at Zeven
 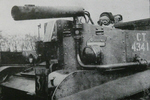 Canadian Ronson Carrier
 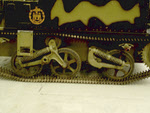 Wheels of Universal Carrier
 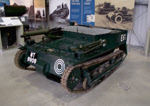 Carden-Loyd Mk VI Tankette
 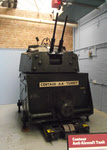 Centaur AA Turret
 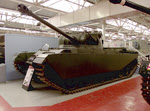 Centurion I from the left
 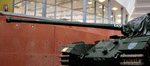 Gun of Centurion Crocodile
 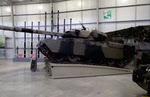 Chieftain Mk 11 from the left
 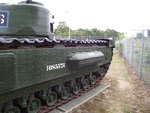 Rear tracks of Churchill I
 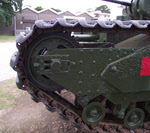 Idler Wheel on Churchill I
 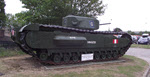 Churchill I from the right
 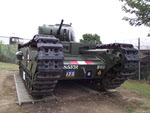 Churchill I from the Front
  Guns of Churchill I
 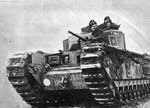 Front view of Churchill Mk.II
 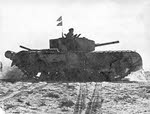 Side view of Churchill Mk.III
  Churchill Mk V from front
 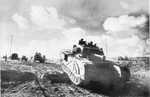 Churchill Mk VI in Normandy
 Guns of Churchill VII
 Front-left of Churchill VII
  Churchill VII from the Front
 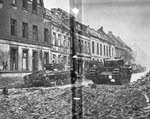 Valentine and Churchill Tanks
 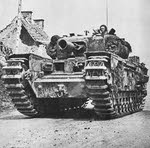 Front view of Churchill AVRE
 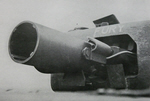 Petard on Churchill AVRE
 Covenanter from the front
 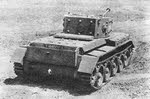 Rear view of Cromwell Mk.I
 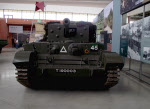 Cromwell IV from the front
 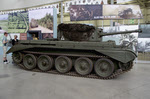 Cromwell IV from the right
  Cromwell IV from the rear
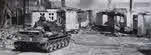 Cromwell tank at Hollenstadt
 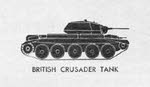 Side plan of Crusader Mk.I
 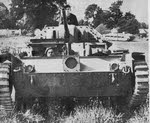 Front view of Crusader Mk.I
  Crusader Mk.II from left
 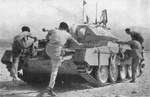 Crusader II
 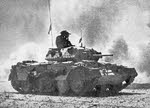 Crusader Mk.II from right
 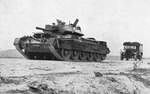 Crusader III
 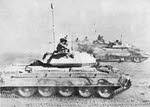 Crusader Mk.III from right
  Light Tank Mark IIA Turret
  Little Willie from the Right
  Little Willie from Above
  Matilda II on Tarakan
  Matilda IIs on Labuan Island
 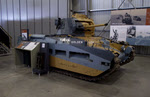 Matilda Mk II from the right
 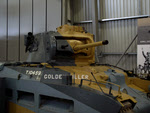 Matilda Mk II turret
 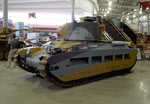 Matilda Mk II from the left
  Mark V Male from the front
 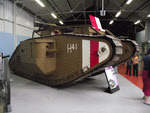 Mark V Male from the right
 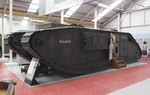 Mark V** Female from the left
 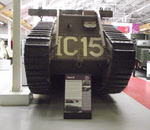 Mark IX Tank from the Front
 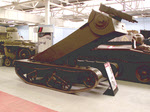 Praying Mantis Carrier
 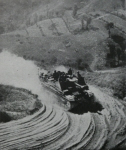 Sexton near Mondaino, Italy
  Valentine II from the left
  Valentine II from the right