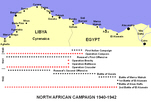
North African Campaign,
1940-1942
|
|
The battle of Mersa Matruh (26-28 June 1942) was Rommel's last victory against the Eighth Army, and saw him brush aside a British attempt to defend the Mersa Matruh position. In the aftermath of the battle the British retreated to El Alamein, the last possible defensive position before Alexandria, where they were finally able to halt Rommel's advance.
At the end of 1941 Rommel had been pushed back to El Agheila, on the western border of Cyrenaica. The long siege of Tobruk had been raised, and for the moment the threat to Egypt appeared to have lifted. Even his Second Offensive (21 January-February 1942), which saw him re-conquer western Cyrenaica, wasn't too worrying, as his advance ran out of steam to the west of Gazala, some way short of Tobruk and the Egyptian frontier. Both sides then settled down and prepared for their next offensive. Rommel moved first, and the resulting battle of Gazala (26 May-14 June 1942) ended as a disaster for the British. Rommel outflanked the Gazala Line, survived a crisis caused by the same move and then destroyed most of the British armour. The British were forced to retreat back towards Egypt, with their army and their plans in chaos. This time Rommel made no mistakes at Tobruk, and the port fell to an assault on 20-21 June 1942.
While Tobruk was still holding out, the British remained on the Egyptian Frontier, but on 23 June, with the port gone, Auchinleck (the British commander-in-chief in the Middle East) got permission to retreat east from the border to Marsa Matruh, almost half way to Alexandria. The hope was that this would give the army the time it needed to recover from the disaster at Gazala. Once this had been achieved, the army would go back onto the offensive and push Rommel back to the Egyptian frontier.
By now Auchinleck had lost faith in General Ritchie, the commander of the 8th Army. On 25 June he took personal command of the army, while Ritchie was sent on leave (unusually this wasn’t the end of his career – he was soon given command of 52 (Lowland) Division, and then commanded XII Corps during the Normandy landings).
Ritchie had been planning for a virtual repeat of the unsuccessful attempt to defend Tobruk. One division was to defend the fortified 'box' at Maras Matruh on the coast. The rest of X Corps was deployed north of the northern escarpment (running parallel to the coast). XIII Corps, which had emerged from the Gazala fighting battered but still able to fight, was deployed south of the escarpment. Once he took command Auchinleck decided abandon this plan. On 26 June he issued new orders – if Rommel attacked, then the British would retreat to the El Alamein position. This was dangerously close to Alexandria, but did have one advantage – its southern flank was protected by the Qattara Depression, which was impassable to Panzer formations. Auchinleck also issued a number of orders for tactical changes – the fortified 'boxes' that had been used at Gazala were to be abandoned, armour and artillery would no longer be scattered piecemeal across the battlefield, and the artillery would come under central control.
The British position at Mersa Matruh wasn't terribly well organised. X Corps was spread out across a large area north of the northern escarpment. 25th Indian Infantry Brigade was defending the minefields west of Marsa Matruh. The rest of the 10th Indian Division was in the Marsa Matrub 'box'. The 50th Division was south-east of Marsa Matruh, guarding the coastal road and railway.
XIII Corps (General Gott) had to defend the area between the escarpments and the area to the south of the southern escarpment. The 5th Indian Division (29th Indian Infantry Brigade only) was to defend the eight miles between the escarpments. It had an unfinished 'box' at Sidi Hamza, on the southern escarpment, and its front was protected by two lines of minefields. The minefields were watched by two small British columns.
South of the southern escarpment was the 1st Armoured Division. Two armoured brigades (4th and 22nd) were posted in the area to the south-west of Sidi Hamza. The division HQ was further east, to the south of Minqar Qaim, where there was a route down the escarpment suitable for use by tanks. During 26 June the New Zealand Division (Freyberg) moved from X Corps to XIII Corps, and ended up south of the southern escarpment, facing north around Minqar Qaim.
Unfortunately for Auchinleck Rommel didn’t give him time to implement his new plans. His forces had suffered heavy losses in the fighting at Gazala and Tobruk. The Afrika Korps had around 60 tanks and 1,500 infantry. The 90th Light Division could add another 1,000 infantry, and the three German reconnaissance battalion up to 300, for a total of 3,400 German infantry. The Italian XX Corps had 44 tanks, while the X and XXI Corps had around 5,000 infantry. Rommel's strongest arm at this point was his artillery, with 330 guns.
Rommel's plan was to outflank the Mersa Matruh position and cut the coast road somewhere to the east of the British X Corps position. The Afrika Korps and the Italian XX Corps would advance on either side of the southern escarpment, with 21 Panzer and Littorio to the north and 15 Panzer and Ariete to the south. The motorised Trieste division would cover the right flank. Their role would be to defeat the British armour and force it to retreat east. On the Axis left flank the two Italian infantry corps would advance towards Marsa Matruh. In the centre the 90th Light Division would advance just to the south of the northern escarpment, and attempt to cut the coast east of Marsa Matruh. The attack was to begin on the afternoon of 26 June.
The British reaction to Rommel's attack can only be described as bodged. Having decided not to make a stand at Marsa Matruh, the obvious response would have been to order an early retreat. Instead the situation was misinterpreted, and orders were issued that eventually saw X Corps trapped against the coast. Rommel's advance began with mixed results. 90th Light Division brushed aside the small columns in the minefield, and by the end of the day was through the minefields. 21 Panzer was close to Sidi Hamza by the end of the day.
On the morning of 27 June 90th Light continued to advance. It crossed the track that ran from Gerawla on the coast inland to Sidi Hamza, dropped down the northern escarpment, and engaged 50th Division. To its right 21 Panzer pushed the 29th Indian Brigade east across the Gerawla track and then advanced east, passing to the north of the New Zealand position. 15 Panzer made slower progress, and was held up by 1st Armoured Division. At 1120 Auchinleck informed both of his corps commanders that if it became necessary both corps would retreat east to the Fuka line. At about the same time General Gott, who was visiting the New Zealanders, told Freyberg that his position wasn't vital, and if necessary he could side-step (heading east towards the Fuka line). By noon 90th Light Division was threatening the coastal road.
At this point Auchinleck misjudged the situation. Both of his corps were still able to retreat – X Corps along the coast road and XIII Corps south-east across the desert – but Auchinleck mistakenly decided that XIII Corps was in danger of being encircled. At 1500 hours he ordered X Corps to launch a counterattack south to take the pressure off XIII Corps. X Corps planned a two brigade attack up the northern escarpment, to begin at 1930 hours.
While this attack was being prepared, XIII Corps was actually holding its own. In the south the 1st Armoured Division was still successfully holding up 15 Panzer and Ariete. 21 Panzer had moved south, and was now attacking the New Zealand division from the east, but again without success. The main threat now came from 90th Light, which was heading towards the coast road. More confusion was caused on the Allied side when General Freyberg was wounded. He was succeeded by Brigadier Inglis, who asked for a target for any side-step. Gott misinterpreted this as meaning that the division was in quite a bad state, and appears to have suggested that it should move back to the El Alamein line.
Late in the afternoon an armoured unit from 1st Armoured Division attacked 21 Panzer east of Minqar Qaim. 21 Panzer halted its own attacks, and asked for help. Rommel's rather typical response was to order the Afrika Korps to prepare to pursue the Allies east towards Fuka. He also sent the Littorio division to the front, and repeated 90th Light's orders to cut the coast road.
At 1900 90th Light reached the coast road. X Corps HQ moved west into Marsa Matruh, temporarily putting it out of touch with 8th Army HQ.
At 1920 Gott issued the retreat orders to 1st Armoured and 5th Indian Divisions of XIII Corps, without first checking with Army HQ. This left X Corps dangerously isolated, and Auchinleck ordered them to withdraw. If this order had arrived promptly, then X Corps would probably have been able to break through the German forces on the coast road, but this order didn’t reach the Corps HQ until 0430 on the following day.
The evening of 27 June thus saw the British attacking in two different directions. One brigade from each of X Corp's division launched their attack south towards the northern escarpment, but none of these attack achieved anything. By dawn on 28 June the attackers were back at their starting points. To the south the units of XIII Corps were heading east, towards the Fuka line. The New Zealand Division proved that it was still battle worthy when it escaped right through the middle of 21 Panzer, inflicting heavy casualties on its infantry.
The confusion on the British side continued on 28 June. X Corps was now surrounded, defending a 30 mile perimeter and facing attack by most of Rommel's force. At noon Auchinleck ordered the corps to break out that night, and promised that XIII Corps would support the breakout with a counterattack. Unfortunately XIII Corps wasn’t informed of this until 1530 hours, by which time most of its troops had continued to retreat east from Fuka. The X Corps breakout began at 2100 hours, without any support from XIII Corps.
X Corps broke up into several columns and attempted to fight its way through the Axis lines. The different columns had very different experiences. Some escaped without any problems. Others were captured. One got involved in a hard fight with the 90th Light on the coast. One passed through Rommel's HQ. By the time the fighting ended Rommel had taken around 7,000 prisoners. The remnants of X Corps and XIII Corps were fleeing east, to join up with the survivors of XXX Corps at El Alamein.
Unsurprisingly this news caused a short-lived panic back in Egypt, but Rommel's forces were now almost exhausted. He pushed them east for one more effort, but his first attacks on the El Alamein position were repulsed (First battle of El Alamein). By now Churchill had lost faith in Auchinleck, and by the time Rommel was ready for a more organised attack a new command team was in place in Egypt. Auchinleck had been replaced by General Alexander, who proved to be a very able coalition leader and political operator, while the 8th Army was taken over General Montgomery. When Rommel attacked again he suffered another defeat (battle of Alam Halfa, 31 August-7 September 1942), and the front then went quiet as Montgomery prepared for his own offensive.
 Rommel in his own words, ed. Dr John Pimlott.
Starts with his inter-war account of his First World War experiences, then moves on to the Second World War, with some material on the 1940 campaign and the defence of France, but with the largest section covering his famous campaigns in the desert of North Africa. Includes private letters, official reports and published works, giving us a range of Rommel’s public and private views(Read Full Review)
Rommel in his own words, ed. Dr John Pimlott.
Starts with his inter-war account of his First World War experiences, then moves on to the Second World War, with some material on the 1940 campaign and the defence of France, but with the largest section covering his famous campaigns in the desert of North Africa. Includes private letters, official reports and published works, giving us a range of Rommel’s public and private views(Read Full Review)