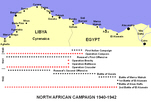
North African Campaign,
1940-1942
|
|
The battle of Alam Halfa (31 August-7 September 1942) was Rommel's last offensive in Egypt, and Montgomery's first victory after taking command of the Eighth Army, and was a British victory that removed any chance of Rommel reaching Alexandria or the Suez Canal.
The summer had begun well for Rommel. He had defeated the Eighth Army at the battle of Gazala (26 May-14 June 1942), and then taken Tobruk in a single assault (20-21 June 1942). He had then pushed into Egypt, and forced the British to abandon the Mersa Matruh line (26-28 June 1942). By the end of June the British had retreated to El Alamein, just over fifty miles west of Alexandria.
By this point Rommel's advance was running out of steam. General Auchinleck, the commander-in-chief in the Middle East, took direct control of the Eighth Army just before Mersa Matruh, but he had more luck at El Alamein. Rommel's first attack on the new British position (1-5 July) was defeated. Auchinleck's own counterattacks later in the month made limited progress, but did make it impossible for Rommel to consider any further attacks until he had received reinforcements, replacement equipment and supplies. Despite emerging as the victor in this First Battle of El Alamein (1-27 July 1942), Auchinleck soon lost Churchill's confidence. The Prime Minister visited Egypt in mid-August, on his way to Moscow, and after some debate decided to replace Auchinleck with General Alexander, and appoint General Montgomery as commander of the Eighth Army (after Churchill's first choice, General Gott, was killed when his aircraft was shot down). Alexander was an uncontroversial choice – he had plenty of military experience, and was also a skilled diplomat, who proved adept at dealing with the multi-national coalition of forces under his command.
Montgomery took over the Eighth Army on 13 August 1942, and had an immediate impact on the army. He was a complex character – charismatic and self confident, but also controversial and sometimes abrasive. He had a big impact on the mood within the Eighth Army. He eventually visited just about every unit, talking to all of his officers and many of the men. He made it clear that his orders were to be obeyed without the sort of questioning that had marred earlier command structures (as late as the first battle of El Alamein Auchinleck had to modify one of his offensive plans when the divisional commander involved complained).
He also announced a series of chances in the way the army would fight. There would be no more 'Jock columns' – small mixed arms forces that had achieved some successes early in the Desert War, but were normally too weak to achieve anything against Rommel's stronger forces. Instead the army would fight in its normal brigades and divisions. There would be no more 'cavalry charges', with tanks advancing across open country only to be blasted by German anti-tank guns – instead units would wait in their defensive positions with dug-in guns and hull down tanks, and wait for the Germans to attack them (exactly what Rommel had been doing so effectively against British armour). There would also be no more use of the fortified 'box', brigade sized defensive positions that were meant to delay the Germans, but more often just left their defenders isolated. Auckinleck had announced several of these changes at the start of his time in charge of the Eighth Army, but too many of them had been repeated at First Alamein. Finally Montgomery positioned his main HQ alongside that of the Desert Air Force, to ensure that the army and air force cooperated properly.
British Position
Montgomery didn't have time to make any dramatic chances to Auchinleck's overall defensive plan, which was to hold a main line running south from El Alamein into the desert, and a flanking position along Alam Halfa ridge, running at right angles to the left flank of the main line. He did make some changes. Auchinleck had begun construction of more defensive positions further east, but Montgomery insisted that there would be no more retreats. Montgomery didn't thing that Auchinleck had moved enough men to El Alamein to hold the key defensive positions, and so he ordered every man who could be scraped up to move from the Nile Delta to the front line, including part of two fresh divisions.
The main line was held by the same units, and in roughly the same locations, as during the first battle of El Alamein. In the north the 9th Australian Division held El Alamein and a salient that thirsted out west along the coast. The 1st South African division held the area between El Alamein and the Ruweisat Ridge. The 5th Indian Division held the Ruweisat Ridge itself. The 2nd New Zealand Division held the area between Ruweisat Ridge and Alam Nayil (also known as Bare Ridge). This line filled just over half of the area between the sea and the Qattara Depression.
The gap to the south was filled by the 7th Motorised Brigade and the 4th Light Armoured Brigade, part of the 7th Armoured Division. The two brigades were originally posted on a line that ran south from the New Zealanders, with the division HQ further east.
The key to the British position was the Alam Halfa ridge, which ran from west-east, with the western end around 15 miles east of the main line. This position was held by the newly arrived 44th Infantry Division, with the 133th Brigade to the west and the 131th Brigade to the east. The 8th Armoured Brigade was south of the ridge, the bulk of the 10th Armoured Division to the north. The 22nd Armoured Brigade and 23rd Armoured Brigades would both end up operating in the gap between the main line and Alam Halfa ridge.
The Allies had around 480 tanks at the start of the battle. Between them the 8th and 22nd Armoured Brigades had 210 medium tanks, including 71 M3 Grants and a mix of Matildas, Valentines and Crusaders.
Axis Forces
Rommel had around 440 tanks, although only about half of them were German. About half of his Panzers were the up-gunned 'specials' – mainly the Panzer III with a long barrelled 50mm gun, but also 26 Panzer IV Specials, with a 7.5cm KwK40 L/47 gun, which turned it from an infantry support tank into the main battle tank on the German side.
Rommel's defensive lines were filled by the recently arrived 164th Infantry Division (on the coast), the Trento division on the Miteiriya Ridge, then running south in a line the German Ramcke parachute brigade, the Bologna division and the Brescia division.
His armour was concentrated in the 90th Light, 15 Panzer and 21 Panzer divisions and the Italian XX Corps (Ariete and Littorio) which were to carry out his outflanking movement in the south.
Rommel had suffered two intelligence blows. The first was that his impressive radio intercept company, that had done so much to keep him informed about Allied intentions and problems, had been captured earlier in the summer, in an action in which its commander, Lt. Alfred Seebohm, had been killed.
The second was unknown to Rommel. A German spy ring in Egypt, the 'Kondor' mission, led by John Eppler and Peter Monkaster, had been feeding him reliable information, but in the summer of 1942 they were arrested. The British then used the spy ring to feed false information back to Rommel. Rommel continued to trust the information he received from 'Kondor', and even wanted Eppler to be awarded the Iron Cross.
Rommel's Plan
Rommel wasn't entirely keen on the idea of a fresh attack, but he was aware that the Allies would get reinforcements quicker than him. He had also been pressed to prepare for a new offensive by Marshal Kesselring, during a visit towards the end of the First Battle of El Alamein. Kesselring was aware that the only way to solve Rommel's supply problems was the capture of the port of Alexandria and the Suez Canal. Just before the start of the battle Kesselring and the Italian Marshal Cavallero promised to supply enough fuel, and so Rommel decided to launch his attack on the night of 30/31 August, the next full moon.
His plan was a repeat of the start of the battle of Gazala. His infantry would make a frontal assault on the British line, to pin it in place. His mobile forces would then sweep around the exposed southern flank of the British line, advance east past the Alam Halfa ridge, and then turn north on flatter ground to reach the coast at El Hamma. This would have trapped the Eighth Army in the Alamein position, and left the road to Alexandria and Cairo almost undefended. 90th Light Division was to advance closest to the British lines, with the Italians on their right, then 21 Panzer and finally 15 Panzer on the far right of the German line.
The Battle
The attack began at 2300 hours on the night of 30/31 August. The German advance was slower than expected, and by dawn the Afrika Korps had only advanced eight miles past the German minefields. They had already suffered heavily from allied air attacks, and had discovered the 7th Armoured Division threatening the southern flank their planned advance east. To make things worse General von Bismarck, command of 21 Panzer, was killed crossing the minefields, and General Nehring, commander of the Afrika Korps was wounded in the arm by an air attack.
The presence of the 7th Armoured Division forced the Germans to turn north earlier than they had planned. The new line meant that the 90th Light was close to the 2nd New Zealand Division, the Italian XX Corps was advancing in the gap between the main British line and the Alam Halfa ridge, and 15 Panzer and 21 Panzer were heading for the western edge of the ridge, and the defensive positions of 22nd Armoured Brigade. Having achieved its main purpose, the 7th Armoured Division withdrew rather than risk getting pinned down.
The Afrika Korps paused to take on fuel, and then resumed its advance at about 1300 hours (the Italians took longer to pass through the minefields and didn't get started for another four hours). The new German target was Point 132, in the centre of the Alam Halfa Ridge, but the Germans ended up hitting the western end of the ridge, defended by the 22nd Armoured Brigade. At first it looked as if the Germans weren’t going to come close enough, and the brigade commander, Brigadier G.B. Roberts, was on the verge of ordering some of his tanks to move into the open to provoke an attack, when the Germans made their move. In his account of the battle Roberts describes seeing the Panzer IV 'specials' for the first time, and their long barrelled 75mm gun inflicted heavy losses on his tanks. Fortunately the British anti-tank guns and artillery did the same to the Germans, and the attack ended just before dark. Overnight the German armour was hit by repeated air attacks. One bomb dropped within 10 yards of Rommel's slit trench, showing just how close to the front he was.
On 1 September the Germans were limited to an attack by 15 Panzer on the centre of the Alam Halfa position, but this was easily repulsed. The air attacks continued all day, and on the morning of 2 September Rommel decided to withdraw to the El Taqa-Bab el Qattara line, close to his starting point.
Montgomery now planned his own offensive, to be carried out by the New Zealanders on 3/4 September. He was clear that the armoured forces were not to leave their defensive positions to take part in this part of the battle, as he didn't want to risk spoiling the earlier defences successes by losing large numbers of tanks in the open desert. This marked the start of two days of heavy fighting between the two lines of British mines on the southern front. The battle finally came to an end on 7 September, and a new front line was established just to the east of the original minefields.
This was the first time a major assault by Rommel had failed. Rommel gave a number of reasons - the unexpected strength of the British defensive positions in the south, RAF control of the air and a shortage of fuel.
Rommel admitted to losing 570 dead, 1,800 wounded and 570 captured, just under 3,000 casualties, as well as 50 tanks, 15 field guns and 35 anti tank guns. He clamed to have take 350 prisoners, knocked out or captured 150 tanks and armoured cars and destroyed ten field guns and twenty heavy anti-tank guns. He also reported that his men called the battle the 'Six-day Race' as a result of its short duration.
On the British side Alexander reported losing 1,640 men killed, wounded and missing, 68 tanks, 18 anti-tank guns and no field artillery. They estimated that they had inflicted 4,500 casualties and taken 300 prisoners. They also reported collecting 42 German and 9 Italian tanks from the battlefield. In terms of prisoners and material losses the two side's estimates match quite closely.
The fighting now died down while both sides built up their strength. Rommel concentrated on constructing a strong defensive position, covered by thick minefields, while Montgomery prepared for his own offensive. He was able to resist Churchill's pressure for an early attack, and didn't attack until he was completely ready. The resulting Second battle of El Alamein (23 October-4 November 1942) forced Rommel to abandon Egypt and Cyrenaica, and marked the start of an advance by the Eighth Army that ended in Tunisia in May 1943.
 Desert Armour – Tank Warfare In North Africa, Gazala to Tunisia, 1942-43, Robert Forczyk.
A detailed examination of tank warfare in the final year of the campaign in North Africa, from the last major German victory at Gazala in the summer of 1942 to the final Axis surrender in North Africa in May 1943, one year later. Covers the armoured warfare of this dramatic period in great detail, looking at how the balance of power in Africa turned away from the Axis, despite the often greater experience of their tank commanders (Read Full Review)
Desert Armour – Tank Warfare In North Africa, Gazala to Tunisia, 1942-43, Robert Forczyk.
A detailed examination of tank warfare in the final year of the campaign in North Africa, from the last major German victory at Gazala in the summer of 1942 to the final Axis surrender in North Africa in May 1943, one year later. Covers the armoured warfare of this dramatic period in great detail, looking at how the balance of power in Africa turned away from the Axis, despite the often greater experience of their tank commanders (Read Full Review)