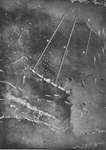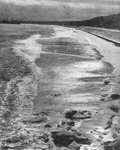
Beach Obstructions under construction, Normandy
|
|
Codenames
Planning
The Allied Armies
The German Forces in France
Deception
D-Day
After D-Day
The Battle for Caen
The American Front
Falaise Pocket
Aftermath
Operation Overlord or the battle of Normandy (6 June-25 August 1944) was the start of the Allied campaign to liberate Nazi-occupied north-western Europe, and began with the largest amphibious assault in history on D-Day, before developing into a costly struggle in Normandy that finally ended with the dramatic collapse of the German position in France leading to the ‘Great Swan’ towards the German border.
There is some confusion over the difference between Operation Neptune and Operation Overlord. Overlord was the overall codename for the invasion of North-Western Europe, with the aim of securing a ‘lodgement on the Continent from which further offensive operations can be developed’. The area was to contain enough port facilities to support 26-30 divisions. Once the original beachhead was captured, the next stage of Overlord was to be the capture of Cherbourg. After that it would depend on what the Germans did, but might have involved an attack west into Brittany or east to capture Havre and Rouen. In the end Operation Overlord was considered to have ended with the liberation of Paris and the start of the crossing of the Seine on 25 August, ending the battle of Normandy.
Contrary to popular belief, Operation Neptune was not the code name for the naval part of Overlord, but was actually the code given to the assault phase of Overlord – the D-Day landings and the establishment of a firm lodgement in Europe. From September 1943 it was used on all planning documents that gave the location and date for the invasion. Neptune was considered to have ended on 30 June, by which time Cherbourg had been captured, and the Allies had a secure lodgement, large enough to build up their armies.
Everything that happened during Operation Neptune was thus also part of Operation Overlord, and the two will be covered in this single article.
Although it had been clear that there would eventually need to be an invasion of Western Europe, formal planning for it didn’t start until after the Casablanca Conference of January 1943, where it was decided to appoint Lieutenant General F.E. Morgan to the new post of Chief of Staff to the Supreme Allied Commander (designation), better known as COSSAC. Morgan’s first task was to decide where the landings were to take place. There were two options with suitable coastlines – the Pas de Calais or Normandy. The Pas de Calais was closest to the English coast and closer to Germany, but it was also much more heavily defended, as these advantages were also obvious to the Germans. Normandy was further from the British coast, but nearer to the major ports of Portsmouth and Southampton, while still within fighter range of Britain. It also had a greater number of sheltered beaches than the Pas de Calais. Morgan suggested an attack by three seaborne and two airborne divisions, and a build-up to eighteen divisions. The main restriction on his plans was the limited number of landing craft available, as the Pacific campaign sucked up ever greater numbers of them. Morgan was able to present his outline plan at the Quebec Conference of August 1943, where it was accepted by the Allied leaders.
In November 1943 Roosevelt and Churchill met at Cairo, and agreed on the command structure for Overlord, with Eisenhower as Supreme Allied Commander, Air Chief Marshal Tedder as his deputy and Montgomery as commander of the ground forces during the assault phase (Operation Neptune). At the time Eisenhower and Montgomery were fighting in Italy, but they were replaced in December 1943 and returned to England.
After his return to Britain Montgomery examined the plans and rejected them. He insisted that initial invasion force should be increased from three to five divisions, which required a postponement into June to allow enough shipping to be gathered. The area to be attacked was also expanded, with beaches added further to the west to speed up the attack on the Cotentin and Cherbourg. The overall size of the invasion army was raised to twenty three divisions at this stage, but that would increase again before D-Day.
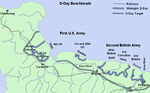
The overall plan was for the British and Canadians to land on the left and the Americans on the right. The Germans were believed to rate the British more highly than the Americans, and the hope was that they would expect the main Allied attack to be due east from the British half of the beachhead, heading towards Paris. The majority of German reinforcements would be drawn onto the British flank, allowing the Americans to build up their forces in the west. They would take the Cotentin Peninsula and Cherbourg, then break out to the south. They would then turn west to occupy Brittany and take the ports of Brest and Lorient. After this the Allied armies would turn east and advance on a broad front towards the Seine. In the event the first part of this plan would be carried out, but the attack on Brittany was abandoned in favour of an attempt to trap the retreating Germans in the Falaise Pocket.
One aspect of the planning that would return to haunt Montgomery was the ‘phase lines’. These were produced by one of his subordinates and presented at two planning conferences on 7 April and 15 May. Montgomery saw them as nothing more than a vague outline, but others saw them as firm objectives. The aim was to have a unified beachhead by the end of D-Day – Caen was also expected to fall on the first day. By D+17 the Cotentin would have been captured and by D+20 the Americans were expected to be at the southern corner of Normandy, ready to advance into Brittany. D+25 was to see the Allies at Argentan in the east and Rennes in the west. By D+35 the aim was to have reached St Nazaire in the west, and for the main line to run along the Loire to Angers then north-east to Alencon and north to the coast. Brest was to fall by D+50, the advance east to have started by D+60 and the Seine to have reached by D+90 (early September). Further ahead the Rhine was to be reached by May 1945. In the long run the Allies actually advanced far more quickly than that, with Paris falling in late August as the German position in France crumbled, but at first progress was much slower than the phase lines might have suggested. Caen didn’t fall until late July, and Operation Cobra, which led to the American breakthrough, didn’t begin until 25 July. Avranches, at the ‘hinge’ between Normandy and Brittany, which should have fallen in late June, wasn’t taken until the end of July. On several occasions Montgomery came under pressure because of this ‘slow progress’, but from his point of view the plan was actually developing perfectly well. The Germans threw most of their best troops into the battle around Caen, and when the breakthrough was finally made it was far more decisive than had been expected. This was partly due to Hitler’s refusal to allow his commanders to surrender any territory, which forced them to fight the decisive battle in Normandy, and not further east, and his insistence on a late counterattack that saw the Germans actually move their troops west just as the trap was about to close behind them!
The invasion was to be supported by a vast array of special weapons. These included the special tanks of General Hobart’s 79th Armoured Division, designed to deal with minefields, ditches and strongpoints, ‘Pluto’ – the Pipeline Under The Ocean, which was to pump fuel directly from Britain to France, and perhaps most impressively the two massive Mulberry floating harbours, each made up of hundreds of individual components supported by thousands of ships of varying sizes. A total of 146 floating ‘Phoenix’ caissons were required, each of which had to be towed across the Channel and sunk into the correct place to form the harbours, which would then be protected by around 70 old ships, which would be sunk to form the Gooseberry breakwaters. In the build-up to D-Day southern Britain increasingly came to resemble a massive armed camp, with the Americans camped across Devon, Cornwall and Dorset and the British and Canadians in Hampshire and Sussex, and both armies with massive logistics tails that spread out across much of the country.
The invasion was to be on a massive scale. The Allies built an army of 45 divisions in Britain. The US Ninth Air Force and British 2nd Tactical Air Force contained around 6,000 aircraft, while the invasion fleet was even more massive, with around 7,000 vessels involved (although sources do disagree on the total number here, probably because of the vast number of smaller ships and boats involved). There were almost 140 major battleships (battleships, cruisers and destroyers). No aircraft carriers were directly involved – Britain was described as an ‘unsinkable aircraft carrier’. There were over 300 landing ships and almost 4,000 landing craft and barges. The larger ones would cross the channel under their own power, others would be carried most of the way across.
Normandy Battlefields gives a total of 6,939 vessels, including 1,213 naval combat ships, 4,126 landing ships and landing craft, 736 ancillary craft and 864 merchant vessels.
General Eisenhower was appointed as the overall commander-in-chief, and his headquarters would become known as SHAEF (Supreme Headquarters Allied Expeditionary Force). The next four senior officers were all British. Air Marshal Sir Arthur Tedder was Eisenhower’s deputy. Air Chief Marshal Sir Trafford Leigh-Mallory commanded the air forces. Admiral Sir Bertram Ramsay commanded the naval operations. Finally General Montgomery commanded the ground forces. On D-Day itself British and American troops were present in equal numbers. Montgomery was officially commander of the British 21st Army Group, which would control the United States First Army (Bradley) and the British Second Army (Dempsey) on D-Day. One of the more significant commanders at the next level down was Air Vice Marshal Arthur Coningham, commander of the 2nd Tactical Air Force. He had helped develop a successful system of close army-air force cooperation in North Africa, which became the template for the system used in Normandy.
Once enough troops had been landed, more formations would be activated. On 23 July 1944 the First Canadian Army became operational, as part of Montgomery’s 21st Army Group. On 1 August General Patton’s US Third Army to become operational. At this stage Bradley moved up to command the US Twelfth Army Group, while Hodges replaced him at the First Army. During August these troops still remained under Montgomery’s overall command.
On 1 September General Eisenhower took over as Ground Forces Commander. Montgomery kept the 21st Army Group, with the British and Canadians. Bradley had the First and Third Armies. He gained the Ninth Army in September. The Fifteenth Army became operational in January 1945, but at first was used to rehabilitate badly damaged units, and never entered the main line of battle.
The Americans also insisted on an invasion of the south of France, originally as Operation Anvil, but carried out as Operation Dragoon. This was originally mean to have happened before Overlord, but was eventually postponed until August. The troops involved in this invasion eventually formed the 6th Army Group, which came under Eisenhower’s command.
On the German side von Rundstedt was officially the German commander-in-chief in the west, but his freedom of operation was greatly limited by Hitler. It didn’t help that his most important subordinate, Rommel, also had access to Hitler.
In November 1943 Rommel was given the task of inspecting and improving the defences of the Western European coast from Denmark to the Spanish border. His authority in this role overlapped with that of von Rundstedt, although Rommel appears to have respected his colleague. The situation became a bit clearer when Rommel was given command of Army Group B, which covered the area from The Dutch-German border to the Loire.
The Germans had more than fifty divisions in the west. Rommel had 40 in his Army Group B, based on the Channel coast. This was split into the 7th Army (General Friedrich Dollman), which was based in Brittany and Normandy and the 15th Army on the coast east of Normandy. However few of these divisions were at full strength, and many of them were static or defensive divisions. Nineteen divisions were posted between the Seine and the Scheldt, to defend the Pas de Calais, and eighteen between the Seine and the Loire, although eight of these were in Brittany. On D-Day three divisions – the 709th, 352nd and 716th – would face the five attacking Allied divisions on the beaches (the 709th at Utah Beach, the 352nd at Omaha Beach and the 716th on the British and Canadian beaches). The 91st Airlanding Division was just to the west of Utah Beach, and became involved in the battle with the US airborne forces. The 711th Infantry Division was just to the east of the beaches. The 211st Panzer Division was based around Caen.
In the immediate aftermath of the landings the Germans were able to move the 77th, 265th and 346th Infantry Divisions, 3rd Fallschirmjager, 17th SS Panzer-Grenadiers, 2nd Panzer and Panzer Lehr divisions to the battlefield. 1st SS Panzer (Leibstandarte) and 2nd SS Panzer (Das Reich) were also on their way.
In the southwest was the 1st Army, while in the south was the 19th Army Group, both part of Army Group G, under General Blaskowitz.
The strong German armoured formations in France were formed into Panzer Group West, under General Leo Geyr von Schweppenburg. One of the many problems facing the Germans was that they couldn’t agree on how to use these tanks. Rundstedt and Schweppenburg wanted to keep them some way inland so they could be used in a powerful counterattack. Rommel believed that Allied air power, which he had experienced in North Africa, would destroy any such counterattack before it could hit home, and wanted the armour closer to the beaches, so it could take part in the crucial initial battles.
Rommel and Rundstedt disagreed on how the Allied invasion should be defeated, and how the German armour should be deployed. Rommel believed that the invasion would probably come in Normandy, and wanted to defeat the Allies on the beaches, or as close to them as possible. He also wanted to have the armour posted close to the beach so it could be used before the Allies could get properly established ashore. His experience of Allied air power in Africa made him believe that it would be impossible to move armoured columns to the threatened area from a central reserve. His fears would prove to be correct. Perhaps the most dramatic example of the problems faced by German troops attempting to move across France was the progress of the 9th and 10th SS Panzer Divisions. They left Poland on 12 June heading west, and were able to cross Germany in only four days, reaching the French border on 16 June. After that their progress was much slower, and they didn’t reach the front until 1 July!
Rundstedt believed that the invasion would come in the Pas de Calais. He wanted to concentrate his armoured forces so he could launch a massive counter-attack once the Allies had broken through the coastal defences and were vulnerable spread out, and out of range of the powerful Allied naval guns. He also respected Allied air power, but feared that if he gave in to Rommel, and the invasion then came somewhere else, then the armour would be trapped in Normandy. He had the support of most of the Panzer commanders, including Guderian, who was worried about Rommel’s plan to commit his panzers before D-Day. In early May Schweppenburg appealed directly to Hitler, asking to keep his armour around Paris, ready to move in whichever direction it was needed. Hitler responded with a compromise that would effectively neutralise the German army on and immediately after D-Day, forming a reserve of four Panzer divisions under the direct command of the OKW. As a result none of the commanders on the ground in France would have the authority to move the panzer divisions when the time came.
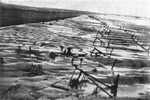
Despite these problems, Rommel was able to improve the defences of Normandy. He ordered the creation of many more beach defences, including more concrete defensive positions, minefields and beach obstacles, many of which also carried mines.
If the German army in France was a potentially powerful force, the same can’t be said of the Navy and Luftwaffe contingents. At sea Theodor Krancke, the commander of German Naval Group West, had sixty small craft under his command, with the most powerful being two destroyers. These boats were largely confined to port by Allied air attacks, and were unable to intervene on D-Day. However the Navy did control many of the coastal gun batteries. In the air General Sperrle’s Luftflotte III officially had 400 operational aircraft, but the chief of staff of II Fliegerkorps, which controlled those aircraft, estimated that he only had fifty operational aircraft at his disposal.
Overlord was supported by a massive deception plan. The overall plan was named Operation Bodyguard, in reference to one of Churchill’s comments – ‘In war-time, truth is so precious that she should always be attended by a bodyguard of lies’. The aim of Bodyguard was to deceive the Germans about the date, strength and location of the upcoming invasion – the fact that an invasion was coming was too obvious to be hidden. An impressive array of subsidiary operations were contained within Bodyguard. Operation Fortitude North was a plan to convince the Germans that a fictional British Fourth Army was to invade Norway. Operation Fortitude South was the most famous, and saw the creation of a fictional 1st US Army Group, under General Patton. The Normandy invasion was portrayed as a feint, to draw German forces west, before Patton carried out the real invasion, attacking the Pas-de-Calais. Operation Ironside suggested that the Allies would also attack somewhere near Bordeaux.
These deception plans used a range of methods, including fake signal traffic, visual deception and most famously the Double Cross operation which fed carefully selected intelligence to the Germans using a mix of captured German agents and other double agents. Perhaps the most famous of them was Jean Pujol Garcia, codenamed ‘Garbo’, who independently invented an entire false intelligence network which he then offered to the British, who moved him to Britain and expanded on his original work until he commanded twenty seven fictional agents. He was so convincing that the Germans awarded him the Iron Cross Second Class in 1944, and his cover remained so intact that one of his handlers gave him the actual medal after the end of the war! By that point he had also received an MBE from King George VI!
The deception plans worked best when they fed into Hitler or his high command’s existing theories, in particular the potential for an invasion of Norway or a second attack against the Pas-de-Calais. The Allies had originally expected the deception to stop working very soon after D-Day, but they actually continued to be effective well into August 1944, and the Germans even reinforced the Pas-de-Calais area
The invasion forces were finally sealed within their embarkation areas on 26 April, five weeks before the actual invasion. On the same day the five assault divisions moved into their embarkation areas, along with all of their support troops. The Germans expected the invasion to come in May, and when that didn’t happen some assumed that the danger had passed until August. At the start of June a period of bad weather set in, and by 4 June Admiral Krancke was convinced that no invasion was imminent. One key reason for this was that the Germans had misjudged what sort of tides the Allies wanted, expecting them to land at high tide. Instead the Allies decided to just after low tide, so that the many German defences built into the inter-tidal zone would be bypassed and could be dismantled while above water. The tides from 5-8 June were exactly what the Allies wanted, but not what the Germans believed they wanted, helping to convince the Germans that the invasion couldn’t come then.
As is well known, the Allies had originally planned to attack on 5 June, but bad weather forced them to postpone the attack until the following day, 6 June 1944.
When the Allies attacked, an impressive number of senior German commanders were away from their commands. The most important of these was Rommel, who after failing to convince Hitler to come and inspect the beaches, arranged to meet him on 6 June. This would also allow him to pay a birthday visit to his wife at Herrlinghen – her birthday was also 6 June. Rommel was informed of the invasion between 06.00 and 06.30, cancelled the meeting with Hitler, and attempted to return to his HQ, but he didn’t arrive until 20.00, so was out of action for most of D-Day. As a result he had little or no impact on the crucial first day of the invasion, the point at which he had always wanted to defeat the Allies.
The D-Day landings began from the air, with the US 82nd Airborne Division and 101st Airborne Division landing inland from Utah Beach and the British 6th Airborne landing to the east of Sword Beach.
The British 6th Airborne had three tasks – to capture a number of bridges over the River Orne and the Caen Canal (most famously Pegasus Bridge), to destroy a number of bridges over the River Dives to prevent the Germans using them to attack from the east with the troops in the Pas de Calais and the capture the Merville battery. All three of these objectives were achieved, and the paratroops were then able to hold out until they made contact with troops coming from the beaches.
The 101st Airborne Division’s task was to seize the causeways that crossed the flooded and marshy ground inland of Utah Beach, to prevent the Germans from destroying them and trapping the US forces on the coast.
The 82nd Airborne Division was to land further inland to capture the area around Ste-Mère-Eglise and Pont-l’Abbé.
Both of the US airborne divisions were badly scattered, but in some ways this aided their cause. The Germans were confused by the widespread appearance of paratroopers and struggled to put together a coherent response. The paratroopers also overran the HQ of the 91st Air Landing Division, killing its commander, General Wilhelm Falley (who thus became the first German general killed during Overlord).
The main attacks began soon afterwards. Bradley’s First Army attacked in the west, at Utah and Omaha Beaches, while Dempsey’s Second Army attacked in the east, at Gold, Juno and Sword beaches.
The landings were preceded by a massive aerial assault, involving around 2,500 bombers and 7,000 fighter bombers. This included heavy attacks on the Pas-de-Calais, to continue with the illusion that a second attack would take place there. This followed a month long air attack on the entire coastal zone, disrupting road and rail communications, and isolating the Normandy battlefield. This campaign was carefully designed to make sure that more attacks took place outside the Overlord area, to prevent giving away the location of the upcoming invasion.
The attack was also supported by a massive naval bombardment with five battleships, 23 cruisers and over 100 destroyers involved. These ships were also able to offer more direct support for the troops after they landed, working with naval gunnery officers to provide invaluable firepower.
Utah Beach was the westernmost of the beaches. It was a fairly late addition to the plan, added to give the Allies a foothold at the base of the Cotentin Peninsula reach for the advance on Cherbourg. The attack was carried out by the 4th Infantry Division of Collins’ VII Corps, with the 8th, 22nd and 12th Regiments carrying out the attack. Much of the area behind the beaches had been flooded by the Germans, so the advance inland was rather difficult, with limited lines of advance. The initial attack was unexpectedly easy, at least in part because the tide had pushed the landing further south than planned, onto a very lightly defended part of the beach. 28 out of the 32 DD tanks allocated to Utah Beach landed safely 15 minutes after the first wave of infantry. By the end of the day over 23,000 men had been landed, the D-Day objectives had been achieved and they had only suffered 250 casualties!
The most famous of the beaches was Omaha Beach. This was added to the plan to avoid having a massive gap between the main beaches north of Caen and Utah Beach. In reality nowhere on that stretch of coast was a good location for an amphibious assault, but Omaha Beach was about the best option. The attacking troops had to attack up steep slopes, strongly defended by the Germans. Omaha would be attacked by the 1st Infantry Division of the 5th Corps, led by the 16th Regimental Combat Team. The 116th Regimental Combat Team of the 743rd Tank Battalion and 16th RCT of the 741st Tank Battalion were to provide armoured support. However 27 of the tanks from the 741st sank on the way into shore. The pre-landing bombing hit too far inland, just missing the German defences. The beach defences were the strongest on any of the five beaches. At first the American troops were pinned down on the beach, but the Germans were unable to actually throw them back into the sea, and slowly the Americans inched their way forward. They were aided by destroyers that risked coming close inshore to attack the defences. By the end of the day the Americans had landed 34,000 men, and captured the key villages of Vierville-sur-Mer, St-Laurent and Colleville-sur-Mere. However the troops landing on Omaha Beach had suffered the heaviest casualties on any of the beaches. The exact figure is unknown, with estimates ranging from 2,000 to 5,000 killed, wounded and missing. However the Allies had expected to lose 10,000 dead on D-Day, so even these high figures were lower than expected.
On the left Dempsey’s British Army landed on three beaches, landing three infantry divisions and three armoured brigades.
The middle of the five beaches was Gold Beach, which was attacked by the British 50th Infantry Division and 8th Armoured Brigades, both from the XXX Corps (Bucknall). Fairly rapid progress was made here, and by the end of the day the British had almost reached their initial target of Bayeux. One advantage the attackers had here was that the landing craft carrying the DD tanks were ordered to simply land them directly on the beaches, because the weather was judged to be too rough, so the attack was fully supported by around. By the end of the day the Allies had captured about 5 square miles, were close to Bayeux and had landed 25,000 men. Around 500 men had been killed.
Next in line was Juno Beach. This was attacked by the 3rd Canadian Infantry Division and 2nd Canadian Armoured Brigade, from Crocker’s British I Corps. Once again good progress was made, with the 9th Canadian Brigade advancing some way towards their D-Day target of Caen. Gold and Juno Beaches were side by side, so their beachheads were quickly united. Here the DD tanks were launched about 100 yards from the shore and safely got to the beach. By the end of the day 21,500 men had been landed, and contact had been made with the troops landing on Sword Beach.
Finally came Sword Beach, where the British 3rd Infantry and 27th Armoured Brigades landed. They made contact with the British airborne troops, and advanced south towards Caen. By the end of the day 29,000 troops had been landed on Sword Beach and the crucial Orne bridges had been secured.
The Germans only made one organised counterattack during the day, but that attack did hit at a key point, and prevented the Allies from making a more determined attack on Caen. During the afternoon the 21st Panzer Division attacked north from Caen towards the coast, hitting the gap between Juno and Sword Beaches. The Germans actually reached the coast before being repulsed, but the attack ended any realistic chance of Caen falling on D-Day.
By the end of D-Day four of the five beach landings were fully secure. At Omaha there was still some concern about the strength of the defence, but the Americans were ashore to stay. The Germans had been unable to launch the immediate strong counterattack that Rommel had believed was the only way to defeat the invasion.
D+1: 7 June
On D+1 the forces from Utah Beach pushed inland to join up with the paratroops fighting their desperate battles. Their main targets were Montebourg in the north and Carentan in the south. The troops coming from Omaha beach pushed west towards Isigny-sur-Mer to try and join up with the forces at Utah and east towards Bayeux to try and close the gap with the British and Canadians. In the centre they pushed inland two miles to Formigny. In the east the British captured Bayeux, which became the first French town to be liberated and then reached the Bayeux-Caen road, as did the Canadian 3rd Infantry Division. However an attempt to capture Caen was stopped by the 12st SS Panzer Division, which entered the battle during the day. This division defeated a Canadian force that had captured Buron, and in the aftermath of the fighting murdered a number of Canadian POWs.
D+2: 8 June
D+2 saw the troops pushing west from Omaha Beach capture Isigny-sur-Mere. At Utah the 4th Infantry and part of 82nd Airborne were held up at Azeville. In the centre of the Allied position No.47 Royal Marine Commando captured Port-en-Bessin (Operation Aubrey), creating a link between the British sector and Omaha Beach.
D+3: 9 June
On D+3 the US 4th Infantry Division broke through at Azeville, after a length battle to take the Azeville fort, and began to push north towards Quineville, heading up the east coast of the Cotentin. 82nd Airborne pushed west towards the Merderet River, which runs from north to south down the middle of the Cotentin. 101st Airborne made another attack on Carentan. At Omaha Beach the Americans reached Trevieres, five miles inland, and pushed towards Agy and Dodigny, to the south-west of Bayeux. On the British front fighting continued around Caen. The day also saw Allied aircraft begin to operate from airstrips in Normandy, yet another sign of the German failure to stop the invasion.
D+4: 10 June
On D+4 the US 2nd Armoured Division led an attack that finally saw the two American beachheads link up, although the Germans still held Carentan, so the link was still narrow. Further to the east US troops reached the road that ran south-west from Bayeux towards the key road junction of St. Lo. On the British flank the 2nd Army launched Operation Perch, an attempt to outflank Caen to the west, but ran into heavy resistance at Tilley-sur-Seulles. East of Caen I Corps was held up by the German LXXXVI Corps.
D+5: 11 June
By the end of 11 June (D+5) 326,547 troops, 54,186 vehicles and 104,428 tons of supplied had been landed on the beaches. The Germans had not only failed to stop the landings, they had also been unable to prevent a powerful Allied build-up that made it increasingly unlikely that they would ever be able to repel the invasion.
The day saw the US 90th Infantry Division cross the Merderet, getting into the western Cotentin. The 101st Airborne finally took Carentan, helping to secure the link between the two flanks of the US army.
The key fighting on the British and Canadian front came around Caen. The city had been a D-Day target, but had been more strongly defended than expected and hadn’t fallen. The leading British troops had got within 3 miles of the city but then ran into part of the 21st Panzer Division and had to stop.
One last attempt was made to capture the city without a major battle, Operation Perch (7 June-14 June 1944). This was meant to be a two- pronged assault, with the 51st Highland Division advancing east of the city and the 7th Armoured Division attacking to the west. However the 51st made very little progress. To the west fierce battles developed around Tilly-sur-Seulles, which changed hands several times. However on 10 June a gap in the German lines was detected ten miles further at Caumont. The British advanced through this gap, and briefly had a chance of breaking through the German lines and getting close to Caen. The lead elements of the 7th Armoured Division reached Villers-Bocage on 13 June, but were then famously attacked by a detachment of Tigers under Michael Wittmann. Although Wittmann lost most of his tanks, they knocked out 23 British tanks. The advance stopped, and the position at Villers Bocage had to be abandoned.
Montgomery now decided to prepare for a large scale deliberate attack on Caen. The newly arrived 8th Corps would attack to the west of the city, cross the Odon River, which flows from west to east into Caen, then attempt to get across the Orne to secure high ground that would allow them to threaten the Caen-Falaise road. The main plan was originally to start on 23 June, but the ‘Great Storm’ that began on 19 June forced a postponement to 26 June.
The new offensive began with Operation Martlet (25 June 1944), a preliminary attack designed to capture high ground at Rauray, on the right flank of the planned Epsom battlefield. However much of this high ground remained in German hands after Martlet. On 26-27 June the British launched an attack west of Caen, Operation Epsom. This saw them reach the Odon, which runs north-east into Caen, but the two inexperienced divisions used for the attack, the 15th Scottish and 11th Armoured, were then hit by two newly arrived Panzer divisions. Allied air power combined with a determined defence stopped the German counter-attack, but the Germans had stopped Epsom achieving its territorial ambitions. Even so, it was a clear Allied victory – forces that the Germans had intended to use in a strong counterattack had once again been rushed into action to keep the line intact.
On 4-5 July 1944 the Canadians attempted to capture Carpiquet Airfield, to the west of Caen (Operation Windsor). The airfield had been a D-Day target, but hadn’t fallen. It was now strongly fortified, and although the Canadians were able to take the village of Carpiquet and half of the airfield, the Germans retained control of the southern half.
The northern part of Caen, on the left bank of the Orne, finally fell during Operation Charnwood (8-9 July 1944). This attack was preceded by a controversial heavy bomber raid which caused massive damage within Caen, but didn’t do much damage to the German defences, most of which were in outlying villages too close to the Allied front line for Bomber Command’s comfort. In the west the 12th Panzer Division managed to hold on, but in the east a division formed from former Luftwaffe personnel didn’t do as well, and by the end of 8 July the Germans had been forced out of the northern part of Caen. However the bombing had caused so much damage that it was impossible to launch a quick attack across the Orne, so the Germans managed to hold on the south bank.
Charnwood was followed by Operation Jupiter (10-11 July 1944), an attempt to expand the bridgehead over the Odon to the west of the city, but this attack failed to make much progress.
Montgomery now decided to launch a massive attack to the east of Caen, starting from the bridgehead east of the Orne that had been captured by the airborne forces on D-Day. While the bulk of the British armour prepared for the move east two diversionary attacks were launched to the west of Caen (Operation Greenline, 15-17 June 1944 and Operation Pomegranate, 18-20 July 1944).
On 17 the Germans suffered a heavy blow when Rommel’s staff car was attacked by Typhoons, Rommel suffered serious injuries in the attack and had to return to Germany for treatment. He would never return to active service.
Operation Goodwood began on 18 July. The plan was to mass most of the British armour in the Orne bridgehead, then attack south just to the east of Caen. The main aim was to pin down the German armour and stop the Germans moving it west to counter the upcoming American offensive (Operation Cobra), but Montgomery didn’t make this entirely clear, and many, including Eisenhower, expected it to lead to a major breakthrough. Goodwood began promisingly, with the first German lines overrun, and the British armour pushing rapidly south, However the tanks soon ran into intact German defences to the south-east of Caen, and the attack lost all momentum. The British suffered very heavy tank losses, but did keep the Germans pinned down. 18 July also saw the Canadians launch Operation Atlantic, which saw them clear the southern part of Caen, before running into the same German defensive line that had stopped Goodwood. Although the two attacks hadn’t achieved a breakthrough, they had pushed the Germans away from Caen in every direction.
The German high command was thrown into more confusion on 20 July, when a bomb exploded in Hitler’s conference room in distant East Prussia. Although Hitler survived, the aftermath of the failed assassination attempt caused chaos. Anyone who was even suspected of a connection to the coup was arrested, and most of them executed. Even Rommel was forced to commit suicide after it was discovered that the plotters had hoped to use him in their new government. In the aftermath of the assassination most senior German officers became increasingly unwilling to stand up to Hitler, while he in turn lost what little trust he had for most of his own senior officers.
The original plan had been for Operation Cobra to begin on around 20 July, but it became clear that this wouldn’t be possible. Montgomery ordered the Canadians to plan a new attack, Operation Spring (25-27 July 1944). This was planned very quickly, but still didn’t start until the same day as Cobra. Operation Spring was rather over optimistic, and involved three phases as well as a preliminary attack to capture the main offensive’s starting point. When the attack did begin it failed to make any real progress, and to make things worse the Germans had access to several mine tunnels, which they were able to use to move reinforcements back into areas the Canadians believed they had cleared. By the end of the first day it was clear that Spring had failed, and at heavy cost. However once again it did pin down strong German forces.
Once Operation Cobra began, Montgomery was keen to prevent the Germans from moving troops west to mount any organised counterattack, and also wanted to support the breakout. According he launched a new British offensive on the western part of their front, away from Caen. Operation Bluecoat (28 July-7 August 1944) made good progress by Normandy standards, but was overshadowed by the much more dramatic breakout on the American sector.
While the British and Canadians fought their costly battles around Caen, attracting the bulk of the German armour, the Americans were fighting an equally costly, but initially less dramatic battle in the western half of the beachhead. Their initial target was to clear the Cotentin Peninsula and take the port of Cherbourg, then turn south, push towards St. Lo and use that position to launch the eventual breakout. The original plan was for them to break out of Normandy, then turn west to clear Brittany and capture its ports, before turning east to take part in a general advance towards the Seine. However this plan was partly based on the expectation that the Germans would conduct a skilful fighting retreat east once their lines in Normandy had been broken. Instead Hitler reacted to the breakthrough by ordering his panzers to move west to launch a counterattack. When this failed, it left a large part of the German army in Normandy in a dangerous position in the western part of the front, with strong American forces dashing east behind German lines. This led to the battle of the Falaise Gap, and the loss of the vast majority of the surviving German vehicles in Normandy.
The first job on the American front was to establish a firm link between Omaha and Utah beaches. This involved a battle for the town of Carentan, in the gap between the two beachheads. The town finally fell to the 101st Airborne on 911 June, and a German counterattack was fought off on 13 June. After that the link between the two beachheads was secured.
The second job was to secure the Cotentin peninsula. The landing on Utah Beach and the nearby airborne landings by the 82nd and 101st Airborne Divisions meant that the US already had a foothold at the base of the peninsula. The initial airborne assault had been rather chaotic, but it did achieve its main aim of securing a number of key routes across the flooded areas inland from Utah Beach. After securing the beachhead, the Americans turned north, in an attempt to push the Germans away from the northern flank of Utah Beach. On 9 June they captured a key German strongpoint at Azeville, and Quineville was liberated on 14 June. On 15 June the US forces in the area were split into two corps. The newly activated 8th Corps was given the task of defending the southern flank of the American position in the Cotentin, while General Collins’ 7th Corps was to push north towards Cherbourg. Their first target was the west coast of the peninsula, which was reached on 17 June. The town of Barneville-Carteret, on the west coast, was captured on 18 June. The speed of the push west had caught the Germans out, and two divisions (77th and 91st) were almost destroyed before they could escape to the north or south.
Once they reached the west coast, the Americans turned north. Three divisions (4th, 9th and 79th) were to push north, advancing side by side. They reached Cherbourg by 20 June and the first major attack began on 22 June. Progress was steady after that, and by 25 June the Americans were in the centre of the city. The garrison commander, General Schlieben, surrendered on 26 June. The last Germans in Cherbourg, in some of the harbour forts, surrendered on 29 June. On the last day of June the last Germans in the peninsula, at Cap de la Hague, surrendered. Although the port had been captured, its facilities had been thoroughly wrecked by the Germans and it took until 12 August for the first transport ship to arrive.
The second American objective was to push south towards Saint-Lo, to expand the beachhead to make it large enough to contain all of the troops and facilities needed for the breakout. In the immediate aftermath of D-Day the Americans had pushed towards Caumont, which was a similar distance inland as St. Lo, but further to the east. On 13 June Bradley decided to halt the advance south to focus on the fighting in the Cotentin. The push south was resumed, and by 18 June the Americans were only five miles from Saint Lo, but they were then delayed by the Great Storm of 19 June, which caused a massive supply crisis within the Allied beachhead.
The attack south resumed on 3 July, with a three pronged assaulting using three of the four US corps in Normandy. 8th Corps attacked first, on the US right, but made slower progress than expected, and after a week their attack was stopped. In the centre the 7th Corps attempted to advance on a single division front, but again ran into heavy resistance, and stopped after eleven days, well short of their target at Periers. The third part of the attack, on the American left, involved General Corlett’s 19th Corps. They attacked on 7 July, heading towards Saint Lo. Once again progress was slow, and this time the Germans were able to respond by moving the Panzer Lehr division west. Their counterattack began on 11 July, but it was now the German’s turn to discover how hard it was to attack in the bocage country. On the first day they lost one third of their tanks, and by the end of the second day the attack had to be cancelled. Panzer Lehr then joined the defensive battle. The Americans were then able to resume their slow advance, advancing only six miles in the next six days. However this did bring them almost to the road from Saint Lo to Periers. Although Bradley had originally wanted to start the breakthrough a little further to the south, he decided that this was far enough.
On 17 July the Germans suffered a blow when Rommel was badly wounded when his staff car was attacked by a British fighter. He was replaced as head of Army Group B by von Kluge, already the Commander-in-Chief, West, who held both posts until he was sacked on 17 August.
On 18 July the Americans finally captured Saint Lo. 19th Corps had lost 6,000 men during the battle of Saint Lo, but they had finally captured the ground that was needed to begin the breakthrough. The plan for Operation Cobra was to attack on a narrow front, using a massive air attack to knock a hole in the German defences. General Collins’ 7th Corps would attack through the gap and advance towards Avranches, at the junction between Normandy and Brittany. Patton’s 3rd Army would then be activated to advance into Brittany before turning east.
The operation had to wait for the right weather for the air attack. This appeared to have come on 24 July, but Leigh-Mallory then flew a reconnaissance in person, and decided the weather was too poor. The attack was postponed for a day, but tragically some of the bombers didn’t get the message, and of them some hit American forces by mistake. The attack was finally launched on 25 July, but once again some of the bombs dropped short, kill 101 and wounding 463. Amongst the dead was Lt General J. McNair, the commander of the US Ground Forces (a home based command). On the German side Panzer Lehr lost 25 tanks, 10 assault guns, 1,000 men and most of its remaining tanks were bogged down. The American ground forces then attacked, but it took most of the first day to even cross the Periers-Saint Lo road. It looked as if the bombing hadn’t achieved its objectives, but the Germans were actually on the verge of collapse. Their communications had almost been knocked out, and by the end of the day von Kluge reported that the ‘front had burst’.
The Americans began to make more progress on 26 July and 7th Corps pushed five miles south of the road. The collapse really began on 27 July when the Americans reached Marigny and St Gilles, and began to push west towards Coutances and south towards Avranches. The German troops on the coast were soon trapped in a pocket, and the German commanders in the area were forced into a rapid retreat. The first American troops reached Avranches on the evening of 30 July, ahead of the retreating Germans! Operation Cobra had actually produced one of the rarest things – a genuine breakthrough. The western end of the German lines were broken, and the Americans were free to thrust into the German rear areas. Patton in particular would soon be able to lead a rapid advance through largely undefended areas, utterly transforming the situation in Normandy.
This led to the last major German counterattack in Normandy, the Avranches-Mortain offensive. Hitler believed that a determined drive west from Mortain towards Avranches could split the American forces in half, isolating the advancing American spearheads. The survivors from the ten Panzer divisions in Normandy were gathered for the attack, which began on 6 August. However they had lost most of their offensive abilities during the bitter fighting around Caen, and the attack was easily repulsed.
At this point Montgomery changes his plans. Patron was ordered to reduce the strength of the attack into Brittany, and instead swing east around the southern flank of the German forces at Mortain. This led to the final collapse of the German position in Normandy and soon afterwards in France. The Brittany Campaign thus began at the same time as the battle of the Falaise Gap.
The US attack east now involved both Hodges’ 1st Army and Patton’s 3rd Army. The 1st Army contribution was delayed by the Mortain counterattack, but Patton’s men advanced at great speed. By 8 August his 15th Corps had reached Le Mans, 85 miles to the south-east of Avranches! On the same day the Canadians launched Operation Totalize, a rather over-complex offensive that still saw them break out of the area around Caen and push eight miles south, getting half way to Falaise. 8 August also saw another change to the plan. The overall aim had been to trap the Germans at the Seine (the long envelopment). Bradley suggested that it would be possible to win a rather immediate victory by switching to a ‘short envelopment’ in which the Americans would attack towards Flers and Argentan from the south, while the Canadians attacked from the north. The only flaw in this plan was that Bradley (with Eisenhower’s support) wanted to have a fixed point where the two armies would meet, near Argentan. The problem with this was that the Americans were advancing through the German rear areas, while the Canadians were still facing an intact defensive line, so were never going to be able to advance as quickly as the Americans. When the Americans reached Argentan on 13 August they thus paused, leaving a blocking force there while Patton was ordered to continue the dash east.
On 14 August the Canadians launched a second massive attack, Operation Tractable. Once again this made good progress at first, and a mixed Canadian and Polish force got to within three miles of Falaise before they were stopped. The two wings of the Allied army were now only fifteen miles apart.
Life within the pocket was now getting very difficult for the Germans. On 15 August Allied air power indirectly claimed another victim. Kluge attempted to move from Dietrich’s HQ to visit Hausser and Eberbach, two of his key commanders, but he was forced to spend most of the day hiding from Allied air power. Coming just after the assassination attempt, this played into Hitler’s paranoia, and he assumed that Kluge was attempting to betray him. Hausser was given temporary command of all troops in the west, but Kluge then reappeared. By 16 August Kluge was back at his HQ, but his time was over. On 18 August Model turned up to take command and Kluge was ordered back to Germany. He committed suicide on the journey.
Model quickly realised that the only option was to retreat. Over the next few days the Germans attempted to escape to the east, while the Canadians and Poles pushed south, and the Americans resumed their advance north. The last German troops crossed to the east bank of the Orne on the night of 17-18 August, although without most of their heavy equipment. On 19 August Polish troops pushing south and American troops pushing north met up in Chambois, but the gap wasn’t entirely closed just yet. The Canadians and Poles held a number of key positions within the gap, but came under heavy pressure. By this point the entire pocket was within range of Allied artillery, which was only six miles deep and seven wide by the end of 19 August. The gap was more firmly closed on 20 August, when Argentan was captured and British and Canadian troops crossed the Falaise to Argentan road. Organised German traffic ended at about midnight on 20 August, although a few individuals managed to escape after that.
The Germans now began a rapid retreat back to the Low Countries and Alsace-Lorraine. The Allies followed up rapidly, reaching the Seine by 19 August. By this point the Germans had managed to ferry most of the surviving troops across the river, but only after abandoning most of their heavy equipment. Overlord was officially considered to be over on 25 August, as the Allies occupied Paris and crossed the Seine.
Overlord was followed by the ‘Great Swan’, a period of rapid Allied advances across France and into Belgium. It was marked by limited resistance and the celebrations of the liberated French and Belgian civilians. Unfortunately it also encouraged the Allied commanders to believe that the German army had been defeated, and that the war could be won during 1944. This over-confidence helped lead to Operation Market-Garden, and the failure to concentrate on opening the port of Antwerp, and massively underestimated the German ability to recuperate. The Allies ended up stalled on the German frontier during the winter of 1944-45, and also had to face the last major German offensive in the west, the battle of the Bulge.
Despite these later relative failings, Operation Overlord had been a stunning success. The Allies had successfully carried out a massive amphibious assault on a defended coastline, established a firm beachhead despite theoretically being outnumbered by the Germany army in the west, and then won a shattering victory that allowed them to liberate all of France well ahead of schedule.
Books
 The Normandy Battlefields D-Day and the Bridgehead, Leo Marriott & Simon Forty.
A good photographic history of the Normandy invasion, with a good mix of well chosen contemporary and modern photographs of the battlefields. Focuses on the five D-Day beaches and the areas immediately behind them, so each area is covered in some detail. Includes a good set of modern aerial photographs with useful annotations showing key areas of the battlefield and war memorials. [read full review]
The Normandy Battlefields D-Day and the Bridgehead, Leo Marriott & Simon Forty.
A good photographic history of the Normandy invasion, with a good mix of well chosen contemporary and modern photographs of the battlefields. Focuses on the five D-Day beaches and the areas immediately behind them, so each area is covered in some detail. Includes a good set of modern aerial photographs with useful annotations showing key areas of the battlefield and war memorials. [read full review]
 D-Day and the Normandy Invasion, Adam Powley.
Covers the pre-invasion planning, the D-Day landings, the battle of Normandy, the break-out and the fighting in the Falaise pocket. A good narrative, broken up by chapters on special topics, and supported by some excellent photos. A good overview of the D-Day and Normandy campaigns, packing plenty of information into its 64 pages. [read full review]
D-Day and the Normandy Invasion, Adam Powley.
Covers the pre-invasion planning, the D-Day landings, the battle of Normandy, the break-out and the fighting in the Falaise pocket. A good narrative, broken up by chapters on special topics, and supported by some excellent photos. A good overview of the D-Day and Normandy campaigns, packing plenty of information into its 64 pages. [read full review]
 Deceiving Hitler, Terry Crowdy. Looks at the full range of methods used to deceive the Germans during the Second World War, from the earliest attempts to discourage a German invasion to the triumphant deception plans that surrounded the D-Day landings. Covers physical deception (models, false radio signals etc) and the famous double cross network of controlled German agents to paint a full picture of the British deception campaign. [read full review]
 Blood and Steel: The Wehrmacht Archive: Normandy 1944, Donald E. Graves.
A look at the German view of the fighting after D-Day, taken from the archives of the First Canadian Army, and mainly based on captured German documents. Gives an interesting view of an army under heavy pressure and the attitude of its soldiers, from the private soldier's diaries to the orders coming from high command. [read full review]
Blood and Steel: The Wehrmacht Archive: Normandy 1944, Donald E. Graves.
A look at the German view of the fighting after D-Day, taken from the archives of the First Canadian Army, and mainly based on captured German documents. Gives an interesting view of an army under heavy pressure and the attitude of its soldiers, from the private soldier's diaries to the orders coming from high command. [read full review]