New Guinea during
the Second World War
|
|
Pre-War New Guinea
The Japanese Invasion
The Turning Point
The Long Allied Advance
1943
1944
The New Guinea campaign (January 1942-September 1945) was one of the longest campaigns of the Second World War. It began with the easy Japanese conquest of most of the north coast of the massive island. The Japanese finally ran out of steam during the Papuan Campaign, and were unable to capture Port Moresby on the south coast of Papua New Guinea. The Allies then went onto the offensive. The Japanese were pushed back across to the north coast of Papua, before the Allies began a series of campaigns that eventually gave them control of almost the entire island. By the end of the war the Japanese had been pushed back into a few isolated strongholds in the mountainous interior, although they did still hold their once-powerful base at Rabaul on New Britain and all of nearby New Ireland. New Guinea had been a key part of the Japanese defensive perimeter, and the Allied victories on the island had repeated forced them to pull that perimeter back before eventually breaching it altogether.
The New Guinea campaign can be divided into five phases.
First was the successful Japanese landings along the north coast, which gave them a series of bases spread out from the western tip all the way to Lae and Salamaua in north-eastern New Guinea.
Second was the Papua campaign, which saw the last major Japanese offensives in New Guinea. This involved two attempts to capture Port Moresby, the first defeated at sea at the Battle of the Coral Sea, the second on land stopped by desperate fighting on the Kokoda Trail. After the failure of the Japanese attack the Allies went onto the offensive, pushed them back along the trail and early in 1943 were forced out of their foothold on the north coast.
For the rest of the war the Allies were on the front foot in New Guinea. The Allied offensive provides the last three phases of the New Guinea campaign. The third phase, which began in the summer of 1943, was aimed at neutralising the powerful Japanese base at Rabaul, at the north-eastern tip of New Britain, a large island off the north-east coast of New Guinea. At first the plan was to actually capture Rabaul, but eventually the decision was made to isolate the powerful Japanese base and leave it to wither on the vine.
The fourth phase of the campaign saw the Allies leapfrog along the northern coast of New Guinea and Dutch New Guinea in order to clear the way for MacArthur's return to the Philippines. This part of the campaign began in the spring of 1944 with the leap forward to Aitape and Hollandia.
The fifth and final phase of the campaign saw the Allies mop up some of the remaining Japanese troops on New Guinea and in the surrounding area, while leaving others to fade away. Much of the fighting during this part of the campaign was done by Australian troops.
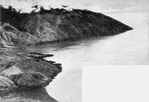
New Guinea is the second largest island in the world, stretching for over 1,500 miles from west to east. The interior is very mountainous and covered in dense jungle, and is still one of the least well known areas of the world. During the Second World War most of the European settlements were on or close to the long coastline of the island but the interior was populated by many of the nearly 1,000 tribes who inhabit the island.
At the start of the Second World War it was split into three political units. The western half of the island was held by the Dutch as part of the Dutch East Indies, and was known as either Dutch New Guinea or Netherlands New Guinea. This part of the island is now part of Indonesia.
The north-eastern part of the island had been taken by the Germans in the 1880s as German New Guinea. At first it was run by a commercial company, but the German government took over direct rule in 1899. It was seized by Australian troops in 1914 and from 1920 onwards was ruled by Australia as the Territory of New Guinea.
The south-eastern part of the island was annexed by Queensland in 1883, and the move was accepted by the British government in 1884. At first the area was known as British New Guinea, but it was officially renamed as Papua in 1905. The two Australian ruled territories now form the independent nation of Papua New Guinea.
Some of the islands off the coast of New Guinea also played a major part on the fighting. The most important of these form the Bismarck Archipelago, which sit to the north-east of New Guinea and north of Papua. The waters to the east of the islands are known as the Solomon Sea, and the Solomon Islands stretch out to the east. The waters to the west form the Bismarck Sea. The Vitiaz strait, between New Britain and New Guinea, would become an important shipping lane for both sides.
The largest of these islands is New Britain, which runs east from the north-eastern corner of New Guinea. New Britain became a German protectorate in 1884 (as New Pomerania). The Australians captured the island in 1914 and were granted it as a mandated territory in 1920 (as part of the Territory of New Guinea). The most important place on the island was Rabaul, at the northern tip of the island, built on one of the finest natural harbours in the world.
New Ireland sits to the north of New Britain, running from south-east to north-west. It also came under German rule, as New Mecklenburg, and shared the fate of New Britain during and after the First World War.
New Guinea was attacked by two separate Japanese forces. The Bismarck Archipelago and eastern New Guinea were the target of the South Seas Detachment, a force of around 5,000 men that had also been used to seize Guam.
Western New Guinea was attacked by the East Force of the larger Japanese force that had invaded the Dutch East Indies.
The strongest Australian force in the Bismarck Islands or north-east New Guinea was at Rabaul, on New Britain. The Japanese began to bomb Rabaul on 4 January, using a mix of long range flying boats and carrier aircraft. A force of RAAF Hudsons based at Rabaul had to be withdrawn. On 20 January the few Wirraway aircraft at Rabaul were all lost and on 21 January the coastal guns were destroyed. The South Seas Detachment landed at midnight on 22-23 January. The Australians resisted until 10am, and then withdrew. About 400 of the 1,200 men at Rabaul eventually reached safety after a desperate march across New Britain. On the same day, 23 January, Kavieng on New Ireland was captured without a fight.
About the only setback suffered by the Japanese at this time was the first US air strike on Rabaul, carried out by B-17s based at Townsville, Australia soon after their arrival in Australia on 17-18 February.
On 2 February the Japanese Imperial HQ issued orders for the capture of Lae and Salamaua, on the Huon Gulf. Troops from the South Seas Detachment took both places without opposition early on 8 March. The few Australian troops in the area withdrew to Wau in the Bulolo Valley. Two days later 104 US carrier aircraft attacked the Japanese invasion fleet in the Huon Gulf, sinking three ships and damaging four. These attacks came too late to help protect Lae and Salamaua, but the South Seas Detachment was operating on very narrow margins, so the losses here delayed their next amphibious attacks. In the meantime the Japanese Army troops returned to Rabaul and the area was garrisoned by the navy.
On 6 April Japanese troops from Rabaul landed at Lorengau in the Admiralty Islands, and they were secured by 7 April.
April also saw troops from the Dutch East Indies finally move into Dutch New Guinea. Fakfak and Babo fell first, followed by Sarong, near the western tip of the island on 4 April. Manokwari fell on 12 April, followed by Morni, Nabira and Seroei. Hollandia and Sarmi were captured on 19 April.
The Japanese created a series of bases along the coast of New Guinea.
From west to east some of the major Japanese bases were:
Manokwari became the Japanese HQ on the Vogelkop Peninsula at the western end of New Guinea, and was the HQ of both the 2nd Army and the 35th Division.
Hollandia, the former capital of Dutch New Guinea, became the main transhipment centre for the South-West Pacific. The Japanese built three airfields at Hollandia, and a series of fortifications in the nearby hills.
Aitape, just over the border in Australian New Guinea, was a minor base with an airfield.
Wewak and Madang were occupied in mid-December 1942, after the failure of the Japanese campaign in Papua. Both places became major Japanese bases, and the site of airfields.
Finschhafen was a former German port at the eastern tip of the Huon Peninsula. It gained in importance after the loss of Lae and Salamaua and the Japanese were determined to hold onto it.
Lae in the Huon Gulf was the main Japanese port on the eastern tip of New Guinea, east of the Vitiaz Straits and New Britain. It was a major offensive base during the Papuan campaign, then the target of the first major Allied offensive after their victory in Papua.
At the start of the campaign the eastern part of the island was in the Southeast Area, with its HQ at Rabaul. The 8th Area Army, commanded by General Hitoshi Imamura, was responsible for eastern New Guinea and the Solomon Islands. For most of the campaign the troops on New Guinea were part of the 18th Army, under General Hatazo Adachi. This army had originally been limited to the Papua area, the south-eastern tip of the island, but the rest of the Territory of New Guinea was added in January 1943.
The western part of the island was part of the Southern Army (Field Marshal Count Hisaichi Terauchi), which was based in the Dutch East Indies.
The next Japanese target was Port Moresby, on the south coast of Papua. Some Japanese commanders had wanted to invade Australia, but the Army opposed the idea and instead preferred to try and isolate the country by taking Port Moresby, Fiji, Samoa and New Caledonia. Only the first of these operations would ever be attempted, and that would end in failure.
When the Japanese first decided to take Port Moresby it probably couldn't have been held by the Allies, but they didn’t attack immediately. Instead the main Japanese fleet carried out a damaging but ultimately pointless raid into the Indian Ocean. The raid failed in its main objective, the destruction of the British Eastern Fleet, and also gave the Americans the time they needed to get their own carriers into the area. The successful carrier attack on the Huon Gulf on 10 March had alerted the Japanese to their presence and so the Japanese decided to commit the fleet carriers Shokaku and Zuikaku to the attack on Port Moresby.
On 28 April the Japanese decided to follow the Port Moresby landings with the attack on Midway, to be followed by the invasions of Fiji, Samoa and New Caledonia. These islands were thus saved from attack by the crushing Japanese defeat at Midway.
The Japanese fleet left Rabaul on 4 May, with the intention of attacking Port Moresby on 10 May. The invasion fleet sailed south from Rabaul, and was to steal around the eastern tip of Papua. The carrier strike force came from Truk, and operated further east. This fleet sailed around the eastern end of the Solomon Islands then moved west, along the northern edge of the Coral Sea.
This brought them within range of an Allied fleet built around the carriers Lexington and Yorktown. This triggered the Battle of the Coral Sea, the first naval battle in history in which the opposing ships never sighted each other. The Japanese lost the light carrier Shoho, and suffered heavy damage to the Shokaku, while the Zuikaku lost most of its air group. Both carriers were thus unavailable for the battle of Midway. The Americans lost the Lexington, but they also turned back the Japanese invasion fleet. The amphibious assault on Port Moresby had been thwarted.
The Allies now decided to secure new bases around the coast of Papua. An airfield was to be built at Milne Bay, at the eastern tip, while another force was to advance north to secure the Dobodura Area. Milne Bay would indeed become an Allied base, but the advance north would be pre-empted by the Japanese.
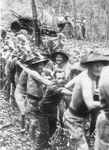
After the failure of the amphibious attack the Japanese decided to attack Port Moresby by land. This involving landing a large force at Buna and Gona on the north-eastern coast of Papua, and then advancing across the towering Owen Stanley Mountains to Port Moresby. This would take them along the Kokoda Trail, a single person wide trail that ran across the mountains. Before the attack the Japanese believed this to be a wider and better road than it was. The battle of the Kokoda Trail would take both sides into some of the most difficult terrain in the world, a landscape of precipitous jungle covered mountains where every movement would take a massive effort.
The Japanese began to land near Gona on the evening of 21 July 1942. The Allies responded with a series of air strikes on 22 July. In 83 sorties they sank one transport ship and one barge, but failed to delay the build-up. At first the Allies dismissed the possibility of a threat to Port Moresby, underestimating yet again the Japanese ability to cross difficult terrain. A similar mistake had played a part in the loss of Malaya, and many of the troops who had just landed at Gona had fought in that campaign. The Allies were aware of the Japanese threat, and in late June had created 'Maroubra Force', which was given the task of securing the airfield at Kokoda, but only one company had been sent forward by the time the Japanese landed.
It quickly became clear that the Japanese were intending to attack Port Moresby. They attacked the Australian outpost at Kokoda on 29 July, forcing them to retreat south-west to Deniki. Despite being heavily outnumbered the Australians managed to retake Kokoda on 8 August, but they were soon forced to retreat, and by mid-August they had reached Isurava, half way between Port Moresby and Gona. The Japanese attacked Isurava on 26 August, and the Australians were forced to retreat by the end of the month.
At the same time a second front had been opened at Milne Bay, at the eastern end of New Guinea. This time the Allies had moved first, and had established a base in the bay. The Japanese attacked on 25 August (Battle of Milne Bay), and soon discovered that they landed in the middle of a sizable Australian and American force. The Japanese carried out a series of desperate attacks on the Allied position, but they were outnumbered by nearly five to one, and were forced to retreat on 5 September.
Meanwhile back on the Kokoda Trail the Australians were being pushed back towards Port Moresby. On 5 September the Japanese reached the 'Gap', the high pass across the Owen Stanley range, and began to advance south, down the mountains towards Port Moresby. On 17 September they captured Ioribaiwa, one of the last villages before Port Moresby. The Japanese were now only 30 miles from their objective, but they were desperately short of supplies and were suffering from the incredible difficulties of the trail. They were also unable to provide any reinforcements to the drive on Port Moresby, and General Horii, the commander of the Japanese attack, was eventually ordered to retreat back to Buna and Gona and defend that area until expected successes elsewhere freed up reinforcements.
This was the turning point on New Guinea. The expected victory on Guadalcanal would never come, and the Japanese would be on the defensive on New Guinea for the rest of the war (despite some local counterattacks later in the campaign). The Allied fight back started on 26-27 September when the Australians attacked at Ioribaiwa and found that most of the Japanese had retreated. The fighting on the Kokoda Trail was now repeated in reverse. The Japanese attempted to hold a defensive position at Eora Creek in the mountains while they built a defensive line further north at Oivi, between Kokoda and Buna. The Eora position held until the night of 28-29 October, when the Japanese retreated to Oivi. The Australians recaptured Kokoda, and quickly pushed the Japanese out of the Oivi position. General Horii drowned crossing the Kumusi River during the retreat, and the survivors of the Japanese column straggled back to their starting point at Buna and Gona.
The Allies now prepared for an attack on the Japanese strongholds. MacArthur allocated American and Australian troops to this attack. New airfields were built near the north coast of Papua and supplies were moved around by sea. The offensive began in mid-November. The Australians attacked Gona and Sanananda, the Americans towards Buna. The Japanese were very well dug in, and the attacks made very slow progress. MacArthur expected too much of his men, demanding rapid progress before their heavy equipment had arrived. On 30 November General Eichelberger was ordered to go to the front and take command. As so often happened the new commander was given the resources his predecessor had lacked, and a new attack began on 5 December. At last progress began to be made. Gona fell on 9 December. Buna village was captured on 14 December, although fighting in the area lasted until 2 January. The final Japanese positions in Papua, at Sanananda, fell on 22 January and the Papua campaign was over.
The Japanese made one more attempt to attack Port Moresby. This time they decided to advance directly from Lae and Salamaua. Their first objective was the mountain town of Wau, from where it was possible (if difficult) to reach the south coast of Papua. The town also had an airfield, which made it a valuable base for any future Allied campaign. The Australians had moved two companies of Commandoes to Wau when the Japanese first occupied Lae and Salamaua, but they were badly outnumbered by the approaching Japanese. The key day of the battle came on 28 January. At first the Japanese had the upper hand, pushing to within a few hundred yards of the airfield, but the next morning the weather cleared and the Allies were able to fly troops from the 17th Australian Brigade straight into the battle. Although the Japanese continued to press, their attacks failed, and they were soon forced to retreat.
The Japanese expected the Allies to attack Salamaua and Lae. In January 1943 they sent the 102nd Infantry Regiment by sea from Rabaul to Lae. Allied aircraft sank two transports, but the Japanese still managed to get three quarters of the men and half of their supplies to Lae.
In March the Japanese attempted to move 8,900 men of the 51st Division by sea from Rabaul to Lae in a convoy of eight transports and eight destroyers. The Allies detected this fleet, and subjected it to accurate air attacks. The resulting battle of the Bismarck Sea (2-4 March 1943) was a major Allied victory. At the cost of only four aircraft they sank all eight transports and four of the destroyers. About 3,000 Japanese soldiers drowned, and only 950 reached Lae. This was the last attempt to move large numbers of reinforcements to Lae and Salamaua using regular transport ships.
On 18 April 1943 Admiral Yamamoto was killed by US aircraft after his travel plans were captured. He was replaced by Admiral Mineichi Koga, who made a crucial mistake. In an attempt to bolster the defence of Rabaul he decided to use his naval aviators to defend the base. They were moved off their carriers, and thrown into the battle on New Britain. Inevitably they were shot down in large numbers. The Japanese were forced to train a new generation of carrier aviators, but time and resources were against them. The results were seen at the next major carrier battle, the Battle of the Philippine Sea of 19-20 June 1944, where the inexperienced and under-trained Japanese aviators were almost wiped out.
A great deal of planning went into the Allied counterattack in the South Pacific. This resulted in a series of plans given the codename Elkton, ending with Elkton III. The Elkton III plan was issued on 26 April after the first meeting between General MacArthur and Admiral Halsey, whose forces would have to carry it out. The plan contained a series of subsidiary operations, which were bundled together as Operation Cartwheel. This started with landings off the eastern tip of New Guinea, and then involved an advance along the north-eastern coast from Lae and Salamaua up to Madang, the occupation of western New Britain and the conquest of New Georgia and parts of Bougainville in the Solomon Islands.
The Allied advance began on 30 June 1943, D-Day for Operation Cartwheel. The day saw four separate landings across the area. Away to the east American troops landed at Redova at the start of the New Georgia campaign. On New Guinea itself troops landed at Nassau Bay, south-east of Salamaua, in preparation for stage two of the Elkton plan. Finally MacArthur's command carried out its first large amphibious invasion - Operation Chronicle, the invasion of Woodland and Kiriwina Islands. All of the New Guinea operations were successful - Woodlard and Kiriwina were undefended and the nearest Japanese troops to Nassau Bay failed to intervene.
The next stage of the plan was originally given the code-name Operation II in the Elkton III plan, and was implemented as Operation Postern. The aim of this operation was to capture the Japanese bases at Lae and Salamaua in the Huon Gulf, Finschhafen at the tip of the Huon Peninsula and Madang, further west along the coast at Astrolabe Bay. This would secure the southern side of the Vitiaz Strait. This fighting is generally split into three campaigns - first the Salamaua-Lae Campaign and then the parallel Huon Peninsula and Finisterre Range campaigns.
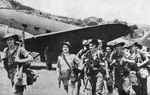
The advance on Salamaua began soon after the Nassau Bay landings, and by the end of August the Japanese had been pushed back to the last defensive positions outside the town. At this point the Japanese commander intended to fight to the last man, but events further north changed their plans. On 4 September the 9th Australian Division (Major General G.F. Wootten) landed on the coast 20 miles east of Lae. On 5 September the US 503rd Airborne landed at Nadzab, a pre-war airfield in the Markham Valley west of Lae. They were followed in by the 7th Australian Division, and the two Australian forces then began to advance on Lae. General Adachi realised that neither town could be defended. The defenders of Salamaua were ordered to retreat on 9 August, and the Allies took the village on 11 September. On the same day the first part of Japanese troops left Lae heading north, and on 15 September Australian troops captured the port. The first stage of Operation Postern was over.
The second stage of the operation involved two separate campaigns. The 7th Division was given the task of holding the Markham and Ramu Valleys, west of Lae and Salamaua, in order to prevent the Japanese from launching a counterattack or from interfering in the main campaign, an attack on the Japanese bases on the coast of the Huon Peninsula. As long as the Japanese held this coast they could damage any Allied naval force attempting to pass between New Guinea and New Britain.
The first target was Finschhafen, on the eastern tip of the Huon Peninsula. On 22 September the Australian 20th Brigade landed at Scarlet Beach, north of Finschhafen, and began to push south. The port fell on 2 October, but the Japanese hadn't given up. On 16 October they launched a fierce counterattack towards Scarlet Beach and even reached the coast just south of Scarlet Beach. By 19 October the attack lost force, and the Australians were able to push the Japanese away. They then launched a counterattack of their own, beginning on 16 November. They reached Sattelberg Hill by 22 November, and occupied the hilltop village by 25 November. The next target was Wareo, the last major Japanese inland position. The Australian attack began on 28 November, and the village fell on 8 December. The Australians then began to advance around the coast, heading towards the Japanese base at Sio.
While the main fighting was going on around the Huon Peninsula, the 7th Division was fighting its own difficult campaign inland. Kaiapit, at the top of the Markham Valley fell on 20 September, and Dumpu in the Ramu Valley, fell on 4 October. The 7th Division's task was to secure the two valleys and prevent the Japanese troops in the Finisterre range to the north from threatening the new Allied airfields in the valleys. The key battleground for the next few months would be on the passes leading north across the mountains towards the coast. The Japanese had been attempting to build a road from Madang to Lae, but they hadn't reached very far. The one intact stretch ran from Madang down to Bogadjim, then left the coast to run inland down a series of valleys. Eventually the route reached the Kankiryo Saddle at the head of the Mindjim valley, then ran down the Faria Valley towards the Ramu. The road itself stopped part of the way up the Mindjim valley. The most famous feature in the area, Shaggy Ridge, was the steep sided ridge on the western side of the Faria Valley.
The Australians got their first foothold on the southern end of the ridge on 10 October, occupying Bert's Post, at the foot of the ridge. They would be engaged in battles on the ridge well into January 1944, although in fairly short bursts. The ridge was steep sided and narrow, and in most places the only way to attack was along the narrow summit, sometimes only one man wide. Their first major success actually came without much combat, when a patrol discovered that the Japanese had left their positions on Green Pinnacle, the first major peak on the ridge. This position was captured on 23 October. November passed fairly quietly, before on 8 December the Japanese launched a counterattack of their own, hitting the Australian positions future west in the Ramu. The biggest attack came on the night of 12-13 December, and the Japanese then retreated back to their starting point.
The Australians began their first major offensive on Shaggy Ridge on 27 December. The first of a series of rocky summit peaks, known as 'the Pimple', was captured after Corporal Hall knocked out a Japanese pillbox. A second pimple was taken, but an attempt to take a third failed. The third pimple fell on the following day, but the Australians were then held up in front of McCaughey's Knoll, the highest point on the ridge.
The fighting on Shaggy Ridge now merged into a wider attempt to capture the Kankiryo Saddle. This involved a three pronged assault, with two along the ridges on either side of the Faria Valley, while the main attack came from a valley to the west. The attack began on 20 January 1944, and the key point, Prothero 1, to the west of the saddle, fell on 21 January. The main Japanese position on Shaggy Ridge was captured on 22 January, and the ridge cleared on 23 January. Kankiryo itself fell on 26 January, and the last major Japanese position near the saddle, on Crater Hill, was captured on 1 February.
Back on the Huon Peninsula the Australians made steady progress around the coast, pushing the Japanese rearguard back. The situation changed when the Americans landed at Saidor, between the Japanese positions at Sio and Madang, 2 January 1944. General Adachi decided to abandon Sio, and ordered the survivors of the 21st and 50th Divisions to retreat back to Madang, avoiding the new American positions. The Americans at Saidor didn't have the authority to try and trap the retreating Japanese, and the survivors of the division eventually limped into Madang.
The last major action of 1943 was the invasion of New Britain, Operation Dexterity. This began on 15 December 1943 with landings at Arawe, on the south-western coast. This was a diversionary attack, and after establishing a firm beachhead the Americans stopped and fought off a series of Japanese counterattacks. The main attack followed on 26 December when the Americans landed at Cape Gloucester, on the north-western corner of the island. This was the key position in the western part of the island. The Americans landed one force on the western coast of the cape, to block one coastal road, and their main force on the eastern coast, from where they advanced north towards Cape Gloucester airfield. The airfield was captured on 29 December, and a counterattack defeated on 30 December. This ended serious resistance around the airfield, and by mid-February 1944 it was ready to take fighter aircraft.
1944 began with the landings at Saidor on New Guinea on 2 January, and fighting around the original landing point east of Cape Gloucester on New Britain. The key position here, Hill 660, was finally captured on 16 January, the same day on which Arawe was declared secure. The Japanese now decided to retreat east, and fought a series of delaying actions along the north coast to allow their scattered troops to escape. At the same time the Americans advanced east along the north coast towards the Willaumez Peninsula. This was taken after an amphibious landing at Talasea, half way up the peninsula, on 6 March. This ended the serious fighting on New Britain, at least until the Australians took over later in the war. Many of the Japanese troops in western New Britain escaped along inland tracks and made their way towards Rabaul, which was increasingly becoming a trap.
Further away from New Guinea, but still part of the campaign against Rabaul, was the invasion of the Green Islands (15-20 February 1944), between Bougainville and New Britain. The tiny Japanese garrison was overwhelmed, and the Allies only lost 13 dead in the fighting. The Green Islands became a useful air base during the long campaign against Rabaul.
The next American move came out of the original sequence as laid out in the Elkton III plan. On 29 February 1944 American troops landed on Los Negros in the Admiralty Islands. This island group was to the north of New Guinea, north-west of New Britain and west of New Ireland, at the north-western corner of the Bismarck Sea. MacArthur escorted the Los Negros force in person so that he could decide if the attack should be an invasion or a 'reconnaissance in force'. He decided that his men should stay, and ordered reinforcements to rush to the area. The conquest of Los Negros was harder than expected, but the island was secured by 8 March. On 12 March the Americans moved to nearby Manus, and this island was secured by the end of March. At the same time the 4th Marine Division occupied Emirau, to the west of New Ireland.
These invasions had several results. First of all the loss of the Admiralty Islands made it clear that the Japanese could no longer hold on to Madang, which was now threatened from the north as well as from the south and east. Second, it gave the Allies control of the massive Seeadler Harbour, capable of sheltering an entire fleet. Seealder and Manus would become an important American naval base for the rest of the war. Third, they completed the isolation of Rabaul. There were still more then 100,000 Japanese troops at that base, but any aircraft that the Japanese managed to get into Rabaul were almost immediately destroyed. The Allies kept up a constant aerial assault on Rabaul, but the Japanese base no longer had any teeth. Eventually a raid over Rabaul was so safe that it was used as in-theatre training for newly arrived units.
General Adachi ordered the 41st Division to move from Madang to Hansa Bay. The 20th and 51st Divisions, already weakened by the march from Sio, were to move further west to Wewak, and Adachi's superiors later ordered him to try and move parts of the 20th Division to Aitape. This last move would never be made, as the Americans would get there first. This left Madang undefended, and it fell to the Australians on 24 April, two days after the start of the next major leapfrogging attack.
Elsewhere March saw the effective end of the New Britain campaign, at least until the Australians took over later in 1944. On 6 March the Marines carried out Operation Appease, the invasion of Talasea, on the Willaumez Peninsula. The Japanese fought a skilful delaying action in order to allow troops retreating from the western part of the island to get past the area, but by 16 March the fighting was over.
Early in 1944 MacArthur decided that he wanted to bypass Wewak and Hansa Bay and attack Aitape and Hollandia, further west along the coast. The Joint Chief of Staffs approved this plan on 12 March, and D-Day for the new Operation Reckless was set for 22 April. The new attack was supported by six major Allied bombing raids between 30 March and 16 April that destroyed 351 Japanese aircraft and a raid by the fast carriers of Task Force 58 in late March that knocked out the airfield at Aitape.
The landings took place on 22 April. General Jens Doe led the attack at Aitape, and that area was secured by 24 April. There were two lands either side of Hollandia, at Tanahmerah Bay and Humboldt Bay. These were carried out by General Eichelberger's I Corps. Once again resistance was low, and the Japanese defenders were defeated by 27 April.
The overwhelming Allied dominance on New Guinea is demonstrated by the overlap between Operation Reckless and the end of the fighting further east, where Madang was occupied on 24 April and Alexishafen on 26 April. The Japanese had decided to abandon Madang after the Allied conquest of the Admiralty Islands. Adachi's aim had been to reinforce Wewak and Hansa Bay, but Operation Reckless left him trapped between two Allied forces.
The Japanese suffered a heavy blow at sea in the spring of 1944. In April the 32nd and 35th Divisions left China. One regiment from the 35th went to the Palaus, but the rest was sent to New Guinea. They sailed in a convoy given the code name 'Takeichi', and suffered very heavy losses on the way. One regiment from the 32nd Division was lost when its ship was sunk by a US submarine in the South China Sea on 26 April. On 6 May three more ships were sunk in the Celebes, again by American submarines. The 32nd now only had two regiments left, the 35th was down to four infantry battalions. Overall the equivalent of a complete division was lost at sea during the journey.
The next leap west was to Wakde Island, just off the coast of the mainland. US troops landed in nearby Maffin Bay on 17 May and on the island itself on 18 May. Wakde Island was secured very quickly, but the Japanese fought on for longer on the mainland. This struggle became known as the Battle of Lone Tree Hill (a key feature was marked with a single tree on US maps), and lasted to the end of June.
Next came the invasion of Biak Island. The Allies underestimated the difficulties this would involve, believing that the island was defended by 4,000 men. In fact the garrison was 11,000 strong, and was well dug in. The Japanese had also abandoned their idea of defending the beach and instead planned to suck the Americans inland before hitting them. The 41st Infantry landed on 27 May and was soon engaged in a bitter battle. This lasted much longer than MacArthur had expected, and despite several announcements that the fighting was almost over the battle lasted to the end of July.
The invasion of Biak had a wider significance. The Japanese had decided to try and trigger a major naval battle somewhere near their land bases (Operation A-Go). When the Americans landed at Biak the Japanese decided that this was the chance they had been looking for. Three attempts were made to get reinforcements onto Biak, the last of them involving the giant battleships Yamato and Musashi, detached from the main Japanese fleet for the mission. On 15 June the Americans began the invasion of the Mariana Islands. This posed a much more serious threat to the Japanese Home Island, and so the plans for Operation A-Go were altered. The Biak relief force was recalled, and the combined Japanese fleet sailed to defeat in the battle of the Philippine Sea (19-20 June 1944). Although six of the nine carriers involved survived the battle, their air groups were almost wiped out and the carriers were never a real threat again.
The Japanese did manage one major counterattack on New Guinea. General Adachi's Eighteenth Army was now pinned between the Americans at Aitape in the west and the Australians coming from Madang in the east. He was ordered to try and expel the Americans from Aitape and Hollandia, but soon realised that he only had the strength for the Aitape operation. He was able to move a strong force through the jungle, and on 10-11 July 1944 hit the American lines on the Driniumor River. They managed to break a hole in the line and briefly forced the Americans to retreat three miles. They were unable to take advantage of this early success, and an American counterattack on 13 July restored the river line. The Japanese attacked again later in the month but made little progress. The Americans began a major counterattack on 31 July and by 9 August General Adachi had decided to abandon the attack. The Americans followed them for a short distance then allowed them to retreat back to Wewak.
On 2 July 1944 the Americans landed on Noemfoor Island, west of Biak. The aim here was to cut the Japanese barge route to Biak and also to gain access to more easily captured airfields. This attack went much better the bogged down campaign on Biak. The Japanese were stunned by the pre-invasion bombardment and the airfield area quickly fell. They put up very little organised resistance, their main effort being a limited counterattack on 6 July. On the same day all thee airfields on the island were captured and two were in use by the end of July. Mopping up operations took a little longer, but were completed by the end of August.
The last significant American offensive on New Guinea came on the Vogelkop Peninsula at the far western end of the island. The Americans examined several possible sites for attack, with the aim of building a medium bomber base that could be used to support operations further to the west and protect the flanks of the move north into the Philippines. At the end of June they chose Sansapor, on the north-west coast, and on 30 July US troops landed nearby at Mar. On the following day Sansapor was captured without any resistance, and by the end of August the first airfield had been completed. Scattered Japanese troops were encountered during August but the area soon settled down.
The final step in MacArthur's long preparation for his return to the Philippines was the invasion of Morotai (15 September 1944). Geographically this lies beyond New Guinea, but it formed part of the same series of offensives. The Americans wanted a base somewhere in the Halmahera Group in the northern Moluccas. This would give them an airbase nearer to what was then their next major target, Mindanao in the southern Philippines, and would also provide a fighter base to protect against any Japanese aircraft coming from the Celebes to the west or Ambon to the south. The only difficulties encountered on Morotai came from the very poor quality beaches, but there was very little Japanese opposition. All of the D-Day objectives were achieved, and within a few days the beachhead had been expanded well beyond the original plans. The operation was officially announced to be over on 4 October, although some surviving Japanese troops remained in the mountainous interior until the end of the war.
The last major fighting on New Guinea was the most controversial. In September 1944 the Australian 6th Division (General Jack Stevens) began to replace the Americans at Aitape. By this point in the war the Australians had been given the task of containing the Japanese garrisons on New Guinea, New Britain and Bougainville, and for largely political reasons had decided to conduct a vigorous offensive on all three islands. On New Guinea that meant that they attacked east from Aitape towards Wewak. The offensive began in December 1944 and continued to the end of the war. Even within the 6th Division there was a feeling that this was a pointless offensive, and the main motivation appears to have been to improve Australia's political standing after the war. The offensive itself achieved most of its aims, and by the end of the war General Adachi had been forced away from his coastal bases and was preparing for a last ditch defence of his food producing areas inland. The campaign cost the Australians 442 dead and 1,141 wounded, while General Adachi ended the war with only 13,500 survivors from the original 100,000 in his army.