New Guinea during
the Second World War
|
|
The battle of Shaggy Ridge (10 October 1943-23 January 1944) saw Australians troops slowly force the Japanese off a narrow mountain ridge that dominated a key route across the Finisterre Mountains of New Guinea. The fighting often took place on the very top of the ridge itself, on a one man wide front, with steep slopes or cliffs on both sides and the Japanese dug in on a series of rocky outcrops.
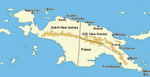
After the fall of Lae and Salamaua on the Huon Gulf the Australians advanced in two directions. The main advance was carried out by the 9th Division, which was sent east to attack Finschhafen at the tip of the Huon Peninsula. At the same time the Australian 7th Division (General George Vasey) was sent west, to occupy the Markham Valley, which run inland from Lae, then cross over to the Ramu Valley, which runs west parallel to the coast. The Finisterre Mountains run to the north of these valleys, separating them from the north coast. Vasey's orders were to hold the two valleys, protect Allied airfields that were being built in the area, and keep the Japanese in the mountains pinned down.
Shaggy Ridge was a key position overlooking a route from Dumpu in the Ramu Valley to Astrolabe Bay on the north coast of New Guinea. This route ran up the Faria Valley from the area of Dumpu, with Shaggy Ridge forming the western wall of the valley. The route then crossed a watershed at Kankiryo Saddle and then ran down the Mindjim River and eventually reaching the north coast at Bogadjim. Shaggy Ridge was around 5,000ft high, with precipitous sides and a very narrow ridge that was often only one man wide. The Japanese were already on the ridge when the Australians reached Dumpu, in the Ramu Valley, and had positioned machine guns and barbed wire on top of the ridge. General Adachi, commander of the Japanese Eighteenth Army, wanted his men to defend the mountains to prevent the Australians reaching Astrolabe Bay on the coast, a move that would cut off his troops fighting on the Huon Peninsula.
Shaggy Ridge was one of the hardest places to fight anywhere in the Pacific. Australian troops had to scale the steep sides of the mountain while under fire, then attempt to make progress along the narrow summit ridge. This came after a period of almost equally demanding combat in the foothills to the south and east of Shaggy Ridge which saw individual knolls and ridges captured after intense but small scale battles. A number of features were given names by the Australians to help describe the fighting.
The southern-most peak became Green Pinnacle. The key position was the Pimple, a rocky peak about half way along the crest of the ridge. The Pimple was protected by very steep slopes on either side, which prevented any local outflanking moves, and could only be approached along the top of the ridge, which was often only one man wide. The highest point on the ridge, McCaughey's Knoll, held out until January 1944.
The Australians first got a foothold on the southern end of the ridge in early October 1943. On 7 October they occupied a position that became known as Young's OP, just to the south-east of the ridge. On 10 October they were fired on from a position on the southern slopes of the ridge that later became known as Don's Post and occupied Bert's Post, at the foot of the southern end of the ridge. Over the next few days patrols found a Japanese outpost on Green Pinnacle, 1,500 yards up the ridge. The outpost was protected by a wire with tin cans attached to warn the defenders if they were disturbed. For the moment the Japanese were in possession of the ridge and the upper reaches of the Faria Valley, while the Australians secured their control of the hills to the east and south.
The Australians quickly realised that they would need to capture Shaggy Ridge if they were to make any progress towards the Japanese Bogadjim Road. On 17 October Brigadier Dougherty, commander of the brigade, carried out a reconnaissance flight over the ridge in a Wirraway. The Australians attempted to find a way to outflank Green Pinnacle, before on 20 October the first attack was launched. The attack began with an artillery bombardment by the 54th Battery, followed by an planned attack by Clampett's company (an indication of the limited front available for attack). When Clampett's men reached the jumping off point for the attack it became clear it would be futile. The Japanese defenses spanned the width of the top of the ridge. They had cut lines of fire through the thick grass, built a barbed wire fence across the ridge and had bunkers on top of the ridge. The attack was cancelled. Instead the Australians attempted to find a way around the north-west side of the ridge, while at the same time continuing an irregular artillery bombardment. In the meantime the Australians remained hidden close to the Japanese line, just in case. Early on 23 October they were able to take advantage of a temporary Japanese absence, sneaked through the wire and captured the unoccupied position. This success was followed by a pause which the Australians used to improve their maps, ready for the next attempt to clear the ridge.
The same period saw the 25th Brigade (Brigadier Eather) take over at the front, while the 21st Brigade was moved into reserve for a rest. The 2/33rd Battalion was based at Guy's Post, with a company posted on the southern slopes of Shaggy Ridge. The 2/25th Battalion was posted on the hills to the east, with one company on the Faria itself below Shaggy Ridge. The Australians carried out a heavy schedule of patrolling, while their artillery bombarded the known Japanese positions. In contrast the Japanese remained in their fortifications, giving the weary Australians an increasing degree of control of the surrounding areas.
At the end of November the two brigades swapped position again, and the 2/16th took over on Shaggy Ridge. The 2/16th carried out a series of patrols along the ridge. On 2 December one patrol got to within four yards of the Japanese position in front of the pimple, and narrowly escaped being trapped by a Japanese party further down the ridge. On 3 December a patrol attempted to move along the western side of the ridge, below the summit. They got close to the Pimple, but ran into overhanging cliffs that stopped all progress. A second patrol on the eastern side made the same discovery.
On 8 December the Japanese launched an attack to the north-west of Dumpu in the Ramu Valley. The Australians were forced to pull back a few miles to the Evapia River. The main Japanese attack came on the night of 12-13 December, but this was repulsed. Just before dawn the defending Australians withdrew a short distance to avoid being exposed to machine gun fire after dawn, but the Japanese never followed up. The attack had been repulsed.
On the night of 10-11 December, as part of their wider offensive, the Japanese carried out a small scale bayonet attack on Shaggy Ridge, attacking the leading Australian positions.
After all of the probing patrols the Australians realised that the only way to take the Pimple would be by frontal assault. They planned their attack for 26 December, to allow their men to celebrate Christmas. The weather then prevented the attack on 26 December, but the clouds cleared at around 8am on 27 December. This allowed two Boomerangs to mark the Pimple, before a force of Kittyhawks carried out a dive bombing attack. The air attack lasted until 8.55am, and Lieutenant Geyton's infantry platoon began their attack just after 9am. The Japanese had sited a pillbox on the ridge, and this held (combined with the difficult terrain) held up the Australians for some time. Eventually a section led by Corporal Hall managed to get to the pill box from the right, and wiped out the defenders of the pill box. This allowed the Australians to get a foothold on the Pimple.
This didn't end the fighting. A second 'pimple' was found just behind the first one, with a Japanese bunker dug into the rock just beyond this. Three men attempted to take out this bunker but all three were wounded and the Australians dug in just past the second pimple. Aircraft reported that a number of Japanese troops were retreating from the ridge, but at 11.40 the Japanese carried out an attack on yet another 'pimple'. This failed to achieve anything as the Australians were still held up by the bunker, so the pimple was unoccupied.
On the night of 27-28th the Australians dug in on the second pimple, while their engineers cut a track into the rock of the cliffs to create an easier way to reach the Japanese bunker. The bunker was attacked and captured on 8.30am, and found to have only contained two Japanese soldiers.
Not all of the ridge was too steep to climb. The Australians decided to try and outflank the third 'pimple' by sending Scott's Platoon part way down the east slope to get behind it. Scott decided that the pimple itself was too tough to climb, but did manage to get back onto the ridge behind the Japanese position. A four man attack captured the third pimple and pinned down the Japanese defenders of yet another outcrop. This turned out to be the highest part of the ridge, and was later named McCaughey's Knoll, after Lieutenant McCaughey's platoon captured it. The Australians were now half way along the ridge.
On the afternoon of 28 December a force of around 80 Japanese attempted to counterattack. They were hit by artillery fire, and their attack, which began at 2.22pm, was a costly failure. The Australians came under intermittent artillery fire from 29-31 December. Sadly Lieutenant McCaughey was one of the victims of this fire, and was mortally wounded.
This didn’t end the fighting on Shaggy Ridge, but the last stage of the fighting formed part of the battle of Kankiryo Saddle, the successful attempt to capture the high ground at the head of the Faria Valley. This involved a two-pronged assault on the ridge, with one battalion advancing up the ridge and another cutting up the valley to the west to attack Prothero 1, a peak to the north of Shaggy Ridge. These two forces then advanced towards each other, and the ridge was finally cleared on 23 January 1943.
At the start of 1944 the 21st and 25th Brigades were both relieved. The 18th Brigade was flown in on 1-3 January to replace the 25th, and the 15th Brigade replaced the 21st by 7 January. The new brigades were ordered to carry out fighting patrols to pin down the Japanese in their area and prevent them from interfering with the American landings at Saidor on the north coast on 2 January. Their orders were soon expanding to include the capture of the 'Mindjim-Faria divide', better known as the Kankiryo Saddle (named after a local village). The Australians carried out a three battalion assault on this position in January 1944, and by the end of the month the Japanese had been forced away from the saddle.