New Guinea during
the Second World War
|
|
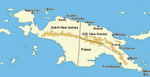
The battle of Finschhafen (22 September-28 October 1943) marked the start of the Huon Peninusla campaign and saw Australian troops capture the former German port of Finschhafen, at the eastern tip of the Huon Peninsula, and then fight off a major Japanese counterattack. The attack on Finschhafen was the start of the second phase of Operation Postern, the Markham Valley/ Huon Peninsula campaign, itself part of Operation Cartwheel, the series of operations designed to isolate the Japanese base at Rabaul on New Britain. The first stage had ended with the fall of Lae and Salamaua in the Huon Gulf in mid September 1943. The Australians then split their forces. The 7th Division was sent west to secure the Markham and Ramu valleys (Finisterre campaign), while the 9th Division (General Wootten) was given the task of taking Finschhafen and the coast of the Huon Peninsula. The aim was to take control of the New Guinea side of the Vitiaz Strait, thus helping to open the sea lanes to northern New Guinea. The Japanese also realised the importance of the area and General Adachi, commander of the Eighteenth Army, was determined to defend Finschhafen and hopefully block any Allied attempt to invade New Britain.
The initial attack was carried out at very short notice. General Wootten was first warned that the attack might be carried out soon at the start of September, just as his troops were leaving to attack Lae. His divisional staff began work on the detailed plan on 17 September, only five days before the landings. The attack was carried out without much intelligence about the Japanese positions in the area, with estimates of their strength ranging from 2,100 on 15 September to only 350 a few days later. In fact by the time the attack was made the Japanese had 5,000 men in and around Finschhafen, with other garrisons along the coast to the north.
The 20th Brigade, which had taken part in the landings east of Lae, was chosen for the new attack because of its experience of amphibious operations. There was some friction between the Australians and the US Navy during the planning process, with the Americans wanting to land at just after midnight to avoid expose to air attack and the Australians preferring first light. In the end the Australians got their way, but had to agree to carry fewer days' worth of supplies.
A beach north of Finschhafen but south of the Song River was chosen for the landing site. It was given the codename Scarlet Beach as Red Beach was already in use elsewhere. This landing point avoided the need for a major river crossing and was also believed to be behind the main Japanese positions, which were expected to be south of the port.
The plan was for the 2/17th Battalion to land on the right and the 2/13th on the left, with all troops close to the main beach. The actual landing, early on 22 September, was somewhat more chaotic, with the two battalions intermingled and the troops spread out from the northern part of Scarlet Beach down almost to Arndt Point. The attack was preceded by an 11 minute bombardment from five destroyers, and the incoming landing craft then veered to the left. Fortunately the pre-invasion training had included instructions on what to do if the troops did land on the wrong beaches. Japanese resistance was limited, with most of it coming from the area of the Song River to the north of the landing area. There were still Japanese troops on the main beach when the second wave attacked, and they also veered left, with some running into sand bars. The assault was aided by heavy machine gun fire from the L.C.I's carrying the second wave, and this meant that the beach defences had largely been abandoned when the third wave finally landed on the correct beach. The beach area was soon secured. The Japanese put up more of a fight just to the south, but retreated before the final Australian attack at 3.15pm. By the end of the day the Australians had successfully captured all of their objectives, and had reached as far south as Heldsbach, about a mile to the south. By the end of the day 5,300 troops, 180 vehicles, 32 guns and 850 tons of stores had been landed. Captured documents showed that there had been 300-400 Japanese troops around Scarlet Beach.
On 22 September Japanese aircraft from Rabaul attempted to attack the American convoy returning from Scarlet Beach, but they ran into five American fighter squadrons. The Americans lost three P-38 Lightnings, but claimed ten bombers and twenty night fighters from an attacking force of around 30 bombers and 40 fighters, while anti-aircraft fire got nine out of ten torpedo bombers. None of the ships were hit.
Also on 22 September the 22nd Battalion began to march east along the coast from Lae towards Finschhafen, heading towards Japanese outposts on the Mongi River, around twenty miles around the coast from the port.
On 23 September the Australians began to push south, with the 2/15th Battalion in the lead and the 2/13th in reserve. They ran into Japanese troops on the Bumi River, just north of the port. Most of the attacking force headed inland to outflank this position. They crossed the river inland on 24 September and spent 25 September consolidating their position and improving their communications. On the same day the Australians first ran into the Japanese defending Sattelberg, forcing them to abandon a plan to occupy the village.
Both the 2/15th and 2/13th were involved in heavy fighting on 26 September, as they expanded their footing on the inland ridges. They were able to push a force of Japanese marines off a key position after a dramatic assault up a steep slope. On 27 September the Australians were engaged in fighting on the Buma River and on the road to Sattelberg, and had to fight off a Japanese counterattack on the later front.
On 28 September the Australians attacked towards Kakakog, to the south-west of Finschhafen, in an attempt to isolate the Japanese defenders. The main attack south-east would be carried out by the 2/13th, with the 2/15th probing the main Japanese defences of the port. Progress was very slow on the 27th, with some confusion caused by the difficult terrain. Wet weather slowed the Australian advance on 28-29th September.
The successful landing was followed by an argument between the Allies. General Herring, the Australian corps commander, had been promised a second brigade, and on 27 September the commanders on the ground asked for the dispatch of a first battalion as well as some tanks, so that he could use the entire 20th brigade for the main attack while the fresh troops guarded the bridgehead. Admiral Barbey, the American commander of the amphibious support force, refused on the grounds that orders from G.H.Q. forbade it. This wasn't actually the case - he did have orders to prepare for a new attack, but an annex made it clear that he was also to ship troops and supplies to Finschhafen whenever the Australians asked. The main problem was that both MacArthur and Blamey had left the immediate area at the same time, and neither liked to delegate. When the issue was taken to MacArthur on 28 September his assumption was that the Japanese would soon be expelled from Finschhafen and thus that reinforcements weren't needed. On 29 September permission was finally granted to move one battalion to Finschhafen, and the 2/43rd Battalion reached Scarlet Beach on the following morning. The new battalion was placed on the road to Sattelberg to protect the right flank of the advance on Finschhafen.
Herring was right to want reinforcements. The Japanese had decided to make a stand at Finschhafen, and the area was defended by around 5,000 troops. This included the 80th Regiment, 20th Division, the 238th Regiment, 47th Division, and the VII Naval Base Unit. As the Australians approached Finschhafen these troops withdrew north-west towards Sattelberg, where they joined up with reinforcements from the 20th Division coming from the north.
On 1 October the Australians mounted a major attack, supported by an air attack on the Japanese positions. Progress was slow, but in the afternoon the Australians overwhelmed some key Japanese positions in the area west of Finschhafen. The Australians lost 10 dead and 70 wounded at Kakakog. To the south the 22nd Battalion, coming along the coast, made more rapid progress, running into signs of a Japanese evacuation.
Finschhafen town was captured by the 20th Brigade on 2 October. The Japanese had evacuated the town overnight, and the Australians only ran into six Japanese troops in the town, capturing three. On the same day the 22nd Brigade arrived from the south and the two forces joined up. The first eleven days of the battle had cost the Australians 73 dead from a total of 358 casualties, with another 301 men evacuated due to sickness.
The Japanese Counterattack
The Australians found key documents in the town that revealed the Japanese order of battle, and their determination to hold the area. This convinced Barbey to change his mind (presumably there was also pressure from further up the chain of command). The Australian 24th Brigade was shipped to Finschhafen, followed by the HQ of the Australian 9th Division (General Wooten). At the same time General Herring's 1st Corps was replaced by General Morshead's 2nd Corps (although the fighting units remained the same). More Australian troops, from the 22nd Battalion, were approaching Finschhafen along the coast from Lae. Despite these reinforcements the Australians were in a rather vulnerable position, with two brigades holding a narrow strip of coastline around twenty miles long. This stretched from Dreger Harbour, five miles south of Finschhafen, up to Bonga, fifteen miles to the north.
The Japanese planned to take advantage of the exposed Australian position with a three pronged counterattack. On land the 79th Regiment was to attack directly towards the Australian landing point at Scarlet Beach. A little further to the south the 80th Regiment was to advance east from Sattelberg towards the Australian outpost at Jivevaneng. Finally an amphibious assault would hit Scarlet Beach from the rear. In the meantime the Australian positions on the Sattelberg road came under constant pressure.
The Australians intercepted orders containing the Japanese plan. General Wooten concentrated his two brigades around Scarlet Beach, with the 20th Brigade south of the beach to face the attack from Sattelberg and the 24th Brigade to the north to face the 79th Regiment.
The Japanese counterattack began on 16 October. The 80th Regiment's attack on Jivevaneng began before dawn. The Japanese made five attacks on the Australian position, supported by at least two artillery pieces, but each one was repulsed. The 79th Regiment had more success, and was able to force its way past the 2/3rd Australian Pioneer Battalion, west of the beach. The 2/3rd wasn't really strong enough to hold its front, and the Japanese managed to slip through gaps in their line. The 79th began to threaten the southern end of Scarlet Beach.
The naval attack was a total failure. On 17 October the Japanese carried out an air attack on the beachhead, which began at 3.15am but caused little damage. This was followed by the three landing barges. They ran into heavy fire from American gunners, Australian anti-aircraft guns, and Australian infantry, and were almost wiped out. Two did reach the beach but the men on them were unable to make any progress, while the Three or four more barges may have been sunk by American PT boats a couple of days earlier. Thirty survivors escaped from the beach area, but only about four of them got past the nearby Australians. In a typical example of the Japanese tendency to over-exaggerate their successes, General Adachi reported that the attack had involved 186 men, 58 had survived and they had killed over 430 of the enemy. The real casualty figures for the Allies were one dead and four wounded on the beach.
The biggest threat came from the 79th Regiment, which now reached high ground only a couple of miles from the beach. General Wootten asked for reinforcements and was given the 26th Brigade, but it took a few days for that unit to arrive. They reached Langemak Bay, south of Finschhafen, on the night of 19-20 October. They brought with them 18 tanks from 'C' Squadron, 1st Tank Battalion (later 1st Australian Armoured Regiment).
After a brief pause the Japanese attack resumed, and on 17 October the 79th actually reached the coast at Siki Cove, at the southern end of Scarlet Beach. At this point the Australian position had been split in three, with the 24th Brigade cut off to the north and the small garrison of Jivevaneng besieged in the west, but the Japanese now ran out of steam. Their main objective was Finschhafen rather than the more important Australian positions on Scarlet Beach, and they missed a chance to turn north from Katika and Siki Cove to hit the beach while the defenders were at their most vulnerable. Instead they spent 18 October securing their position at Siki Cove and preparing for an attack south.
On 19 October the Australians were able to force the Japanese off the high ground west of the beach around Katika, attacking from the north and catching the Japanese by surprise. This forced the troops at Siki Cove to retreat, reuniting the Australian beachhead. By 23 October the Australians were able to concentrate on reorganising their scattered units, and on the same day an American engineer battalion landed at Langemak Bay to begin work on new airfields. By 28 October the main Japanese forces had fallen back to Sattelberg and Wareo, although they also maintained a presence around Jivevaneng.
The failure of the Japanese counterattack meant that Finschhafen was now secure. The Australian 26th Brigade arrived in time to take part in the next part of the campaign, the attack on the Japanese positions at Sattelberg.
The battle for Finschhafen cost the Australians 49 dead and 179 wounded. As was so often the case, the Japanese suffered much heavier losses that their opponents, taking around 1,500 casualties in total.
It took three Australian brigades another two months to clear the area around Finschhafen, Sattelberg and Wareo. Their next major advance around the coast didn't come until January 1945, when US troops landed at Saidor, west of the Japanese base at Sio. In the aftermath of this landing the Japanese decided to retreat west, and the Australians were able to advance along the coast, eventually joining up with the American beachhead.