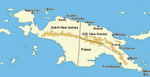
New Guinea during
the Second World War
|
|
The battle of Sattelberg (29 October-25 November 1943) saw Australian troops capture a strongly defended Japanese position in the hills to the north-west of Finschhafen, and helped secure their position on the eastern tip of the Huon Peninsula.
The Australian 9th Division landed north of Finschhafen on 22 September 1943. They advanced south and captured the port on 2 October. General Adachi, commander of the Japanese 18th Army, was determined to hold Finschhafen, and ordered the troops in the area to carry out an immediate counterattack. This began on 16 October, and some Japanese troops actually managed to break through to the coast between Finschhafen and the main Australian landing beach. Despite these early successes the Japanese began to ran out of steam, and on 19 October they were forced to abandon the high ground near the coast. Their foothold on the coast was soon eliminated, and the survivors of the attack had to retreat back to Sattelberg.
After the failure of the Japanese counterattack the Australians were able to go back onto the offensive. They still held a fairly narrow coastal strip, running north from Finschhafen past Scarlet Beach and up to Bonga. They also had an isolated outpost at Jivevaneng, on the road west from the coast to Sattelberg.
The Japanese held the high ground around Sattelberg, the area north from Sattelberg to Wareo, and a ridge that ran east from Wareo to Gusika, on the coast just to the north of Bonga. They also still had a roadblock east of Jivevaneng, manned by a company from the 80th Regiment.
The Australian attack involved three brigades now in the Finschhafen area. The 24th Brigade was posted to the north, with the task of cutting the Japanese track between Wareo and Guisika. The 20th Brigade was to clear the Japanese roadblock. The 26th had the task of clearing the heights of Sattelberg. The 4th Brigade was also moved to the area to reinforce the 9th Division.
The 20th Brigade had a difficult task. The Japanese were well dug in, on a steep ridge, protected by a steep ravine to the north and surrounded by bamboo which acted as an early warning system. The attack began on 29 October when a party from the 2/13th Battalion occupied a position north of the Japanese outpost. Next came an attack on the Japanese supply route into the outpost. Finally, the outpost itself was attacked, and by the end of 2 November the road had been cleared. This now allowed the 26th Brigade to move up to attack Sattelberg.
The 26th was supported by nine Matilda tanks, no longer front line weapons against the Germans, but perfectly capable of operating against the Japanese. They moved slowly up the Sattelberg road and by the night of 9-10 November they were in position just to the east of Sattelberg. The tanks helped the brigade in the first part of the offensive, but the terrain stopped them taking part in the final assault on Sattelberg.
Brigadier Whitehead, commander of the 26th Brigade, planned to attack with three battalions in line. The 2/24th would advance on the right, towards a known Japanese strong point. The 2/48th would follow the road and the 2/23rd would advance on the left. The 2/23rd was then joined by the 2/4th Commando Squadron before the attack began. D-Day for the attack was set for 17 November, with preliminary attacks on 16 November. As always on New Guinea the terrain dominated the Allied plans. The Sattelberg road ran west along one ridge, then turned sharply right to cross a valley before climbing up the steep Sattelberg ridge to the village. This would be the route take by the centre and left battalions. The right battalion was to cross to a parallel ridge (the 2,200 feature), and then advance west towards Sattelberg.
The D-1 attack began with an artillery bombardment that started early on 16 November, carried out by two artillery regiments. The infantry soon fell behind the artillery schedule, but they took their main targets for the day.
On D-Day itself the attack was supported by the Matilda tanks, and by a barrage of American rockets. The attack started on time, with a howitzer armed tank in the lead, followed by a gun tank and the infantry. The tanks were to take on the heavily fortified Japanese bunkers, while the infantry protected them against close in attackers. During the morning the advance went well, but at about noon the lead tank was immobilised after it ran over an unexploded Australian 25pdr shell. The tank was stuck just around a corner, so the other tanks couldn't pass it or tow it away. The infantry continued to advance without the tanks and made some progress before running into strong a Japanese position that held them up. By the end of the day both the 2/23rd and 2/24th were stuck at the positions they had reached at noon, and neither had reached their main objectives for the day. Over the next few days the 2/23rd would make some progress on the left, but the 2.24th would remain held up on the 2200 Feature. The 2/28th made more progress, but was still stuck.
On 18 November the Japanese pulled out of Coconut Grove, the 2/23rd's target. On the road the 2/48th, again supported by tanks, attacked, and this time they reached Coconut Grove where they ended the day. On 19 November the tanks ran into an anti-tank ditch which held them up for some time. After this barrier was overcome the advance resumed until the terrain finally defeated the tanks. The day ended with a successful infantry assault up a steep hill covered by the first use of a fougasse (a 5 gallon drum filled with flammable oils) on New Guinea. On 20 November the advance west along the road continued, and on 21 November the Australians broke through the Japanese lines at Steeple Tree Hill. There was then no opposition until the advancing troops reached the first hairpin bend on the road. By the end of the day the Australians were ready to attack the Sattelberg ridge itself.
At the start of 22 November the 2/23rd and 2/48th were at Turn-off Corner, where the road turned north to climb onto Sattelberg Ridge. The 2/24th was still stuck on Feature 2200 to the east, and would remain there until 25 November. On 22 November the 2/23rd advanced to the north-west while the 2/48th advanced up the road. Both units made slow progress, but closed in on the main Japanese position. On 23 November scouts discovered a way across the valley to the right of the road, allowing them to conduct a surprise attack up the south-eastern corner of the ridge. On 24 November the Australians finally managed to get onto the summit after a day of very confused combat.
This finally convinced the Japanese to retreat north towards Wareo, their last major inland position. On the morning of 25 November the Australians made an unopposed entry into Sattelberg, while the deadlock was also broken around Position 2200.
In the north the 24th Brigade captured Pabu, blocking the Gusika-Wareo track, on 19 November. This was the main Japanese supply route, and they responded with a week of counterattacks. They also carried out a major attack towards the coast between Scarlet Beach and Bonga. The attack began on 22 November, but made no real progress. A few days later reinforcements reached the isolated Australian troops at Pabu. This secondary assault greatly helped the attack on Sattelberg by disrupted a planned Japanese counterattack.
The capture of Sattelberg helped secure the beachhead at Finschhafen. It also caused a great deal of damage to Japanese morale on New Guinea, and saw the failure of the last major large-scale counterattacks on the Huon Peninsula. Although the Japanese conducted attacks later in the campaign, they normally had less ambitious aims than their attacks around Finschhafen.
The fall of Sattelberg didn’t end the fighting on the Huon Peninsula. The Australian's next target was Wareo, to the north of Sattelberg, the last inland base held by the Japanese at the east end of the Huon Peninsula.