Engraving of Admiral Cuthbert Collingwood, 1748-1810
|
|
It is common these days to see the two years between 1803 and 1805 as merely a precursor to Trafalgar (see Trafalgar campaign). This is utterly false. While Nelson was always hoping to come to battle with the French fleet based at Toulon, this would only have been a minor battle, between the nine (later eleven), ships of the line in Nelson’s fleet and a similar sized French fleet. In many ways, Trafalgar came after both Nelson, and the French admiral Villeneuve had left their Mediterranean command behind.
For the moment, Nelson had enough problems in the Mediterranean. His new command stretched from the straits of Gibraltar, all the way to Greece and Turkey. It included responsibility for Italy, where the Kingdom of Naples was a doubtful ally. Nelson also found himself acting as a diplomat dealing with the troublesome states along the North Africa coast, many of whom were havens for pirates (or even pirate states). Fortunately, Nelson was almost an able a diplomat as he was a sailor, for in the Mediterranean he would have to react to events without any chance of consulting with London. To fulfil his wide range of responsibilities, Nelson had eight ships of the line and 32 smaller ships, eventually rising to eleven ships of the line and 46 smaller ships in 1805.
It took Nelson a month to reach Malta, where he arrived on 15 June 1803 (He had reached Gibraltar on 3 June, bringing the first news of the renewal of war). It took him another three weeks to reach his new fleet, then patrolling off Toulon. This delay convinced him that Malta was not a suitable base for the blockading fleet.
Nelson’s first task was to assess the state of his new command. He found Spain neutral, but likely to side with France. Malta was loyal, but inconveniently located. The kingdom of Naples was in a mess. French troops were threatening the mainland; the King was melancholy, and pondering abdicating. Nelson left a ship in the Bay of Naples to reassure the Royal family, and considered the possibility that they might be forced to flee to Sicily. Genoa should now be treated as part of France and blockaded. The British consul to Algiers had been expelled, apparently for having women in his house, but more likely as a test of British resolve. Sardinia was neutral. Further east, the Mameluke rulers of Egypt were asking for aid against the Turks, whose empire they were theoretically part of.
Next, he had to assess his new fleet and the best way to use it. The latter task was simple. If Nelson could control the gap between Spain and Italy, then he would control the entire Mediterranean. Even after Spain entered the war, this was still the case – the Spanish fleet was not prone to act unless prodded by the French.
The fleet itself was in good shape. On hearing of the renewal of war, Sir Richard Bickerton, the peacetime commander in the Mediterranean, had moved to blockade Toulon. The only problem in the fleet was that prior to the outbreak of war, everyone in the fleet had expected to be able to return home, and now that prospect was removed for the foreseeable future. Desertion was always a problem in the Royal Navy in this period, and although Nelson’s presence reduced this a little, it was still a problem. Luckily, Nelson was one of the better Admirals when it came to maintaining his fleet. Within months of his arrival, scurvy had been banished, and the health of the men in his fleet remained impressively high for the rest of his time in charge.
Nelson’s first major problem was to a suitable base for his ships to refit and take on supplies, without having to resort to the long and slow voyage to Malta. He found his bolt hole in the Maddalena Islands, between Corsica and Sardinia. The islands provided Nelson with a secure harbour, fresh water and supplies of food, all within a safe distance of Toulon. The fleet visited the islands half a dozen times over the winter of 1803-4. A second rendezvous, known as rendezvous No. 97, was off Cape San Sebastian, between the Balearic islands and the Spanish coast, and was also a constant base for the fleet, playing a part in the Trafalgar campaign.
A major problem facing Nelson and his fleet over the winter of 1803 and the summer of 1804 was boredom. The French fleet showed little or no serious intent of coming out of Toulon, the weather was atrocious for most of the winter and news from home was almost none existent. Nelson’s approach to this problem was to alter the routine of the fleet as much as possible. Rather than just sitting off Toulon, the fleet cruised between Barcelona, the Balearics and Sardinia.
Nelson planned a very different form of blockade to the close blockade used to pin the French fleet in Brest. He was more interesting in forcing a battle, so he used an Open Blockade. His aim was to encourage the French to sail, then attack and wipe them out.
This was a dangerous plan. It depended on Nelson’s frigates being able to keep a close watch on the French, and ran the risk that bad weather would force the frigates away from their station, or put Nelson in a position where he could not intercept. The French position was strengthened when Spain entered the war on their side, bringing with her 32 ships of the line.
The risks of Nelson’s plan were well demonstrated early in 1805. The French commander at Toulon was now Admiral Villeneuve. He had received orders from Napoleon to break out of Toulon and make for the West Indies, where he was to join with the Rochefort fleet. Their eventual aim was probably to attack British possessions in the Caribbean.
Villeneuve sailed on 17 January, with a fleet of 11 ships of the line. Nelson’s frigates saw him, and after following the French fleet for a short period, sailed to find Nelson at the fleet rendezvous at the northern tip of Sardinia.
The main problem with Nelson’s plan now became clear. He was convinced that the French were intending to attack Italy, and so he deployed his fleet to block French access to Sicily and the eastern Mediterranean. Nelson was now out of touch with the French fleet. When they had not appeared between Sardinia and Sicily by 26 January, when the weather improved, Nelson’s assumption was that they had either returned to Toulon or sailed past him towards Greece or Egypt. He took his fleet east, in an attempt to intercept the French.
In fact, Villeneuve had intended to sail in the opposite direction, leaving the Mediterranean altogether. He was foiled by the weather and the inexperience of his sailors, who had been blockaded in port for most of the last decade. By 21 January, Villeneuve’s sortie was already over.
This had been a false alarm, but the next time Villeneuve slipped out of Toulon, it was part of Napoleon’s grand plan for the invasion of Britain.
The essence of the plan was that every major French and Spanish fleet would converge at Martinique, before returning to European waters to sweep away the Royal Navy, and allow the Grand Army to cross the channel.
One French fleet was already in the West Indies. Villeneuve with the Toulon fleet was to join it. The Brest fleet was to leave harbour without fighting a battle, sail to Ferrol, where it would meet with a combined French and Spanish fleet. The combined fleets would then join Villeneuve. The resulting fleet of 40 ships of the line would then return to Europe, defeat the British channel fleet off Ushant, and sail along the channel to Boulogne.
What exactly the blockading fleets off Brest or Toulon were expected to be doing while their respective opponents escaped is unclear. Napoleon’s orders to the Brest fleet made it almost impossible for it to leave harbour. The British blockade at Brest was much closer than Nelson’s off Toulon, and it was almost impossible for Admiral Ganteaume to escape the port without fighting a battle. This also meant that the Ferrol fleet could play no part in the upcoming campaign.
Only Villeneuve was able to escape. On 30 March, he sailed from Toulon, on the campaign that was end at Trafalgar. At first he headed south, almost directly towards Nelson, who was waiting off the southern end of Sardinia. Unluckily for Nelson, Villeneuve received news of his location from a neutral merchant ship, and changed course to sail between the Balearic Islands and the Spanish coast. For the next two weeks, Nelson had no news of the French.
While Nelson was worrying in the Mediterranean, Villeneuve entered the Atlantic on 9 April. At Cadiz he picked up a sizable Spanish force, and the combined fleet began its first transatlantic crossing.
It was only on the 18th that Nelson finally got news of the French fleet. At last he knew where to go, although the weather now slowed him down. On 11 May, Nelson was finally able to start his own Atlantic crossing. Only three days later, Villeneuve reached Martinique.
Despite this head start, the French plan now started to unravel. The Rochefort squadron under Missiessy had returned to France by the end of May, so Villeneuve found no other fleets waiting for him. His time in the West Indies was not productive. Other than recapturing a small island just off Martinique that had been held by the British since 1803, he was largely passive.
Nelson made better time across the Atlantic than Villeneuve. Villeneuve heard of his arrival on 8 June, and only two days later began his return journey. Meanwhile, Nelson had been having an unlucky time in the West Indies. His information had been bad, and he had spent most of his short visit sailing away from the French. Now, on 12 June he learnt that Villeneuve had probably already left, and on the following day began his journey back.
Nelson’s Atlantic crossing has caused much debate. It was the accepted duty of the commander in the Mediterranean to follow any fleet that escaped to its destination. This was to prevent the escapers combining with any ships at that destination and overwhelming any Royal Navy force in the vicinity. Nelson’s actions have been called into question on the grounds that if the Brest fleet had also escaped, then Nelson’s fleet could have been destroyed and also on the grounds that if his news about Villeneuve had been wrong, then the Channel Fleet might have been vulnerable. These seem somewhat spurious objections. The Channel Fleet was probably strong enough to deal with the combined fleet, while British fleets showed themselves able to defeat larger French and Spanish fleets time after time.
This was demonstrated during Villeneuve’s return trip. The combined fleet was heading towards Ferrol. That port was being blockaded by Admiral Calder, with ten ships of the line. When news of Villeneuve arrived in London, five more ships of the line were added Calder’s force. This gave him fifteen to put against the twenty ships of the line in the combined fleet, rather better odds than Nelson had expected to fight with in the West Indies.
On 22 July, Villeneuve met Calder. The resulting battle off Finisterre was would have been considered a solid victory in earlier periods, but Nelson had already raised expectations at the Nile. With a smaller force, Calder captured two Spanish ships and forced Villeneuve to abandon his original plan. Instead, Villeneuve was forced to make for Vigo, an unsuitable refuge for his fleet. His morale suffered after the encounter, despite early claims of victory.
Demonstrating the superior seamanship of his fleet, Nelson had actually overtaken Villeneuve on the return journey, reaching Gibraltar on 20 July. There, news reached him that Villeneuve had been sighted heading further north, and so Nelson decided to follow. If he encountered the combined fleet, then he would offer battle, if not then he would join Admiral Cornwallis with the Western Squadron off Ushant, the heart of the British defences.
Nelson reached Cornwallis without any encounter. From there, he sailed for England, to make his report, and what would turn out to be his last few days with Emma. His reception in England after his arrive on 18 August was almost as dramatic as if he had won a great victory, rather than engaged in a futile chase, while the professional judgement on his actions was positive.
Having made his report, Nelson returned to Merton and to Emma, although it was clear that his mind was already on the next campaign. He did not have long to wait.
Nelson’s final days in England sometimes give the feeling of tragic inevitability. The last meeting with Emma, her own claim to have encouraged Nelson to accept the new command, even his own dairy, help give this the feel of a final chapter. This is slightly misleading. Nelson was always somewhat overdramatic, as his cry of ‘Westminster Abbey or Glorious Victory’ as he was about to board a Spanish ship at the battle of St, Vincent demonstrated. It was actually very rare for an Admiral to be killed during a victorious battle (although quite common on the defeated side).
Nelson had already worked out his plan for defeated the combined fleet while he was at Merton. His original plan was to split his fleet into three parts. The fastest ships he would place to the windward of the enemy, so that they could join the battle when and where would do the most damage. The remaining two thirds of the fleet would be split into two. One half would attack the enemy line one third of the way down, the other further back. The enemy fleet would be split into three. Their van (front) would be cut off from the battle, and in most wind conditions would be unable to play a part in the crucial part of the battle. The remaining two thirds would be forced into a ‘pell-mell battle’ – a confused melee – where the superiority of the British ships would guarantee victory. This was a radical break from the normal line of battle, even compared to Nelson’s earlier battles. Nelson christened it ‘the Nelson Touch’ (never a modest man!), and it formed the basis of his orders for the battle itself.
Nelson joined the fleet blockading Cadiz on 28 September 1805. By the time of the battle, he commanded a fleet of 32 ships of the line (although only 27 were available on the day), where once again he found many of his ‘band of brothers’. He faced a combined fleet of 33 ships of the line. Morale in the combined fleet was low. It had little or no cohesion, despite the shared experience of the Atlantic crossing. Villeneuve himself had no confidence in his ability to beat the Royal Navy, and seems to have had a dread of Nelson ever since escaping from the battle of the Nile.
Left to himself, Villeneuve would have stayed in Cadiz, frustrating Nelson. However, Napoleon had decided on a new plan. The fleet was needed at Naples, and Napoleon had lost all confidence in Villeneuve. New orders were sent out, informing Villeneuve that he was being replaced by Admiral Rosily. The new orders arrived while Rosily was stuck in Madrid. Villeneuve, hearing that Nelson was missing five ships away at Gibraltar, decided to risk everything on a dash into the Mediterranean.
Villeneuve started to sail on 19 October. Changeable winds slowed down his fleet, and it was not until the following morning that the entire combined fleet was at sea and ready to attempt its escape. This delay was disastrous. Any chance of getting past Nelson was gone – he had had nearly a day to reach the area of Cadiz, and was able to position himself in the straits of Gibraltar, ready to intercept Villeneuve. The following day saw the two fleets manoeuvre around each other, Villeneuve hoping to evade battle and Nelson hoping to force it.
At dawn on 21 October, it was clear that Nelson had won. The British fleet was positioned nine miles directly to the windward of the combined fleet, the perfect position to force battle. Villeneuve realised that his fleet was in a perilous position. If he continued toward the straits of Gibraltar, he was in danger of being attacked while strung out in the straits, with Nelson attacking his rear and any ships at Gibraltar, including the five members of Nelson’s own fleet that missed the battle, joining the attack. Accordingly, he decided to turn the fleet and make for the safety of Cadiz.
This order produced something close to chaos in the allied fleet, and convinced at least one Spanish captain that the fleet was doomed. The combined fleet was already disorganised before it attempted to turn. Even when battle was eventually joined, the combined fleet was still not in a clear line of battle.
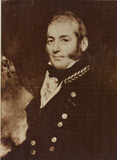
Nelson now issued his final orders for the battle of Trafalgar. Collingwood with the lee column was to aim for the centre of the combined fleet, while Nelson with the weather column attacked nearer the front. Each ship was to sail as fast as possible in order engage with the enemy. The wisdom of Nelson’s plan has been questioned. It exposed the ships at the front of each line to sustained enemy fire that they were unable to reply to. It meant that some of the heaviest ships in the British fleet, which were also the slower sailors, did not play a part in the crucial first part of the battle. If the wind had dropped, the British fleet would have been dreadfully exposed.
These criticisms are largely unfounded. Although the wind was light at the start of the day, Nelson was sure that the wind was picking up, and a gale was coming, and he was correct. His assessment of the enemy gunnery was that it was slow and inaccurate, and once again this was proved correct. Nelson’s aim was to force as many of the enemy to fight as possible. On a short autumn day with light winds, this meant abandoning the slower ships. If Nelson had sailed at the speed of the slowest ships in his fleet, the battle might not have started until close to dark, and could not have been as decisive as it actually was.
Before battle was joined, Nelson made his most famous signal, ‘England expects that every man will do his duty’ (Expects was substituted for confides when the signal lieutenant pointed out that it would be quicker to signal). This signal was generally received well, although Collingwood was recorded as saying that he wished Nelson would make no more signals. This was not typical. The signal was cheered around the fleet, while Napoleon had it painted on all of his ships.
The battle itself went almost exactly as Nelson would have hoped. After a long slow approach, Collingwood was first into action, reaching the French line at noon. Her first broadside did massive damage to the Santa Ana, establishing a pattern that would continue through the battle. The French and Spanish were able to inflict severe casualties on the upper decks of the British ships, but the British gunnery was aimed lower, and inflicted massive damage on ship after ship in the combined fleet.
The ships that were first into battle suffered heavily themselves, but slowly the rest of the British fleet came into action. The Victory entered battle at around one, hitting the allied fleet at one of its most powerful points, probably lured by the presence of the French flagship. The main threat to the Victory came from snipers. Nelson himself was fatally wounded at about twenty past one, although he survived for most of the rest of the battle, living long enough to be certain of victory.
The battle now developed into the general melee that Nelson had hoped for. The front of the French fleet had been chopped off, and was unable to intervene for some hours, leaving the allies outnumbered. Ship for ship, the British were invariably superior to the French and Spanish. Although many of the allied ships fought bravely and will some skill, they had not had enough chance to practise their gunnery, and their morale was poor. After twp hours of fighting the Spanish Argonauta surrendered, the first of seventeen French and Spanish ships that surrendered or were captured.
Trafalgar was a devastating British victory. The Spanish and French fleets were crippled by the losses they had suffered. Napoleon would no longer be able to threaten the invasion of Britain. The only thing that spoiled the victory was the death of Nelson.
Nelson’s victory at Trafalgar did not prevent an immediate invasion of Britain. Napoleon had already abandoned his grand design by the time his fleets were destroyed at Trafalgar and moved into central Europe, where he was to win another string of stunning victories. What it did do was prevent Napoleon from returning to the invasion of Britain. It was now abundantly clear to him that his sailors were unable to face the Royal Navy. His eventual reaction was to be the Continental System, an attempt to defeat Britain by economic blockade, which played a part in the slow failure of his European empire.
Nelson had been hit by a musket ball at about twenty past one. The musket ball had lodged in his spine, and he had no feeling below the wound. He was convinced that he was dying, and the ship’s doctor had to admit that Nelson was right. Nelson survived for long enough for victory to be certain. He was kept in touch with events as they happened, and was still concerned for the fate of his fleet, despite being convinced that he was dying. Captain Hardy was finally able to come below decks just after half past two for the first of two interviews with his commander. Despite the popular view, Hardy was not present when Nelson died. He was able to make a second visit to the dying Admiral, when he could report that at least twelve of the enemy had surrendered, but events forced him back onto deck while Nelson was still alive. Nelson’s last words have often been misreported. This is hard to explain – both Dr. Beatty, the surgeon, and the Reverend A. J. Scott, the ships chaplain, report similar words. At about half past four, as Nelson fading fast, he repeated the line ‘Thank God, I have done my duty’ several times. Rev. Scott then reported hearing Nelson whisper ‘God and my country’, before finally dying. His body was preserved in a cask of Brandy and returned to London, where he received a state funeral.
Great efforts were made to make sure that Nelson’s body was returned to London intact. It was actually stored in a cask of brandy, which did its job. He was buried in a coffin made out of wood from the mast of L’Orient, given to him after the battle of the Nile. Over the Christmas of 1805 Nelson laid in state at the Naval Hospital at Greenwich. He was given the honour of a state funeral (they are reserved for the ruling monarch, with very few exceptions – the Duke of Wellington and Winston Churchill share that honour with Nelson). On 8 January 1806, his coffin was carried by boat along the Thames from Greenwich to the Admiralty. The next day, a crowd tens of thousand strong watched the procession from the Admiralty to St. Paul’s, where Nelson had always wanted to be buried (on the grounds that Westminster Abbey had been built on a swamp and would eventually sink back into it!). His sarcophagus had been ordered by Cardinal Wolsey, who had died in disgrace, leaving it unused). His coffin was followed by thirty-one admirals, one hundred captains, forty-eight men from the Victory and forty-eight Greenwich pensioners who had served under Nelson. As the funeral ended, Nelson’s coffin was lowered in his sarcophagus, covered in the white ensign from the Victory. The sailors who had lowered him in tore the flag into pieces so that they could each keep part of it, a gesture that was widely seen as typical of Nelson.
As a sailor and admiral he deserves his fame. He was one of the few Englishmen to quickly understand the new nature of warfare after the French revolution. Earlier wars had not been fought to the finish, and earlier naval battles were often indecisive. This was not good enough for Nelson. He wanted total victory, the annihilation of the enemy fleet.
Coupled with this was his aggression. Nelson was never happy with passive inactivity, and was always looking for a way to attack the enemy. Sometimes this could lead to disasters such as the attack on Tenerife, but more often it led to victories.
He was willing to take calculated risks. At the battle of St. Vincent, he risked reprimand for disobeying orders in order to intercept the Spanish fleet. At the battle of the Nile, his entire plan was a gamble on the quality of his captains. These were calculated risks. When it came to battle at sea, his risks almost always paid off.
The Nile demonstrates another important principle. Nelson had proved you did not need to issue detailed plans, or control every action from the flagship, in order to win major victories. He trusted his captains to understand his intentions, and to do what was best in the circumstances that faced them.
He inspired and energised most people he served with, from his captains to the common seamen. The arrival of Nelson at any fleet was the signal that something was going to happen. He had the rare ability to inspire his captains to the same level of enthusiasm as he demonstrated himself.
He was willing to adapt his plans. His three major battles are all different. The Nile was an attack made at speed, without a detailed plan, to take advantage of a weak French position. At Copenhagen, he crafted a much more detailed plan, although once again his captains were aware of the general principle and were thus able to take the appropriate action when the plan started to go wrong as ships ran aground. At Trafalgar, Nelson had been working on his plan before he even left England, and had come up with the ‘Nelson Touch’, designed for the circumstances that faced him at the time – a combined fleet that might be unwieldy and the need to force battle.
Above all, he was successful. He took part in four major fleet encounters, all victories. He was solely responsible for two of them, almost entirely responsible for the third (Copenhagen), and can take a lot of credit for the victory at the fourth (Cape St. Vincent). His own victories were on an unprecedented scale, only matched by those of Napoleon on land. In what seems a rather ironic gesture, Napoleon had had a bust of Nelson in his apartment. Nelson was one of the few men that Napoleon was willing to consider as his equal in skill, possibly because he did not share the same theatre of war.
 Nelson's Navy, Brian Lavery. A fascinating book that covers every aspect of life at sea in Nelson's navy, from ship building to the daily life of the sailors. If you have any interest in naval warfare, or in life at sea, then this book is essential for you.