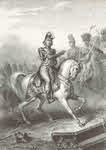
Marshal Bessieres
on Horseback
|
|
Introduction
Napoleon's Preparations
Austrian Plans
The Battlefield
The Crossing from the Lobau - Plans and Preliminaries
The Crossing Battle, Morning of 5 July
The Evening Battle
The Second Day - 6 July
Plans
The Austrian Attack
The French Attack
Aftermath and Conclusion
Books
The battle of Wagram (5-6 July 1809) was the decisive (if not the final) battle of the Franco-Austrian War of 1809 and was a costly French victory that saw Napoleon command a larger army than at any previous battle.
The Franco-Austrian War of 1809 began with an Austrian invasion of Bavaria. The Austrians moved far too slowly, and missed a series of chances to inflict significant defeats on parts of Napoleon's army, with the last one coming on 19 April at Teugn-Hausen. In the aftermath of this battle the Austrian army was badly strung out, with the right wing, under the direct command of Archduke Charles, facing towards Regensburg and the Danube, and the left wing, under General Hiller, rather further south, facing towards the approaching French.
On 20 April Napoleon announced his arrival, inflicting a defeat on the Austrians at Abensberg. This split the Austrian army into two unequal halves. On 21 April Napoleon attacked the weaker left-hand half (Hiller) at Landshut, forcing it to retreat once again, before turning north to defeat Charles at Eggmuhl (22 April) and Regensburg (23 April). As a result of these four battles the Austrian army was split into two separate armies, separated by the Danube. The two wings were forced to retreat back east into Austria, eventually joining up on the north bank of the Danube opposite Vienna, which fell into French hands on 13 May.
Napoleon had hoped to fight the final decisive battle of the campaign somewhere outside Vienna, but the Austrians had denied him that chance by staying on the opposite side of the river. This forced Napoleon to cross the Danube if he wanted to come to grips with the Austrian army, but his first serious attempt to gain a foothold on the north bank saw him suffer his first serious military defeat, at the battle of Aspern-Essling (21-22 May 1809). Although Napoleon did manage to gain a foothold across the Danube the bridges connecting the southern bank to the Lobau Island were inadequate, and spent much of the battle being prepared. Cut off from his reinforcements Napoleon perhaps did well to avoid a serious mauling, but when he was forced to retreat back onto the Lobau it was a clear defeat.
In the aftermath of Aspern-Essling Napoleon decided to prepare as thoroughly as possible before making a second attempt to cross the Danube. This involved three main strands of activity. The first saw the Lobau turned into a strongly fortified military camp, ready to support the eventual attack. The second involved building solid bridges linking the Lobau to the southern bank of the Danube and preparing four bridges that could quickly be put in place between the Lobau and the northern bank. The third involved concentrating as many extra troops as possible in the vicinity of Vienna, so that they could take part in the second attempt to cross the river.
By the end of June the island was a proper fortress, defended by 109 guns and mortars in fourteen batteries. Two well built bridges connected the south bank of the Danube to the Schneidergrund in the middle of the main channel, and three connected that island to the Lobgrund, just to the south of the Lobau. Shorter bridges connected the Lobgrund to the Lobau, and the French also occupied several islands in the channel between the Lobau and the north bank of the Danube. The main bridges were protected by a line of pilings driven into the river bank and by a fleet of thirty boats.
Preparations for the crossing itself involved the construction of a large number of boats and of four pre-fabricated bridges. Three were fairly standard, but the fourth was a single-span bridge designed to be moved rapidly in place by floating it down the river.
Reinforcements were called in from every direction. Perhaps the most dramatic arrivals were those of Eugène de Beauharnais with the Army of Italy, which at the start of the war had been forced to retreat by a successful Austrian attack, and Marmont's rather smaller Army of Dalmatia, which reached the battlefield in time to take part in the second day of the battle, having marched from the Adriatic coast. Napoleon was also joined by the Saxons of Bernadotte's 9th Corps and Wrede's Bavarian division from 7th Corps. The Guard Artillery also arrived in time for the battle.
Napoleon started the battle with 122,911 infantry, 24,941 cavalry and 404 guns, roughly equal to the Austrian in infantry and guns, but with a significant advantage in cavalry. The army was split into the Imperial Guard, 2nd Corps (Oudinet), 3rd Corps (Davout), 4th Corps (Massena), 9th Corps (Bernadotte), Army of Italy (Eugène de Beauharnais) and the Cavalry Reserve (Bessières). Another 22,838 infantry, 1,246 cavalry and 71 guns arrived by the morning of 6 July, consisting of the Army of Dalmatia (Marmont), two more divisions from the Army of Italy and Wrede's Bavarian 2nd Division from Lefebvre's 7th Corps. These reinforcements would play a major part in the eventual French victory.
In the aftermath of the Austrian victory at Aspern-Essling the Archduke Charles came under intense pressure to go onto the offensive. In the days immediately after the battle he did miss a chance to attack the French while they were isolated on the Lobau, but after that he was in a difficult position. Charles believed that his army was the only thing standing between the Habsburg monarchy and destruction, and was unwilling to risk its destruction. If Napoleon and his renowned army had been unable to make a successful opposed crossing of the Danube, then how much harder would it be for the Austrians? Charles was also concerned that if he moved away from the Lobau to cross the Danube somewhere else then Napoleon would move onto the north bank and attack the Austrians while they were split by the river. Charles's plan was thus to sit and wait for Napoleon to try and cross the river a second time, and try to defeat him a second time.
This was not an entirely bad idea, but Charles failed to take some simple measures that might have made it easier to achieve. No real effort was made to harass the French as they worked on fortifying the Lobau, or as they used it to prepare for the next river crossing. Even harder to understand is Charles's failure to fortify the banks of the river opposite the French. Some efforts were made in the area fought over at Aspern-Essling, but the shore facing the eastern part of the Lobau was left unfortified and almost unguarded.
Charles's most significant move in the period between the two battles was to pull most of his army back from the immediate area of the Danube, partly to give him more flexibility when the French finally crossed again but mainly to avoid the danger of disease amongst troops living on the Aspern-Essling battlefield.
Unlike Napoleon, Charles was not able to rely on large numbers of reinforcements. Austria had two other main armies in the field in 1809, one under Archduke John and one under Archduke Ferdinand. John's role had been to invade Italy, while Ferdinand had attacked the Grand Duchy of Warsaw. Both attacks had failed. Ferdinand's army was pinned down in Galicia by the Russians, who were officially allied with Napoleon. Although they made it clear to the Austrians that they were no longer enthusiastic supporters of Napoleon, the Russians still hoped to make some easy gains at their expense, and so Ferdinand and his army had to remain in place to watch them. Charles had more reason to expect John's army to be able to reach him in time - both Eugène and Marmont managed to reach Napoleon despite having to travel further than John, but the Archduke really wanted to maintain an independent command. When he was finally forced to move to join Charles he moved so slowly that he didn't arrive until the battle of Wagram was over, reaching the battlefield at around 5pm on 6 July.
Charles was able to recall most of III Korps (Kolowrat) from Bohemia, and received sizable numbers of Landwehr and volunteer troops, although their value in combat wasn't entirely clear. On the morning of 5 July Charles had 120,197 infantry, 15,569 cavalry and 388 guns close enough to take part in the battle. The army was organised in an Advance Guard (Nordmann), I Corps (Bellegarde), II Corps (Hohenzollern), III Corps (Kolowrat), IV Corps (Rosenberg), VI Corps (Klenau, replacing Hiller on the day before the battle), the Reserve Corps (Liechtenstein) and the Grenadier Reserve (split into two divisions under d'Aspre and Prochaska).
The battle of Wagram was fought on the Marchfeld, a large plain on the north bank of the Danube opposite Vienna. The Danube formed the southern edge of the battlefield. The northern edge was on the Russbach Heights, a plateau bordered to the south by the Russbach stream. Neither were major features - the plateau was only ten meters higher than the ground to the south, but they would be significant during the battle. The escarpment at the southern edge of the plateau was known as the Wagram. The Marchfeld was covered with villages, many of which came to play a prominent part in the battle. Several of the main villages were on or close to the Russbach stream. At the extreme eastern edge of the battlefield was Leopoldsdorf. Next in line to the west was Markgrafneusiedl, at the south-eastern corner of the plateau. Deutsch-Wagram was further west, at its south-west corner of the plateau. At this point the battle lines begin to turn south-west, towards the crucial village of Aderklaa, then south through Süssenbrunn, Breitenlee and Aspern before reaching the Danube.
Key to the entire French plan was the Lobau Island, close to the north bank of the Danube. This island had been the launching point for the unsuccessful crossing to Aspern-Essling, and was now a strongly fortified military base. The Lobau was separated from the north bank by the Stadtler Arm of the Danube, which flowed along its northern and eastern sides. In the build-up to Aspern-Essling the French had crossed over from the north-west part of the island onto the area between the villages of Aspern and Essling
The Crossing from the Lobau - Plans and Preliminaries
Deception played a key part of Napoleon's plan for the crossing of the Stadtler Arm. His actual plan was to cross over from the eastern shores of the Lobau, placing his army in a position south-east of the battlefield of Aspern-Essling, but a great deal of effort went into convincing the Austrians that he intended to cross further west. On 30 June he went as far as ordering Massena to cross the Danube in the same area as before Aspern-Essling, onto a spit of land called the Mühlau. This operation was a total success, but it did have the unfortunate effect of increasing Napoleon's tendency to underestimate the Austrian army. Although the Austrian army could not react quickly to the unexpected, it would soon prove itself able to stand and fight.
Similar actions took place on the next few days, successfully convincing Charles that the French were intending to cross over from the Lobau, and distracting his attention away from the eastern part of the island. Charles reacted by moving most of his army close to the Danube on 1 July, before moving it back to positions on the hills to the north and west of the Marchfeld on 3 July. The Austrian plan was now to defend both of these positions and attack the flank of the French if they moved to attack either one of them.
Early in July Napoleon began to move his troops onto the Lobau. 4th Corps was already there, acting as the garrison. The Baden brigade moved over on 30 June, followed by two divisions from Oudinot's corp on the night of 1-2 July. Bernadotte's 9th Corps and the Guards crossed on the night of 3-4 July. Finally on 4 July Napoleon ordered the bulk of his army to cross onto the island. Only then did the Austrians realise that something unusual was going on. Lasalle's cavalry, 3rd Corps and a division from 2nd Corps crossed on 4 July, followed by the Army of Italy, the heavy cavalry and Marmont with the Army of Dalmatia on 5 July. Finally Wrede's Bavarians would cross over on the night of 5-6 July. Marmont and Wrede both made marches of around 125 miles in four days.
The French assault finally began at around 9pm on 4 July when 1,500 men crossed the far end of the Stadtler arm to attack the Hanselgrund, yet another large island in the Danube. This triggered a massive artillery duel, which took place during a night of rain and storm creating an image that remained with everyone who saw it for years afterwards. The first French troops began to cross the Stadtler arm at around 9.30pm, and by 11pm Oudinot (2nd Corps) and Massena (4th Corps) both had footholds across the Danube.
When the French finally began to cross the Danube on 4 July the nearest Austrian troops were from VI Corps (Klenau) and the Advance Guard. IV, II and I Corps were on the Russbach Heights, at Markgrafneusiedl, Baumersdorf and Deutsch-Wagram respectively. III Corps was on the high ground to the west, the Grenadiers were at Gerasdorf, in the gap between the two areas of high ground, with the reserve cavalry close by. Klenau had the job of guarding the area between Aspern and Essling, while the Advance Guard were directly in the path of the upcoming French assault, between Essling and the main branch of the Danube.
The Crossing Battle, Morning of 5 July
Despite the terrible weather the crossing of the Stadtler army went well. The floating bridge was in place just before midnight, although most of the first troops to cross did so in boats. The other three prefabricated bridges were soon over the river. By 6am Oudinot and Massena had most of their men across the river, and the first of Davout's men (3rd Corps) were crossing. By 9am the French were ready to advance out of their initial beachhead, and Massena began his attack on Gross-Enzersdorf, a walled village that had been at the eastern end of the Aspern-Essling battlefield. The Austrian garrison was soon overrun, and by 10am the left flank of the Austrian Reserve Corps was in serious trouble. Klenau's VI Corps, further west, had barely been involved, and quite remarkably the Austrian high command did not yet realise that Napoleon had moved a large part of his army across the Danube.
This mistake was partly explained by the pause in French operations that began at around 10am as Napoleon moved the rest of his available troops across the river, and by midday the French had just under 140,000 men across the river. At about 1pm the French advance began. The infantry was arranged with Massena's 4th Corps to the left, Oudinot's 2nd Corps in the centre and Davout's 3rd Corps on the right. Lasalle and Marulaz with the light cavalry started off in front of the right and centre, but soon moved to the left, while Grouchy and Pully with their dragoons protected the right. Oudinot and Davout were to move north (towards Baumersdorf and Glinzendorf respectively), while Massena swung left and headed west along the Stadtler Arm. This meant that a gap opened between Massena and the rest of the French line, into which Napoleon placed Eugène's Army of Italy and Bernadotte's 9th Corps (Saxons).
As the French advanced the two Austrian units posted closest to the Danube retreated in different directions. Nordmann's Advance Guard moved north towards Markgrafneusiedl, joining Rosenberg's IV Corps at the left wing of the army. Klenau's VI Corps retreated north-west, ending up at Stammersdorf, having retreated a little further than he perhaps should have done. Massena only followed as far as Breitenlee, to the north of Aspern.
By the end of this phase of the battle the two armies were arrayed in a large arc, with the French on the inside lines. Davout (3rd Corps) was at the right of the line, facing Rosenberg (IV Corps) and Nordmann (Advance Guard) opposite Markgrafneusiedl at the south-eastern corner of the plateau. Both sides had cavalry protecting their open flanks. Next in line to the west were Oudinot (2nd Corps) and Hohenzollern (II Corps), around Baumersdorf. Bellegarde's I Corps held the next part of the heights and the village of Deutsch-Wagram, facing Eugène's Army of Italy and Bernadotte's Saxons of 9th Corps. The French line then turned away to the south-west, with Massena guarding a large section from Sussenbrunn down to the Danube at Kagran. The Austrian line continued on to the west, with the Grenadier Reserve next in line, followed by Kolowrat's III Corps and Klenau's VI Corps, both some way to the west of the French lines. Finally Reuss's V Corps was posted on the next area of high ground, the Bisamberg, to protect the army's lines of retreat.
The successful French advance hadn't answered any of Napoleon's key questions. His troops had only clashed with the two Austrian corps posted close to the Danube. The three Austrian corps posted on the plateau were largely invisible, with most of their men out of sight behind the lip of the escarpment. Napoleon's main concern at this point was that Archduke Charles would retreat overnight, forcing the French into a potentially difficult pursuit. Napoleon decided to launch an attack across the Russbach in an attempt to both pin the Austrians in place and discover how strong a force he faced.
The upcoming French attack involved Bernadotte, Eugene, Oudinet and Davout (from west-to-east). Bernadotte's Saxons were to attack Deutsch-Wagram, Eugene was to attack Bellegarde's I Corps on the heights, Oudinot was to attack Hohenzollern's II Corps around Baumersdorf and Davout was to attack around Marksgrafneusiedl. The four separate attacks were poorly coordinated, and all four failed, although not without causing some problems for the Austrians.
Oudinot and Eugene were the first to move. Oudinot's men attacked the defenders of Baumersdorf at around 7.30pm, but were repulsed. Oudinot responded by ordering a fresh attack, sending the 10th Léger to outflank the village and capture the heights while the 57th Ligne attacked the village. Once again the defenders of the village held out. The 10th Léger managed to reach the plateau, but only to find themselves badly outnumbered and under fire from three sides. A cavalry charge broke them and they fled down the hill, forcing the 57th Ligne to abandon its attack. Oudinot's men ended the day between Baumersdorf and Raasdorf.
Eugène's attack, just a little further to the west, came closer to success. Supported by Dupas's French division of Bernadotte's corps, this attack struck the Austrian line at the point where I and II Corps met. The French reached the top of the escarpment in some strength, with Dupas turning left and seven of Eugène's battalions turning right. Part of the front line both Austrian corps broke and fled into their second line, and a bitter battle developed on the edge of the plateau. The personal interventions of Charles and Bellegarde helped to steady the situation, but the French were close to establishing a foothold on the plateau that would have threatened the entire Austrian position. Not for the first time the similarity between the white-coated Saxons and white-coated Austrians was about to cost the French dearly. Newly arrived French troops fired on the Saxons of Dupas's division from the rear, and unsurprisingly they broke and fled back down the escarpment. The remaining troops fought on for some time before also abandoning their positions. Worse was to come - as the retreated French and Saxon troops reached the flat ground they encountered cavalry, actually French cavalry coming to their assistance, but in the darkness many took them to be Austrian horse, and several units scattered in the dark.
Davout's attack was the least convincing. Davout himself believed that the Austrians intended to defend Markgrafneuseidl, and so his attack was largely limited to an artillery bombardment. Two infantry divisions threatened to attack, but when it was clear that the Austrians would stand and fight he ordered his men back to their camps.
Bernadotte's attack was the last to begin. This was partly because Bernadotte was sulking, angered at having been appointed to command Saxon troops and then at having lost large parts of his command to detachments, but also because at 7.30pm when the attack was first ordered he only had his 2nd Division to hand, a total of around 7,700 men. Bernadotte decided to wait until his 1st Division (Zezschwitz) arrived from the bridges over the Danube, and didn't begin his attack until around 9pm. He thus missed a chance to take advantage of the near-success just to his left.
Bernadotte's first attack involved three battaliosn from Lecoq's brigade. Despite being outnumbered this force managed to fight its way into Wagram, but was then stopped. Zeschau's brigade was sent into to support Lecoq, but also failed. Finally Hartitzsch was ordered into the attack, with Bernadotte's last infantry. Unfortunately Hartitzsch had not been told that there were already white-coated Saxon troops in Wagram. When his men approached the village they opened fire on the first white-coated infantry they saw, believing them to the Austrians. Unsurprisingly this broke the resistance of the Saxons in Wagram, who now believed that they had been outflanked, and most of the Saxon infantry retreated in some disorder back to Aderklaa. Bernadotte spent much of the night complaining about Napoleon, before early on the following morning abandoning Aderklaa without informing the Emperor.
Despite the failure of all four attacks Napoleon was pleased with the evening's work. It was now clear that Charles was present in some force, and that he was willing to stand and fight. The decisive battle that Napoleon had been searching for since April was now close at hand.
Charles was also happy with the performance of his men. A large-scale French attack had been defeated without Charles having to commit all of his men to the battle. While I and II Corps had been heavily engaged, the Grenadier Reserve, III Corps and VI Corps were still fresh, and Archduke John was expected to appear from the east.
Napoleon's plan for the second day of the battle was quite simple, and was based on a belief that most of the Austrian army was already on the Russbach Heights, or would be moving there overnight. He underestimated how many Austrian troops were on his left, and felt that the biggest danger would come on his right, where Archduke John was expected. According Massena was ordered to concentrate his scattered corps to the north, towards Aderklaa.
Charles also planned to go onto the offensive on 6 July. His plan was based on a more accurate understanding of the French position, and an awareness that Napoleon's left wing was rather weak, even before Massena was moved north. The main Austrian attack would thus come from VI corps (Klenau) and III corps (Kolowrat). Klenau was to attack along the Danube towards Aspern and Essling. Kolowrat would attack to his left, on a line towards Breitenlee. The Grenadier Reserve would attack through Sussenbrunn. I Corps (Bellegarde) would pivot around at Wagram and form the left-flank of the Austrian attack, along with the Reserve Cavalry. II corps (Hohenzollern) was to maintain his position on the heights of Russbach until I Corps passed in front of him, and then join the attack. IV Corps (Rosenberg), on the Austrian left, was to attack Davout. All of the main attacks were to begin at 4am. The corps on the right were under orders to advance in line with each other, so their progress would be set by the slowest to move.
In theory this was a good plan. VI corps would only face a single French division, and could easily have got into the French rear, but the Austrians failed to take into account the time it would take to issue orders and for the corps to move into place. III and VI corps would have had to begin their march at around 1am, but didn’t even receive their orders until 2am.
The failure to properly coordinate the Austrian attacks became clear at 4.00am, when Rosenberg, on the Austrian left, launched his attack on schedule, but virtually alone. This attack began in a promising style, but before Rosenberg could make any real progress he was ordered to pull back to Markgrafneusiedl. Charles realised that the attack was not developing as he had hoped, and didn’t want to expose Rosenberg to a full scale French counterattack.
On the French side the noise of fighting from their right wing caused serious concern, and was interpreted as meaning that Archduke John had arrived from the east. Napoleon ordered his reserves to move to the right, and then led the Guard infantry and artillery and Nansouty's and Arrighi's cuirassiers to the right. By the time these reinforcements reached Davout it was clear that the fighting was already dying down. Napoleon left Arrighi with Davout, and agreed to give Davout two hours to prepare for his own attack. The rest of the reserves were ordered back to the centre of the battlefield.
A much more serious crisis was about to develop on the French left. Bellegarde's I Corps also began its attack on time, but much to their surprise the Austrians found Aderklaa abandoned, Bernadotte having withdrawn in the night. The Austrians were then forced to halt to wait for the arrival of the Grenadier Reserve to their right. A minor matter in its own right, attempts to recapture the village would soon drag in Massena's corps, leaving the French left very weak.
Reinforcements reached both sides by around 7.30. On the French side Bernadotte had moved to his right, and was engaged in an artillery duel with Austrian guns on the plateau and from Aderklaa. Massena's leading troops were now appearing to the south-east of the village. On the Austrian side the first two divisions of Grenadiers arrived on Bellegarde's right, and were then forced to stand and wait for III Corps to arrive on their right. Finally, on the French side Napoleon arrived on the scene, and ordered Massena to recapture the village.
Massena sent Carra St. Cyr's division to attack the village. The 24th Léger and 4th Ligne successfully achieved this, and nearly broke Bellegarde's first line, but the French advanced too far, and were forced back in disarray by Austrian Grenadiers and cavalry. Carra Saint-Cyr committed his reserves, but this phase of the battle ended with the Austrians in command of Aderklaa. Bernadotte shared in this defeat, having sent his Saxon infantry into the gap between Aderklaa and Wagram. They too were repulsed by heavy Austrian fire, and an Austrian pursuit was only halted when Bernadotte led a cavalry counter-attack in person. Napoleon then ordered Molitor's division from Massena's corps to attack Aderklaa. This attack was a success, and Molitor was able to hold the village until around 11am.
This all left the French left very weak. Two of Massena's four divisions had been swallowed up by the fighting at Aderklaa. To the south Boudet's division was being forced back by Klenau, and by 11am the Austrians had occupied Aspern and had outposts at Essling. This only left Legrand's division, and they were soon engaged with elements of Kolowrat's III Corps. This was the Austrians great chance of success - Klenau now had a chance to get in behind the entire French army and take advantage of the chaos around Aderklaa, but instead his advance slowed and stopped, and he too waited for events elsewhere to unfold, in this case for III Corps to advance so that VI corps could stay in line.
Napoleon did have some reserves he could have used to deal with this crisis - Marmont's Army of Dalmatia and Wrede's Bavarians, but he intended to use those units in his own offensive. Instead he decided to disengage Massena's corps and send it south to deal with VI corps. This would require Massena to march across the front of III Corps and the Grenadiers, so Napoleon decided to launch a massive cavalry attack and create a huge artillery battery to hold the gap. At the same time Eugène was to turn to his left and prepare to attack the new Austrian centre, while Marmont was to fill the gap this would create between Eugène and Oudinot.
The grand battery was to contain sixty guns from the Guards, forty from the Army of Italy and a number of 12-pounders from Wrede's Bavarians. Eventually 112 guns were found and the massive battery opened fire on the Austrian line south of Aderklaa. Massena's movement was also covered by a cavalry attack led by Bessières. This attack wasn't as well coordinated as it might have been, but it did help pin III corps in place until Massena was safely past.
The French weakness on their left was balanced by their strength on the right, where Davout had 40,000 men facing Rosenberg's 27,000. Rosenberg was not expecting an infantry attack around his left flank, and so when the fighting began in 6 July his infantry was deployed in Markgrafneusiedl and on the heights to the west. He was thus caught out when Davout began to move his troops across the Russbach to the east of Markgrafneusiedl and prepared to attack the eastern side of the plateau. Rosenberg responded by using Meyer's brigade to form a new flank heading north-east along the edge of the escarpment, with Riese's brigade forming a second line and cavalry to its left. The rest of the Austria infantry remained in place around Markgrafneusiedl.
Davout planned to attack on both sides of the Russbach. On the north bank Grouchy's and Montbrun's cavalry formed the far right of the French line. Morand's division was to attack just under one mile north of the village, with Friant to his left. Gudin's and Puthod's infantry divisions were to attack the village from the southern side of the Russbach.
The French attack began at around 10am. Morand's and Friant's infantry pushed back Meyer's brigade, mortally wounded both Meyer and Nordmann, the commander of the Advance Guard. A confused cavalry action beyond the infantry ended in success for the French, and their cavalry began to threaten to outflank the Austrian line. At Markgrafneusiedl the French were also successful, with Puthod capturing ground to the west of the village and Gudin fighting his way into the place. The French soon had a secure foothold at the eastern end of the Russbach Heights, and Napoleon's overall plan was beginning to bear fruit. It was time to begin his grand attack.
Archduke Charles made an attempt to restore the situation, bringing Buresch's brigade, the Hohenzollern Cuirassiers and four squadrons from the Hessen-Homburg cavalry. These reinforcements were able to stabilize the line, but an attempted counterattack failed by 1pm, and the Austrians were slowly pushed back across the plateau. This exposed Hohenzollern's II corps to a flank attack.
This attack had several elements. Oudinot was to attack Hohenzollern and Massena was to attack Klenau, but the most famous part of the attack came in the centre, where a 'grand square' was formed using Macdonald's troops from the Army of Italy. This controversial formation involved two divisions, Broussier's on the right and Lamarque's on the left. The front of the hollow square was made up of two rows of eight battalions deployed in line. The sides were made up of the remaining battalions arranged in columns of divisions - two companies wide and three deep. This allowed the square to defend itself against attack from three sides. The main problems with this formation were that it moved very slowly, and was a massive and easy to hit target for Austrian artillery. It also relied for it success on a belief that the Austrian forces opposing it had been badly hurt by the grand artillery battery.
Macdonald's men were soon to discover that this was not the case. Their advance began at about noon. Aiming at Süssenbrunn the French found that they were advancing towards the join between the Grenadiers and III Corps. Both units withdrew their respective flanks, and the French advanced into a dent in the Austrian line, exposing them to fire from three sides. The attack of the grand square was a failure. In an hour Macdonald's strength dwindled from 8,000 down to only 1,500, and he was forced to call for reinforcements. Napoleon was able to send in three new divisions. Pacthod and Durutte from the Army of Italy attacked to the right and left of the square, while Wrede's Bavarians and the Young Guard were sent to support Macdonald directly.
Despite this setback in the centre Napoleon was now close to victory. At about 2pm Charles received a message from Archduke John announcing that he hoped to begin moving at 1pm and would arrive at around 5pm. This would have been far too late in the day, and at around 2.30pm Charles issued orders to begin a phased withdrawal. By this point his promising attack on the right had failed. Massena's men had recaptured Essling, rescued Boudet's isolated division and were moving north-west alongside the Danube, potentially threatening the Austrian right flank. By the end of the day Klenau had been pushed back to his starting point at Stammersdorf. The French did suffer one serious loss during this fighting, when the cavalry general Lasalle was killed.
In the centre Macdonald and Wrede, supported by Massena's right, pushed back the Austrian III Corps, although the Austrians were already beginning to retreat after receiving their orders from Charles. III Corps also ended the day close to its starting point, around Gerasdorf. To the right of the French line Davout was able to push Rosenberg north, through the village of Bockfliess. Next in line Hohenzollern's men held on for a little longer, before being forced to join the retreat. In general the Austrians performed well during the retreat, with each corps keeping together well. Fighting in the centre ended at around 3.30pm.
Only after the fighting was effectively over did Archduke John's leading troops make their appearance on the eastern edge of the battlefield. His cavalry patrols caused a panic amongst French stragglers at around 5pm, causing chaos at the bridges onto the Lobau. Napoleon sent out scouts to discover what was happening, but was soon reassured to learn that John was retreating back to the east.
Both sides suffered similar levels of casualties during the fighting at Wagram. Although estimates of casualties do vary the Austrians are normally credited with around 23,750 killed and wounded, 10,000 missing and 7,500 prisoners, as well as the loss of 10 standards and 20 guns. French losses are similar, at 27,500 killed and wounded, 10,000 missing or prisoners and 12 eagles and 21 guns lost. Despite suffering a defeat the Austrians could be proud of their army's achievements at Wagram, where it had stood up to Napoleon and his much-vaunted army with much more determination than on previous occasions. Napoleon had less reason for satisfaction. He had failed to win his decisive battle, and the Austrian army had escaped intact. Its ability to stand and fight was an ominous sign for the future.
On the day after the battle Napoleon was not even sure where the Austrians had gone. His own army was too exhausted to pursue on the night of 6-7 July, and so he was forced to send out scouts to find out which of three possible routes the Austrians were using. This allowed Charles to move towards Znaim, but he was finally caught on 10 July (battle of Znaim). Napoleon's real victory was over Charles, who in the days after the battle made it clear that he no longer believed a victory was possible. Instead he constantly pressured his brother to begin peace negotiations. On 8 July the Emperor agreed, and Charles was ordered to send Liechtenstein to negotiate an armistice. By the time Liechtenstein reached Napoleon the French emperor had already accepted a local armistice offered by Charles, and late on 11 July the fighting at Znaim came to an end. The military phase of the War of 1809 was over.
The armistice caused an uproar at the Austrian court, where its terms were considered to be unreasonably harsh. On 23 July Charles resigned, never to return to high command against Napoleon. When the final peace treaty was agreed at Schönbrunn in October Francis's anger looked justified - Austrian lost its access to the sea, 3.5 million (or one fifth) of its people, and had its army limited to 150,000 men. Although nobody knew it, Napoleon had just concluded his last victorious war. Over the next few years the Peninsular War would rumble on, while the campaigns in Russia in 1812, Germany in 1813, France in 1814 and the Low Countries in 1815 would all end in failure. In 1809 that would have all seemed very unlikely. Napoleon rewarded three of his generals - Marmont, Oudinot and Macdonald - with promotion to Marshal, and was about to marry Francis's daughter Marie Louise, creating a family tie with the Habsburg dynasty.
 1809 Thunder on the Danube: Napoleon's Defeat of the Habsburgs, Volume III: Wagram and Znaim, John H. Gill. The third part of a very impressive narrative history of the War of the Fifth Coalition, looking at the final battles at Wagram and Znaim and the subsidiary campaigns in Poland, Hungary, Dalmatia, Styria and the Tyrol. Manages to be both very detailed and readable and coherent, a very impressive achievement. [read full review]
 Aspern and Wagram, 1809, Ian Castle. An interesting Osprey campaign book covering some of the largest but often forgotten battles of the Napoleonic wars, including Aspern, Napoleon's first defeat on the battlefield. It is clearly written and of great use to those interested in the Austrian Army of the period [see more]