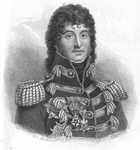
Portrait of
Marshal Jean Lannes,
10 April 1769-1809
|
|
Army Sizes
The Austrian Plan
French Positions at Dawn
Austrian Attacks
First Attack - Hadik
Second Attack - Kaim
Austrian Breakthrough - The Third Attack
Napoleon Arrives
The French Counterattack
Casualty Figures
Aftermath
Introduction
The battle of Marengo (14 June 1800) was a major French victory that helped to secure Napoleon's power as First Consul as well as expelling the Austrians from most of Italy. The battle came at the end of a month long campaign that began when Napoleon led his army across the St. Bernard Pass in mid May. The French advanced towards Turin, before turning east, entering Milan on 2 June. Napoleon then turned south to the Po, occupied a key chokepoint on the road between Turin and Mantua at Stradella. Napoleon hoped that the Austrians would be forced to attack him in this position in an attempt to re-open their supply lines.
For most of this period the Austrians were distracted by the siege of Genoa, which finally fell on 4 June. This meant that the Austrian commander, Michael Friedrich Freiherr von Melas, was able to concentrate a sizable army at Alessandria. It also meant that he no longer needed to attack the Stradella position, but instead could either break out to north-east, past Milan, to rejoin the Austrian armies forced east by Napoleon, or move south to Genoa and the sea. On 8 June Napoleon ordered his army to move west from Stradalla, in an attempt to catch the Austrians before they escaped. This brought on a battle between the French advance guard under Lannes and an Austrian force under Ott, which had been heading east in an attempt to defend Piacenza. The resulting battle of Casteggio-Montebello (9 June 1800) ended in a French victory. Ott was forced back towards Alessandria, while Napoleon continued to advance west (see Marengo Campaign for more details)
Marengo was the subject of more propaganda than just about any other Napoleonic battle. The original Army Bulletin was followed by three Official Reports, each less reliable than the last. By the time of the third report the Austrian breakthrough had been turned into a planned fighting retreat carried out by Napoleon simply to increase the size of a victory he had already won. The reason for this was quite simple - Napoleon had come to power claiming that he was the only man who could save France from a military disaster. Although he had indeed won a victory at Marengo, the most significant victory during the War of the Second Coalition was won by Moreau at Hohenlinden on 3 December 1800. Napoleon's propaganda was designed to increase the scale and significance of his own victory, and thus his own claim to be the greatest general in France. Austrian accounts were often no more accurate, so although the basic outline of events is clear, the details are not always so certain, and a very wide range of casualty figures can be found.
Neither Napoleon nor Melas had managed to concentrate their armies before the battle, and both would fight with less than half of the total men available to them in Italy. The exact size of the two armies is the subject of a certain amount of disagreement, but the consensus is that Melas had around 31,000 men at Alessandria, made up of 23,000 infantry and 8,000 cavalry. Napoleon had a similar number of men available at the start of 13 June (figures range from 28,000 to 31,000), but when the fighting began on 14 June only 23,000 of them were available at Marengo. Desaix, with 6,000 men, would not return until the early evening.
By 12 June Napoleon had concentrated all of his available troops around Voghera, just over twenty miles to the east of Alessandria. This placed him at the eastern edge of the plains to the east of Alessandria, bordered by the Po to the north and the Bormida to the west. The initial Austrian plan (adopted on 11 June) was for a breakout to the north, crossing the Po at Valenza and Casale, west of the junction with the Bormida. They would then advance east along the Po to Pavia.
This plan was abandoned when Austrian scouts reported that there were strong French forces (under Chabran) on the north bank of the Po. Melas decided to break out to the east, using a double agent in an attempt to move Napoleon out of position. This agent, François Toli, was to provide Napoleon with evidence that the Austrians still planned to break out to the north. Melas hoped that this would bring Napoleon to Sale, at the northern edge of the plains. The Austrians would cross the Bormida further south, at Marengo. One column, under Ott, would advance north-east to attack the French centre, while Melas, with the Austrian centre, would move east. He would join up with the small Austrian garrison at Tortona, and then turn north to attack the French left flank. If all went well this would allow the Austrians to slip past Napoleon and escape east along the southern bank of the Po.
Napoleon didn't entirely fall for Toli's plan. After reaching Sale the French moved south, towards the road that ran west from Tortona to San Guiliano and then on to Marengo. Thus put the main French army directly in the path of Melas's planned attack. Worse was to come for the Austrians - late on 13 June the French attacked their outposts at Marengo and drove them back to the Bormida (combat of Marengo). This meant that the Austrians no longer held the starting point for their planned attack, and meant that the main focus of the battle on 14 June would be around Marengo. A clever outflanking manoeuvre was turned into a straightforward frontal assault.
The Austrians did benefit from two pieces of luck. Although Napoleon wasn't entirely convinced by Toli, he didn't know what the Austrians were planning. He was fairly certain that they weren't planning to attack east, and he was also worried about a report of Austrian reinforcements coming from the south. On 13 June he sent Desaix, with Boudet's division, south towards Novi to watch for these reinforcements, while Rivaud's cavalry was sent north to Sale, to watch for any move in that direction. As a result the Austrians would outnumber the French at the start of the battle.
At the start of the battle the French were stretched out between Marengo and Torre Gargoli, six miles to the east. Victor's corps (Chamberlhac's division), with Gardenne's division, was around Marengo, at the western end of the French line. Lannes (with Watrin) and Murat (with the cavalry) were in the centre, at San Giuliano Vecchio and Castel Ceriolo. Napoleon's headquarters were at Torre Garofoli, as was Monnier's division. Desaix, with Boudet's division, was on the road to Novi.
The Austrians began to cross the Bormida at 8am. The first clashes, between Frimont's advance guard and Gardanne's position at Pedrabona, ended in a quick Austrian victory. Gardanne retreated back across the Fontanone, and took up a new position on Victor's left, facing north across the stream.
At about 9 Melas received an inaccurate report from Acqui, claiming that Suchet's column from the coast was nearby. In response Melas ordered Nimbsch's brigade of Hussars to re-cross the Bormida and march south to Acqui. This prevented Ott and the Austrian left from crossing the bridge, and delayed the attack by the Austrian left.
The first major Austrian attack was made by four battalions from Bellegarde's brigade, led by Hadik. After a bombardment lasting about an hour Hadik's men attacked the village, which was defended by Rivaud and the 43th demi-brigade. The Austrian attack was also opposed by Gardanne, on Rivaud's left.
The Austrians managed to reach the Fontanone, and briefly threatened the French position in the village, but they were coming heavy fire all of the time, and were repulsed by an attack led by Victor with the 24th légère. Hadik was mortally wounded, and his four battalions forced to retreat.
The second attack was launched by Kaim's brigade, which was slightly larger than Bellegarde's, and with support from Bellegarde. Although this attack was made in larger numbers, and with strong artillery support, it too failed. The attack began at around 10.45, and was largely over by 11.00. On the Austrian left Bellegarde was temporarily able to cross the Fontanone and occupied Barbotta Farm, but was soon driven back by the 22th demi-brigade, part of Lannes' division, which was now arriving to form a new French right wing. Most of Lannes' men remained close to the Marengo position, but part of the 6th légère was sent north to Castelceriolo, which would soon be the target of a major Austrian attack.
By now both Melas and Napoleon realised that a major battle was developing around Marengo, against both of their expectations. Napoleon responded by sending urgent messages after Desaix ordering him to return to the battlefield, while Melas was finally able to begin the attack with his left wing, while at the same time he sent forces south to attack the vulnerable left of the French line, at Stortiglione, between the Bormida and the Fontanone.
Austrian Breakthrough - The Third Attack
The third Austrian attack finally made some progress. On the Austrian left Ott reached Castelceriolo at about 12, and quickly captured the village. It was clear that there were no large French forces to the east of the village, and so Ott turned south, sending Gottesheim to attack Lannes' right flank.
Lannes responded by moving a battalion of the 22nd demi-brigade from the river to form a new right flank, with the 28th demi-brigade to their east, in a square. Lannes was then forced to use the 40th demi-brigade against a force of Austrian dragoons spotted to the north-east.
This left something of a gap in the French lines north of Marengo, just as the Austrian's began their third attack in the centre. Most of Kaim's and Bellegarde's men were engaged in a fierce fight with the French, often at very short range across the Fontanone. Just to the north of Marengo a group of Austrian sappers were able to build a new bridge over the stream, and at around 12.45 a battalion from IR 63 crossed the stream, and into a gap between Lannes on the right and Rivaud in Marengo.
Lannes was now close to being surrounded. At about 1.30 Watrin's brigade broke under the pressure, but Watrin was able to restore order quite quickly. He was helped by Rivaud, who led Victor's last two reserve battalions north to attack the Austrian bridgehead. Threatened from north and south the Austrians were forced to retreat back across the Fontanone
On the French left O'Reilly was fighting at Stortiglione. Melas decided to send a cavalry force further south, to get around the French left. Nine squadrons under Pilatti managed to get across the stream, but were then charged by Kellermann, and forced to retreat.
Despite the apparent French success, their line was now badly stretched. Victor's men had been forced to move north to deal with the Austrians who had crossed the new bridge, and at around 2 they were forced to extend their line to the south when O'Reilly forced Dampièrre to retreat from Stortiglione.
The Austrians attempted to take advantage of this weakness by sending Pilatti's cavalry across the road bridge (2.15). The French responding by sending Kellermann to launch a counter-attack, which forced the Austrians to withdraw, but it was clear that they could no longer hold Marengo or the line of the Fontanone.
Victor decided to retreat away from the stream towards Spinetta, and the shelter of a thick line of vineyards (the vines were strung between trees, making effective barriers). At about 2.30 Lannes was forced to follow, when Schellenberg's division arrived from the north to support Gottesheim. A small garrison was left in the farm at Marengo, but was soon forced to surrender. Melas, with the main Austrian force, was finally able to cross the Fontanone, and prepare to attack the new French line in the vineyards.
At around 3pm Napoleon finally reached the front line in person, having spent most of the day at his headquarters further east. He realised that his army was close to being surrounded. Melas was threatening Victor's and Lannes' new line, Ott was to the north, and a large number of troops were heading south to get around the French left.
Napoleon responded by sending Monnier's division to extend the line out towards Castelceriolo. Monnier was able to capture that village, but this left a new gap in the French lines, between Monnier and Lannes. Napoleon was forced to move his Consular Guard into the gap. Napoleon's last reserves fought off one cavalry attack on their way into the gap, and then became engaged in a musketry duel with IR 51, before they was attacked from the rear by Frimont's cavalry. Most of the guardsmen were forced to surrender, breaking the French right. Despite Napoleon's efforts the rest of the French line began to retreat back east towards San Giuliano.
With victory apparently in his hands Melas, who had been wounded, decided to hand command over to Kaim. The Austrian pursuit was slow and badly organised, perhaps not surprisingly after a battle that had already lasted for eight hours. The Austrians advanced as if they were chasing a broken enemy. The Austrian right, advancing along the New Road, was particularly disordered.
This allowed Napoleon to restore some order as his men reached San Giuliano. At around 4 he received the news he had been waiting for since noon - Desaix was close, and should arrive at around 5.
When Desaix did finally arrive he suggested that a renewed attack could still win the day. While the 9th Légère carried out a fighting retreat, Desaix prepared his trap. Guenard's brigade would form up on the road, close to the point where the Old and New Roads merged. Marmont's guns would provide artillery support and Kellermann would provide cavalry support. The remains of Napoleon's original army formed the left and right flanks of the new line.
Just as the Austrian Grenadier's leading the pursuit were about to close with the 9th Légère, part of Kellermann's cavalry charged them from the flank. Three Grenadier battalions were quickly overrun, as was IR 11. The rest of Kellermann's men defeated the Austrian Light Dragoons, and their supporting artillery. The leading Austrian troops were soon fleeing west in panic. The Austrian Chief-of-Staff, Zach, who had been largely responsible for the day's plans, was captured close to the start of the rout.
At the moment of his triumph Desaix was killed by a musket ball, but the French victory was now assured. The retreating Austrians spread panic as they went. Kaim's infantry, on the Austrian centre-right, broke when they were attacked by Guenard's brigade. Some parts of the Austrian right managed to escape in better order, and Ott's column, on the left, retreated in good order, fighting their way through Castelceriolo to reach the original bridgehead over the Bormida. The Austrian centre and right made a brief stand at Marengo, before also retreating back to the Bormida.
Different sources give dramatically different casualty figures for the battle of Marengo. Some early French sources gave the highest figures, with Austrian losses of 12,000 dead and wounded and 7,000 prisoners, and French losses of 7,000. The official French figure of 700 casualties was clear propaganda.
The military victory at Marengo was soon followed by diplomatic and political victories. The diplomatic victory came first. On the day after the battle Melas agreed to the Convention of Alessandria. The Austrians withdrew to the Mincio, while the French occupied the area west of the Chiesa. Melas was able to extract the rest of his army intact, while Napoleon had restored his conquests of 1796-7.
The political victory came later. Although the war resumed later in 1800, and was effectively ended by Moreau's victory at Hohenlinden on 3 December, Napoleon made sure that it was his victory at Marengo that would be remembered, using it to help secure his position as First Consul.
Books
 The Battle of Marengo, 1800, Olivier Lapray.
An account of the battle of Marango told largely from the French point of view, starting with northern Italy back in Austrian hands and tracing Napoleon's successful efforts to restore his earlier conquests. The main strength of this book is the excellent selection of pictures, covering Napoleon's dramatic crossing of the Alps, the advance into Italy, the two armies and the battle itself. [read full review]
The Battle of Marengo, 1800, Olivier Lapray.
An account of the battle of Marango told largely from the French point of view, starting with northern Italy back in Austrian hands and tracing Napoleon's successful efforts to restore his earlier conquests. The main strength of this book is the excellent selection of pictures, covering Napoleon's dramatic crossing of the Alps, the advance into Italy, the two armies and the battle itself. [read full review]