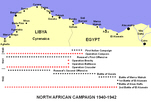
North African Campaign,
1940-1942
|
|
The battle of El Agheila (12-18 December 1942) was a rearguard action during Rommel's retreat in the aftermath of his defeat at El Alamein, and saw Montgomery outflank a strong defensive position, forcing Rommel to resume his retreat (North African Campaign).
The full scale retreat from the El Alamein position began on 4 November. At first Rommel may have been planning to try and fight delaying actions in eastern Libya, but after news of the Allied landings in North Africa (Operation Torch) reached him on 8 November he decided to abandon Cyrenaica completely, and withdraw to a strong defensive position at El Agheila, the point at which the two previous Allied advances had run out of steam.
The first of Rommel's troops reached the new position on 12 November. He set up two delaying positions, one at Agedebia and the second at Mersa Brega. The area between Mersa Brega and El Agheila was filled with salt lakes, which would delay an attacker. The main El Agheila position was based around field defences built into some dominating hills. The southern flank was protected by the gorge of the Wadi Faregh, which ran parallel to the coast. By 22 November Rommel's forces had all reached the new defensive position.
Rommel really didn't want to risk a battle at El Agheila. Although his left flank was protected by the coast, and there were some natural barriers near to the coast, there was no natural barrier to protect his right flank, and the 'line' stretched almost 120 miles south into the desert, ending at the oasis of Marada. Rommel had faced the same problem at the start of 1942, and his solution then had been to go onto the offensive (Rommel's Second Offensive), but now he wasn't strong enough to risk that, and instead wanted permission to retreat back towards Tripoli, where he would at least be close to his main supply base. Rommel's requests were turned down by Marshal Cavallero, the Italian chief of staff in Rome, with the support of Mussolini and later of Hitler. Eventually Rommel's demands triggered a remarkable meeting of four field marshals - Rommel, Kesselring, Cavallero and the Italian governor of Libya, Marshal Bastico, at Mussolini's triumphal arch on the border of Cyrenaica and Tripolitania on 24 November. Rommel was ordered to stand his ground at El Agheila (Bastico even ordered a counterattack!). Rommel completely ignored these orders. On 25 November he ordered the commander of XXI Corps to prepare his infantry for a retreat to Buerat. Rommel then flew to Hitler's HQ at Rastenburg in an attempt to make the Fuhrer see reason. Hardly surprisingly this didn’t work. Hitler was furious that Rommel had left his army without permission, and ordered him to hold the El Agheila line at all costs. Rommel returned to North Africa without achieving his objectives. A few days later Mussolini did conceded that Rommel could pull back to Buerat if the El Agheila line position was about to be lost, but no further. The Axis high command also began to discuss the possibility of replacing Rommel.
At first Montgomery's troops kept up constant pressure on the Germans, generally entering places the day after the Germans evacuated – Tobruk on 13 November, Benghazi on 20 November. The Germans abandoned the Agedebia position on 23 November. At this point Montgomery halted – the El Agheila position was a strong one, and one of his main concerns was to avoid a repeat of the disasters of early 1941 and early 1942, when the British had advanced beyond their supply lines and suffered embarrassing defeats at Rommel's hands. As a result he stopped, and began to build up new supply lines and proper supply dumps, ready for a full scale assault on the new position. The first British troops reached the El Agheila position on 26 November.
During the pause Montgomery reorganised his army. XIII Corps was disbanded, and its commander, General Horrocks, took over X Corps (Montgomery had never been impressed with General Lumsden, X Corp's original commander). X Corps had conducted the pursuit so far, but on 26 November it was withdrawn to the Benghazi area, while General Leese's XXX Corps took over the front line. Leese had the 7th Armoured Division, 51st (Highland) Division and the New Zealand Division under his command.
Montgomery's plan was to carry out a frontal assault on the El Agheila line, and at the same time send the 2nd New Zealand Division on an outflanking march through the desert, south of the Wadi Faregh, in an attempt to get behind the German lines, exactly what Rommel feared would happen.
On 6 December Rommel began the retreat, when the infantry of XXI began to retreat back to Buerat. This left the front line thinly held by German troops and the Ariete division. Rommel's plan was to withdraw just before the start of the upcoming British attack. The British artillery bombardment would hit empty land, and the British would advance into an empty minefield.
Montgomery soon realised that Rommel wasn't planning to stand, and he brought the start of his attack forwards by 48 hours.
On 12 December Montgomery began his attack, with a artillery bombardment on the Mersa Brega line. This was followed by a night assault on the line. Rommel had ordered the commander at Mersa Brega not to get drawn into a major fight, and so he withdrew before dawn on 13 December. On 13 December the British cautiously followed the retreating Germans, who used mines and booby traps to slow the pursuit.
On 14 December German aircraft found the 2nd New Zealand Division, heading west with 300 vehicles on the southern side of the Wadi Faregh. Rommel realised that the El Agheila position was no longer viable, and after sunset on 14 December the Axis retreat began again. Once again the Germans came under heavy air attack, the RAF having moved into bases in western Cyrenaica.
In order to try and slow the British advance, Rommel ordered a counterattack against the advancing British 7th armoured Division. This involved a mix of Italian and German tanks, and although the advance up the coastal road was delayed, the Axis troops suffered 20% casualties.
By late on 15 December the New Zealanders were in place to turn north. This triggered a series of battles between their advancing troops and scattered German units, as the New Zealanders attempted to reach Merduma and the coastal road. The Germans were able to delay the move north long enough for the bulk of Rommel's men to have escaped by 17 December.
The final clashes of the battle came between the Mersa Brega force, which was now being used to protect the southern flank of the retreating army, and the 2nd New Zealand Division, around Nofilia on the morning of 18 December. After a sharp fight here, the Axis retreat continued.
Aftermath
This was Rommel's last significant stand in Libya. After the fighting at Nofilia the German rearguard formed up near Sirte. The leading British elements arrived on 21 December, and another outflanking move began. Rommel ordered the rearguard to fall back on 24 December, when they were in danger of being cut off, and the British occupied Sirte on 25 December. On 29 December the British reached the Buerat line, where Rommel had been ordered to make his next stand.
This time Montgomery decided to plan both for the initial attack, and for the advance to Tripoli. His original plan was for a four division attack on two fronts. The 50th and 51st Divisions were to advance along the coast road. The New Zealand Division and 7th Armoured Division were advance along a parallel route some way inland. The 23 Armoured Brigade would link the two forces. The precarious nature of Montgomery's supply lines was demonstrated on 3 January, when a storm temporarily damaged the port of Benghazi. Montgomery decided to remove the 50th Division from the attack.
Rommel had no intention of fighting at Buerat, and early in January began the slow process of evacuating his infantry, leaving the line held by mobile German forces. On 12 January the Desert Air Force began to attack the Axis positions, and on 14 January Rommel decided that the British attack was imminent, and he withdrew his mobile forces.
The British attack began on 15 January. The 7th Armoured Division began the attack with an outflanking move in the south, heading for Tarhuna. After dark the 51st Division began the frontal assault. 7th Armoured caught part of 15 Panzer and destroyed 15 tanks, but the infantry found the main line empty. The coast road was heavily mined all the way behind the retreating Germans, slowing the pursuit. They were also help up by a series of delaying actions by the 90th Light Division. The outflanking force made steady progress, but the terrain around Tripoli was more difficult than further east, and slowed their movements. Every time the inland force came close to outflanking Rommel, he withdrew another 50 miles, until he reached Homs, the last possible defensive position before Tripoli. However Rommel did make one misjudgment - expecting the main British effort to be made in the south, he moved his rearguard forces to Tarhuna. Montgomery decided to make his main effort in the north instead, and the 22nd Armoured Brigade moved to support the 51st Division. For once the British pursued night and day, denying Rommel any time even to prepare for a delaying action at Homs.
On 19 January the leading elements of the 51st Division reached the German position at Homs, while further inland the 7th Armoured reached Tarhuna, to the south-east of Tripoli. Montgomery decided to send his armour on out flanking move via Castelverde, aiming for a point 30 miles or so to the west of Tripoli. On 20 January Rommel's men captured orders that revealed the Allied plan, and he began his final retreat from Libya. He was still able to fight a skilful delaying action, and the terrain south of Tripoli slowed the outflanking move. On 22 January the 22nd Armoured Brigade was ordered to pass through the infantry and Tripoli. The infantry captured Castelverde in a night attack, and the armoured followed through.
The Eighth Army entered Tripoli at 5am on 23 January, three months after the start of the Battle of El Alamein. In that period the Eighth Army had advanced 1,400 miles across difficult terrain, supported by an increasingly lengthy supply line. Tripoli had been the target of every British offensive in North Africa since the end of 1940, so the celebrations were understandable. Churchill even visited in early February, taking the salute at a Victory Parade march-past (alongside Brooke, Alexander, Montgomery and Leese).
Rommel was now free to retreat into the Mareth Line, where he was finally able to make a stand, protected by pre-existing fortifications. The British had to pause around Tripoli while their supply lines caught up with the advance, but the advance resumed in February 1943, in response to a call for help from the First Army, and on 16 February Medenine and Ben Gardane fell to the Eighth Army. This probably helped convince Rommel to call off his attack in the Kasserine Pass on 22 February, aware that his respite on the Mareth Line was coming to an end.