|
|
|
|
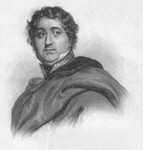
The battle of Corunna, 16 January 1809, was the final fight during Sir John Moore’s retreat from Spain in the winter of 1808-1809. After a desperate retreat across the mountains of north western Spain, the British army had reached the coast at Betanzos by the morning of 10 January 1809, where it quickly began to recover from its ordeal. After resting for a day at Betanzos, on 11 January the British made the final march to Corunna. By the end of the day Hope’s, Baird’s and Fraser’s divisions had all reached the port, while Paget’s rearguard division was at El Burgo, where the coastal road crossed the tidal river Mero. For only the second time during the retreat, the British engineers were able to blow up a major river bridge, both at El Burgo, and further upstream at Cambria.
On 12 January the first French infantry column reached Paget’s position, and a day of skirmishing followed, with the French unable to make any progress, but on 13 January the French cavalry under Franceschi found a way across the river at Celas, seven miles inland. At this point Moore ordered Paget to retreat back to the heights around Corunna. Meanwhile the French crossed the river, and then concentrated on repairing the bridge at El Burgo.
On 14 January the French artillery was able to cross the bridge, but Soult did not rush towards Corunna. His army was still badly stretched out – Merle’s and Mermet’s divisions were present but still under strength, while Delaborde’s division was still some way behind the main force. Soult decided to wait for the rest of his army to catch up before attacking the British.
On the afternoon of 14 January the British transport fleet finally reached Corunna, and Moore began to embark his sick and wounded. By the time the fighting began on 16 January the British had embarked the sick and wounded, most of the cavalry, and all but nine of their sixty guns.
That still left 15,000 men in Moore’s army, nearly all infantry. Many units that had virtually disintegrated during the retreat recovered once they had reached the coast, and even more when it was realised that there might finally be a battle. A good example is reported by Oman – at Betanzos one regiment from Manningham’s brigade of Baird’s division could only muster nine officers, three sergeants and three privates, but at the battle of Corunna the same regiment was 500 strong.
Moore decided to defend the Monte Mero, a low ridge two miles south of Corunna. This was a reasonably strong position, protected on its left by the Rio del Burgo (the mouth of the Mero), but it did suffer from two weaknesses, both on the right flank. This end of the ridge was just within artillery range of the next line of ridges, the Altos de Panasquedo, which would be the main French position. More seriously the right flank was unprotected by any natural features, overlooking a valley than ran down to the coast close to Corunna. To protect this open flank Moore posted just over one third of his army as a withdrawn flank guard, with Fraser’s division on the Altos de San Margarita, on the far side of the valley (the division was based in Corunna with orders to move out the moment the fighting began), and Paget’s division at Oza, in the valley itself.
Hope’s and Baird’s divisions were placed on the Monte Mero. Hope’s division formed the British left, with Hill’s brigade at the end of the line, with Leith’s brigade to its right. Craufurd’s brigade acted as the left reserve. To Leith’s right was Manningham’s brigade, and to his right was Bentinck’s brigade, both of Baird’s division, with Warde and the Guards as their reserve. The village of Elvina was just in front of Bentinck’s and Manningham’s positions, and would be the site of most of the heaviest fighting of the battle.
The French army was significantly larger than the British force. Soult had three infantry divisions, containing 39 battalions, along with twelve regiments of cavalry (4,500 men) and about 40 guns. In November each of the battalions had contained 700 men, giving Soult just over 27,300 infantry. If the French had lost one third of their army during the pursuit, this would still have left them with 20,000 infantry. Some French accounts gave Soult only 13,000 infantry, an average of only 333 for each battalion, which would suggest that the French had lost half of their army without fighting a single battle!
Soult’s army was split into three divisions. Delaborde’s division was on the French right, Merle in the centre and Mermet on the left, with the French cavalry of Lahoussaye and Franceschi to Mermet’s left. Soult noted both of the weaknesses in the British position, and decided to attack the British right flank. A strong artillery battery was placed on the hills opposite Baird’d division. Delaborde and Merle were to attack the British left and centre, to prevent them from moving reinforcements to the right. Mermet’s division was to attack Bentinck’s brigade, and attempt to work their way around his right flank. Lahoussaye’s cavalry was to advance down the valley towards the coast, while Franceshi was to head for Corunna.
Soult’s starting position was on the heights of Palavea and of Penasquedo. This was rugged ground, with no roads along the ridges, and so it took the French until noon on 16 January to get into position. By now Moore was becoming convinced that the French would not attack that day, and so he ordered Paget’s division to return to Corunna to embark onto the transports, but between 1.30 and 2pm the French attack began.
The fighting on the British left, near the river, can be quickly dealt with. Delaborde’s orders were to pin the British in place, but his attack was at best half-hearted. Some fighting took place in the village of Piedralonga, in the valley below the British lines, but this never developed into a serious clash.
The main French attack was on the British right. Here the eight cavalry regiments under Lahoussaye and Franceschi began to move around the British right, eight battalions of infantry (two brigades) from Mermet’s division advanced down the heights of Penasquedo and up the slope towards the British position, Mermet’s third brigade began to advance around the British right flank, and the French artillery bombarded the British lines. Very early in the battle General Baird, the commander on this flank, was seriously wounded when a cannon ball hit his arm, forcing Moore to take personal command. He recalled Paget from Corunna and ordered Fraser to take up his watching position to guard against the French cavalry.
Moore then effectively took command of Bentinck’s brigade. The 4th regiment, at the extreme right of the line, was ordered to throw back its right wing to guard against the flanking move, while the 42nd and 50th regiments were ordered to advance towards the French. The purpose of this advance was to move the British infantry into a position where they could fire volleys of musket fire into the French columns. Heavy fighting soon followed. After the Guards were called in from the reserve the French were forced to retreat.
This phase in the battle also saw General Moore fatally wounded by a French cannon ball, which hit his left shoulder. He was removed to the rear, and survived long enough to know that the battle had been won. Command devolved to General Sir John Hope.
The French soon renewed their assault on the village of Elvina. This time Mermet’s division was supported by the left hand brigade of Merle’s division. In response the British moved Manningham’s brigade from the centre-right to reinforce Bentinck. The British reinforcements attacked Merle’s columns, and after heavy fighting the French were forced to withdraw for a second time. By now it was almost dusk, and the fighting died down. A limited amount of skirmishing went on in the valley bottom, but neither Soult nor Hope had any real interest in renewing the battle.
While the main fighting had been going on around Elvina, Mermet’s third brigade and the French cavalry had moved around the right of the British position. Here they were met by Paget’s division. His first response to the French advance had been to move the 95th Rifles forward into the half mile wide gap between the Monte Moro and the heights of San Cristobal. He had then reinforced them with the 52nd, and finally with the rest of his division.
The fighting in this gap fell into two separate categories. On Paget’s left, two of his regiments clashed with Mermet’s infantry. They were now under attack from two directions, with Paget to their left, and the 4th on the hilltop to their front, and were soon forced to retreat back towards their starting point. To Paget’s right his remaining three regiments held off Lahoussaye’s cavalry. The valley bottom was very poor ground for cavalry, split up by a large number of rough stone walls, and the French cavalry were never able to gain any momentum. Eventually they too were forced to retreat.
On the far left of the French lines, Franceschi’s cavalry advanced toward Corunna, but they then sighted Fraser’s division on the hillside outside Corunna. Finally, when Lahoussaye’s cavalry retreated, Franceschi was forced to retreat to avoid being cut off.
Casualty figures on both sides are uncertain. On the British side most regimental returns tended to lump the losses suffered at Corunna in with the losses suffered on the retreat. Fortunately a few of the most heavily involved units did keep separate records. The 50th regiment lost 2 officers dead and 5 wounded and 180 casualties in the rank and file, while the 42nd lost 39 dead and 117 wounded, including 6 officers. In Paget’s force the 95th suffered 12 dead and 33 wounded and the 52nd suffered 5 dead and 33 wounded. In his first report of the battle, Hope estimated his losses at 700-800, which was possibly too high.
The French losses were probably much higher, although little direct evidence survives. Le Noble’s biography of Soult gives the figures at 150 dead and 500 wounded, a clear underestimate. Marshal Jourdan reported a figure of 1,000 casualties. Colonel Fantin des Odoards, commanding the 31st Léger in Mermet’s division reported that his unit alone suffered 330 men, and the rest of Mermet’s division suffered just as heavily, so this one part of Soult’s army probably suffered at least 1,000 casualties, amongst them General Gaulois, killed in the battle, and General Lefebvre, who was badly wounded. French losses were probably at least 1,500. Soult’s own reports on the battle are no help – in his first report, when the defeat was fresh, was downbeat, and he claimed that he was unable to do any more without large reinforcements. Two days later, after the British had completed the evacuation, he had changed his tone, and was claiming that it was his “success” in the battle that had forced the British to evacuate, a nonsensical claim.
At 9pm on the night of the battle the British began to withdraw from the Monte Moro, only leaving pickets behind. That night they began to embark on the transport ships, and by the end of 17 January all but Beresford’s brigade was safely onboard their ships. Beresford’s rearguard embarked from a safe point behind the citadel on 18 January. The commander of the Spanish garrison, General Alcedo, waited until the British were safely out to sea, and then surrendered to the French. Soon afterwards he changed sides, and joined the forces supporting King Joseph.
The evacuation from Corunna saved the only field army the British possessed at the time. Although it was not realised at the time, Moore’s campaign had fatally disrupted Napoleon’s own campaign in Spain, preventing him from moving into Portugal. Moore’s reputation suffered at the time, partly because he was seen as having mishandled the retreat and partly because the survivors of his army sailed straight to British ports, where their condition caused a certain amount of outrage, but it has now recovered. All of his actions were influenced by his knowledge that the force under his command was not just one British army, but the only available British army.
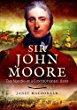 Sir John Moore - The Making of a Controversial Hero, Janet MacDonald.
A full length biography of Sir John Moore, best known for the battle of Corunna and for training the rifle corps at Shorncliffe. As this book proves, he had an active and varied career, serving on Corsica, in the West Indies, Ireland, Holland, Egypt, Sicily and Sweden as well as in Spain and Portugal, so as well as providing a biography of Moore, this book also gives us a cross-section of the British army's activities during the Revolutionary and Napoleonic Wars. [read full review]
Sir John Moore - The Making of a Controversial Hero, Janet MacDonald.
A full length biography of Sir John Moore, best known for the battle of Corunna and for training the rifle corps at Shorncliffe. As this book proves, he had an active and varied career, serving on Corsica, in the West Indies, Ireland, Holland, Egypt, Sicily and Sweden as well as in Spain and Portugal, so as well as providing a biography of Moore, this book also gives us a cross-section of the British army's activities during the Revolutionary and Napoleonic Wars. [read full review]
 History of the Peninsular War vol.1: 1807-1809 - From the Treaty of Fontainebleau to the Battle of Corunna, Sir Charles Oman. The first volume of Oman's classic seven volume history of the Peninsular War, this is one of the classic works of military history and provides an invaluable detailed narrative of the fighting in Spain and Portugal. This first volume covers the initial French intervention, the start of the Spanish uprising, the early British involvement in Spain and Portugal and Napoleon's own brief visit to Spain.
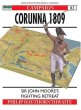 Corunna 1809, Philip J. Haythornthwaite. A 96 page Osprey campaign book written by one of the leading authors on the Peninsular war. It is packed full of 3 D maps, colour artist plates and black and white images and some contemporary photographs of the battle area. It is better organised and laid out than many Ospreys which makes for better reading and includes orders of battle for the forces involved [see more]