|
|
|
|
One of the great controversies of naval warfare has always been over the right of neutral trading nations during times of war. The British position had always been that denying their enemies their trade was a legitimate part of warfare. As a naval power, blockade was a key part of the British planning for any war.
In contrast, most neutral powers held to the theory of free ships and free trade – neutral ships should be allowed to continue as normal, protected by their flag, or if needed, by their fleet.
The situation was made more complicated by the accepted trading patterns of the period – genuinely free trade was rare during peacetime. Legal opinion tended to divide trade during warfare into two categories – trade that was allowed during peacetime and trade that was not. Most countries restricted trade with their colonies to their own ships – French colonies, French ships – but during wartime were willing to allow neutral ships to take on some of the risk of trade. Britain, as the power most likely to be blockading trade, was not willing to allow this trade.
Another problem was the definition of contraband. By the time of the revolutionary and Napoleonic wars, Britain operated a wide definition of contraband goods that included just about anything that could be of help to the enemy. Neutral trading nations, including the Baltic nations soon to be involved in the armed neutrality, tended towards a narrower definition, which excluded the majority of naval stores.
Some countries tended to adapt whatever attitude suited their alliances at the time. The United States has been particularly prone to switching her position on this issue depending on her involvement in the war in question, supporting free trade while neutral, and the right to blockade once involved in any war. At this time, the American position was strongly pro-free trade, a major contribution to the outbreak of war in 1812.
Britain insisted on the right to ‘visit and search’ ships at sea. This right was an absolutely essential part of any policy of naval blockade, but it was also the main cause of friction between Britain and the neutral powers. There was a widespread legal consensus around Europe in favour of this right, supported by French, Spanish, Swiss and Swedish legal opinion (amongst others).
That did not mean that it was unopposed. A common counter argument was that if ships were in convoy, then a statement by the commander of the naval escort that the convoy contained no contraband goods should be enough. This principle was unacceptable to the British, who could point out that no convoy commander could be entirely sure what was being carried by the ships was protecting, but who also felt that it was an unacceptable principle. Even if the convoy commander was being honest, there was no consensus on the nature of contraband.
A series of incidents involving Swedish and Danish ships brought this issue to the fore. In January 1798 a Swedish convoy, escorted by a single frigate, was searched in the Channel. The frigate offered some resistance – token and as a matter of honour according to the frigate’s commander. However, when the convoy was searched a variety of naval stores were found (including tar, pitch and hemp). This was clearly contraband by British standards, but despite this the Swedes still maintained that the convoy should not have been searched.
The next two major incidents involved Danish ships. At the end of December 1799 a Danish merchantman was seized off Gibraltar, despite some opposition from a Danish frigate. The most dramatic incident came in July 1800. An attempt was made to search a Danish convoy off Ostend. The commander of the escorting frigate refused to give permission, and then fired on the British ships when they continued with the searches. This was more than a token resistance – there were casualties on both sides – and the entire convoy was seized. In the aftermath, the British government attempted to maintain her crucial legal claims while also keeping on good terms with Denmark. The British needed naval supplies from the Baltic, and preferred to stay on amicable terms with Denmark and Sweden (At this time, Norway was part of Denmark). This effort soon ended in failure.
In December 1800, Russia, Denmark, Prussia and Sweden formed the ‘Armed Neutrality’. In effect, this was an alliance aimed at defending their right to trade with the French, although it was framed in broader terms. The prime mover of the Armed Neutrality was Tsar Paul of Russia. In the aftermath of the battle of the Nile, he had joined the coalition being formed against France. One of his main aims was to gain control of Malta, to give Russia a base in the Mediterranean. However, Malta had been captured by Napoleon on his way to Egypt. A British force had settled down to besiege Malta, and after a lengthy siege the French surrendered in September 1800. It was already clear that Britain had no intention of handing Malta over to the Russians, and Tsar Paul had already started to move against British interests.
On 27 August he issued a call for the formation of an Armed Neutrality. Soon afterwards he showed just how neutral that would be by ordering an embargo on all British ships. Sweden’s king, Gustavus IV Adolphus, had recently come of age. He was strongly pro-Russian, and one of his first moves was to visit St. Petersburg. While there, the ‘Armed Neutrality’ was formed.
It had five objectives.
This was entirely unacceptable to Britain, where it was seen as a hostile move, in effect adding the Baltic navies to the French cause. Russia had little or no maritime trade, and so her claims to be defending neutral trade were particularly unconvincing.
Napoleon certainly saw it in a similar way. He announced that he regarded France and Russia to be at peace, and ordered the end of all attacks on Russian ships. He may have had in mind the previous ‘Armed Neutrality’, formed in 1780, during the American War of Independence. At that time, the Royal Navy was too stretched to take any action, and the armed neutrality achieved its aims, severely weakening Britain’s position in the war. This time was to be different.
A small fleet had been sent to Copenhagen in 1800 after the seizure of the convoy off Ostend. After the formation of the Armed Neutrality, a stronger fleet was assembled. This fleet was to proceed to the Baltic, and disrupt the Armed Neutrality by force. It had enough ships of the line to fight a full fleet action with any one of the Baltic fleets, and enough smaller ships to attack a city. It also carried a full infantry regiment (the 49th), two rifle companies from the 95th regiment and some artillery.
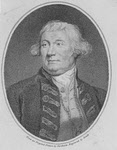
Command of the fleet was given to Admiral Sir Hyde Parker, mostly on the grounds of seniority. Third in command was Rear-Admiral Thomas Graves. However, the star of the expedition, and the main reason for its enduring fame, was the second in command. Vice-Admiral Lord Horatio Nelson, the hero of the Nile and of Cape St. Vincent, and the navy’s most brilliant tactician, was in England, and out of favour. He had returned from Naples with Lady Emma Hamilton in tow (or possibly the other way round!). Their affair was already well known before they returned to England, and Nelson’s conduct was felt to be totally inappropriate. The Admiralty felt that Nelson needed to sent back to sea as quickly as possible, and the Baltic expedition was to hand. Thus, at the start of 1801, Nelson joined Sir Hyde Parker’s fleet as second in command.
The expedition had three enemies to deal with. Simply because of their position at the entrance to the Baltic, the Danes would have to be dealt with first, probably at Copenhagen. Once the Danes were neutralised, the fleet was to enter the Baltic, where its main objective would be to defeat the Russians, seen as the prime movers of the Armed Neutrality. The Swedish fleet would be dealt with if it tried to intervene, but was not a prime target.
When Nelson joined the fleet in early 1801, he found rather less action that he would have expected or liked. Admiral Parker had little recent experience of action, and had spent most of his career in hotter climes. He was in no hurry to enter the Baltic in winter. He was said to be waiting until after a ball that his new young wife was eager to attend, and it took all of Nelson’s efforts to get Parker to leave.
Initial relations between Nelson and Parker were distant. They had served together before, so were not strangers. However, Parker found himself in an awkward situation. He was twenty years older than Nelson, and his senior officer, but it must have been clear to him that Nelson would probably dominate the expedition.
The fleet sailed on 12 March. Nelson still had no idea what Parker’s plans were. The gap between them appears to have been closed by a turbot! Parker was known for his love of good food, and so when one of Nelson’s officers caught the fish, it was immediately requisitioned and sent over to Parker. The fishy gift appears to have done its job. On 14 March, Nelson received a note outlining Parker’s plans. Ten days later he was willing to send Parker a memorandum expressing his views on how the campaign should be conducted. Unsurprisingly, he favoured bold action.
Four days later, the fleet reached the Naze (off the southern tip of Norway). The next two days saw severe gales, so on 21 March Parker anchored outside the Sound (the stretch of water between Sweden and the Danish island of Zealand, partly so that his fleet could come back together and partly to decide what to do next.
![]() Map of the approaches to Copenhagen
Map of the approaches to Copenhagen
Parker had to choose between sailing through the Sound or the Belt (the sea separating the island of Zealand from the Danish mainland). The Sound was the quickest route, and the safest water, but was guarded by a Danish fortress at Helsingor (Hamlet’s Ellsinore), and a Swedish fortress at Helsingborg. Once past that barrier, the fleet would be within 20 miles of Copenhagen. In contrast, the Belt was relatively unguarded, but was more dangerous water, especially for larger ships. It was also the longer route, involving a voyage of at least 200 miles.
Parker’s first choice was the Belt, but after sailing some way along the coast of Zealand he decided to consult one of his captains, who was familiar with the Baltic and with Nelson. Captain Murrey recommended the Sound, while Nelson’s response was ‘I don’t care a damn by which passage we go, so that we go fight them!’.
Nelson’s thinking at this point can be seen in his decision to transfer his flag from the 98 gun St. George to the 74 gun Elephant on 29 March. While Parker was still worrying about how to reach Copenhagen, Nelson was already planning his attack.
Parker now decided to use the Sound, but first he approached the Governor of Kronborg Castle (Helsingor) to see if he could be persuaded not to fire. The Governor’s response was that he had orders to fire on the British fleet if it attempted to pass into the Sound. Despite this, at 6 a.m. on 30 March, the fleet weighed anchor and sailed into the Sound.
An hour later, they came under fire from Kronborg Castle. However, the Swedish guns on the opposite shore remained silent, allowing the British ships to sail out of range of the Danish guns. The only British casualties came when a gun exploded while being fired.
Four hours after weighing anchor, the British fleet anchored in two lines between the islands of Van (Hveen) and Amager, in the heart of the Sound. Once there, Parker decided to reconnoitre the defences of Copenhagen. In the frigate Amazon, Parker, Nelson, Rear-Admiral Graves (the third in command) and the Captain of the Fleet (Captain Domett, effectively Parker’s deputy), looked over the Danish defences.
That evening Parker held a council of war on his flagship. Nelson was never a fan of councils of war on the grounds that they inevitably led to inaction. As he expected, several other officers suggesting delay, pointing out all sorts of potential problems, from the strength of the Danish defences to the potential threat from the Russian fleet.
It took all of Nelson’s enthusiasm to overcome this mood, but overcome it he did. Eventually he offered to attack Copenhagen with ten ships of the line and the smaller ships. Much to his credit, Parker accepted this offer and gave Nelson twelve ships of the line and complete control over the attack.
The Danish plan was simple. Their fleet was moored along the shore at Copenhagen, turning their ships of the line into gun batteries. It was generally accepted that the increased stability of a land based gun battery gave it a massive advantage against naval guns. The Danish fleet was supported by the Trekroner gun battery (The Three Crowns, so named after the union of Denmark, Norway and Sweden). This was a gun battery built on piles driven into the foreshore. Finally, there were a series of fixed gun batteries built on land. The Danes were fighting from a very strong position. British fleets fighting on the defensive had resisted strong attacks from weaker positions.
The British plan was much more risky. The heavier ships in the British fleet were too large to take part in any attack against the Danish position. Nelson requested a squadron made up of 74-gun ships and below. These ships could operate in shallower water than the three-deckers, important in the unknown shallows that defended the Danish position.
![]() Map of the area around Copenhagen in 1801
Map of the area around Copenhagen in 1801
At 7 in the morning on 1 April, Nelson scouted out the Outer Channel for a second time. Having done this, he paid Parker a final visit, and then at half past two, taking advantage of a short-lived northerly breeze, Nelson’s squadron sailed down the Outer Channel, and anchored south of Copenhagen, two miles from the Danish fleet.
Once there, the detailed planning began. Captain Hardy was sent out in a small boat to take soundings in the King’s Channel. Under cover of darkness he was able to get remarkably close to the Danish line and take accurate readings of the approaches that the British were going to have to use. His soundings suggested that the water was deepest nearer the shore. Unfortunately, this information appears not to have been used on some of the ships, as will be seen below.
Meanwhile, Nelson was dictating a detailed plan of action. His actions before the battle of Copenhagen disprove the idea that Nelson always charged recklessly into battle. Copenhagen gave him the chance to study an enemy position in detail and come up with a detailed plan to defeat them. He continued to dictate this plan until the early hours of the morning, not stopping until one in the morning, at which point his clerks began to copy the orders.
Nelson’s plan involved all of the ships under his command. Seven of the frigates, commanded by Captain Riou of the Amazon were to attack the ships at the northern end of the Danish line and in the harbour mouth. Captain Rose of the Jamaica, with six gun-brigs, was to take up position at the southern end of the Danish line, and rake it (fire along the line). The bomb ships were to position themselves outside the main British line, and cast their shells over the top of the British ships. The British troops were to capture the Trekroner batteries, once they had been silenced.
The British ships of the line were to follow a complex plan. Each of the British ship had precise instructions. The intention was to attack the southern end of the Danish line first, as it was the hardest part of the line to reinforce. The rest of the fleet was to pass to the starboard of the first ships, and attack the northern end of the line. This was to take two of the British ships too close to the Middle Ground shoals, taking them out of the battle.
The Danish defence forces can not be called a fleet. The line of ships moored along the shore contained seven ships of the line, each with the masts and riggings removed to make them less vulnerable. They were supported by eleven floating gun batteries. These included some ‘hulks’ – obsolete ships of the line that could still carry a strong battery of guns, transport ships and old east Indiamen. Some of the eleven were tiny – the Elven was a 6-gunned Sloop, and none carried more than 24 guns.
Another force of ships of the line and frigates was moored in the entrance to Copenhagen Harbour, to block any British move against the harbour. In the even, the wind meant that while Parker’s division of the fleet was unable to take part in the battle, this Danish reserve was also unable to intervene (Click here for a full list of the Danish ships).
The British fleet was a strong one (click here for a full list of the British ships). The ships of the line included two three-deckers (Parker’s flagship HMS London and Nelson’s HMS St. George). There were eleven 74-gun ships, five 64s one 54 and a 50, as well as seven frigates. Aware of the potential need to operate in shallow waters or bombard land targets, the fleet contained an unusually large number of smaller ships – sloops, cutters and schooners, as well as a force of bomb ships in case there was a need to bombard a city. This was a very capable fleet, stronger than Nelson’s fleet at the Nile, although his plan at Copenhagen did not involve the three deckers. While this only eliminated two ships from the fleet, one of them was his own flagship, the St. George.
Nelson’s squadron, used in the attack on the Danish line, consisted of twelve ships of the line (seven 74s, three 64s, one 54 and a 50). He also had the fleet’s frigates, gunboats and bomb ships. The rest of the fleet remained with Admiral Parker. His role was to block in the Danish ships still in Copenhagen harbour, and if possible to attack the Trekroner batteries at the northern end of the Danish defences. On the day, the wind prevented him from doing this.
On the morning of the 2 April, the wind was from the correct direction for Nelson’s plan to be carried out. By eight in the morning, the captains of the British ships had their orders. At half past nine the fleet was ordered to weigh anchor.
![]() Detailed map showing the position of the ships.
Detailed map showing the position of the ships.
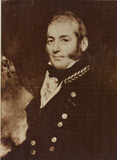
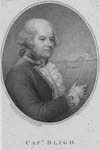
At the head of the British line was the Edgar. She sailed past the first four Danish ships, exchanging fire, before taking up her position against the fifth Danish ship, the Jylland, a two-decked ship of the line. Second was the Ardent, who passed by the Edgar and took up position against the sixth and seventh Danish ships (a frigate and a floating battery). The Glatton, commanded by the infamous captain Bligh, took up position against the Danish flagship Dannebrog (later to be replaced by Nelson’s flagship the Elephant. The rest of the British fleet was intended to take up station in a similar way.
Three of the British ships did not make it into the action. The Agamemnon had anchored too far east, found herself unable to sail around the shoal and took no part in the battle. Both the Bellona and the Russell ran aground on the Middle Ground, although the distances involved were so short that they were both able to play a limited role in the fighting.
Nelson was able to readjust his line to compensate, but the loss of three ships of the line meant that the head of the line, opposed to the Trekroner Fort, was much weaker than intended. The British line was fully in place by 11.30, when the Defiance took up position against the Trekroner. Captain Riou’s frigates also ended up fighting the Trekroner.
The fighting at Copenhagen was of a very high level of intensity. Many of the Danes were inexperienced, but they were fighting close to land, to defend their capital, and with the Crown Prince (the effective ruler of Denmark) watching from the shore. The Danes were easily able to reinforce the ships, even replacing the captain of one ship mid-battle.
After three hours of intense fighting, Parker began to worry. His squadron was still slowly edging towards the fighting, but was still some way away from being able play an active part in the battle. From his distance, the Danish fire appeared to be undimmed. Three British ships of the line were grounded, and the frigates were under fire from the Trekroner. Parker was beginning to consider giving the signal to discontinue the action. Captain Otway, Parker’s flag-captain, managed to persuade Parker to let him row to the Elephant to give Nelson verbal orders, giving him permission to withdraw if he felt the need, but before Otway could reach Nelson, Parker gave the order anyway.
Parker did not expect Nelson to automatically obey the order. Eyewitnesses report that he said ‘If he is in a condition to continue the action successfully, he will disregard it; if he is not, it will be an excuse for his retreat and no blame can be imputed to him’. This shows a good understanding of Nelson’s character, but not the steady nerve needed to command in battle. While Nelson could be relied on to act as Parker intended, there was always the risk that his captains would see the order and obey it. This is what happened to Captain Riou and his frigates.
Located at the northern end of the line, they could see Parker’s signal rather more easily than any signals flying on Nelson’s ship. Riou had little choice but to obey, but as his ship was turning to leave the battle, he was cut in two by enemy fire.
It was at this point that the famous incident of the blind eye occurred. Nelson had obviously been expecting some sort of signal from Parker, as he had ordered his officers to concentrate their attention on the Danish flagship, not the British one, but eventually he had to acknowledge Parker’s order to withdraw.
Our best eyewitness for the events on the Elephant is Colonel William Stewart, the commander of the infantry. Once he had admitted to having seen Parker’s signal, he ordered the signal to be acknowledged, but not repeated, meaning that his own squadron was expected to keep obeying Nelson’s own order to stay in close action.
After a couple of minutes, he turned to Foley, his flag captain, and said ‘You know, Foley, I have only one eye. I have a right to be blind sometimes’. He then put his telescope to his blind eye, and said ‘I really do not see the Signal!’
This was typical of Nelson. Only a commander with his enormous self confidence would have been willing to ignore a direct order from his commander in chief. His characteristics were well known in the fleet, and Parker was well aware that he could trust his subordinate not to obey the order to discontinue.
What Parker could not see was that the Danish fire had already started to slacken. The men to reinforce the Danish ships had to be taken from the shore batteries, weakening their fire. The ships themselves were increasingly crippled. The first break in the Danish line came at about 2 pm, when the Nyborg, 4th in the Danish line, attempted to make a dash for the harbour, taking the 12th in line Aggershuus in tow. Both ships quickly sank. A third ship, the frigate Hjaelperen managed to escape. By half past two, most Danish fire had ended.
This was not quite the end of the battle. The Trekroner battery was still firing, while the inexperienced crews of several Danish ships kept on firing after their officers had signalled their surrender. If the battle had been against the French, Nelson would have had no qualms about continuing until the enemy was utterly destroyed, but he had no such personal grudge against the Danes.
Accordingly, as the Danish fire slackened Nelson sent a letter to Crown Prince Frederik, offering a truce (Nelson's first letter to the Crown Prince). This note has sometimes been taken as a sign of Nelson’s weakness, but his motivation appears to have been largely humanitarian. Many of the Danish ships had actually surrendered, but there was still sporadic firing, making it too risky for the British to take their prizes. If there had been no truce, Nelson would probably have sent in the fire ships and burnt out the Danish ships.
Fortunately, it did not come to that. The Crown Prince sent back a letter asking what the intention behind Nelson’s letter had been. This letter was sent back under a flag of truce, at about three in the afternoon. When this flag reached the battle, all firing stopped. Nelson replied with a second letter (Nelson's second letter to the Crown Prince), where he offered to all the Danes to remove their wounded, while the British would take off the unwounded prisoners, and then seize or burn the surrendered ships. In the event, only one Danish ship was seized (the Holsteen).
The events of the day did not end with the fighting. The Danish flagship Dannebrog had been reducing to a burning wreck in the fighting. At about half past four she exploding, killing over 250 men. In all the Danes probably suffered 790 killed and 910 wounded, compared to 253 killed and 688 wounded. Copenhagen was one of the bloodiest naval battles of the entire revolutionary and Napoleonic wars.
Most of the British ships had sustained serious damage during the battle. The danger that Parker’s order to quit the battle would have exposed them to was demonstrated as they moved away from the Danish shore. The Monarch ran onto a shoal and had to be pushed over it by the Ganges. Both the Elephant and the Defiance ran aground, and could not be pulled free until nightfall. How the already badly damaged British ships would have coped if the Trekroner guns were still firing can only be imagined.
Having understandably left the conduct of the battle to Nelson, Parker was now equally willing to let him handle the diplomacy. The morning after the battle, Nelson was sent into Copenhagen to meet Crown Prince Fredrick. Fredrick had been acting as his father’s regent for some years, and was to succeed him as Fredrick VI in 1808.
There are conflicting accounts of Nelson’s reception in Copenhagen. All agree that crowds gathered to watch Nelson on his way to the palace. He was offered a carriage, but chose to walk through the crowds. Danish accounts suggest that he was watched in silent respect. British accounts suggest cheering crowds calling out ‘Viva Nelson’. Neither account is likely to be entirely true. Nelson had become a hero across Europe after the Nile, and so some popular acclaim was likely. Merchants involved in the British trade were unlikely to have supported the armed neutrality. On the other hand, the British fleet had been threatening to bombard the city on the previous day, and the Danish wounded must have been on many minds.
The negotiations with Crown Prince did not go well. Nelson did not believe that there was much hope of a peaceful resolution to the trade issues. The Danes denied that their actions were aimed against Britain, and refused to budge on their claim to free trade.
Leaving the main issue unresolved, the negotiations now moved on to an armistice. The British aim was to get a long enough armistice to give them time to deal with the Russians, seen as the main enemy. Eventually, on 9 April a 14 week armistice was agreed.
The armistice allowed the British free access to Copenhagen. The Danes left the Armed Neutrality for the duration of the armistice. In return, Copenhagen was not attacked and the Danish prisoners were returned on parole. Parker was free to move into the Baltic to confront the main enemy.
After recovering at Copenhagen, the British fleet moved on into the Baltic. There, they discovered that events in Russian had already given them the results they had been sent to achieve. On 24 March, Tsar Paul had been assassinated, and replaced by his son Alexander. The new Tsar began his reign by pulling back from many of his father’s policies, amongst them armed neutrality (later in the wars, Alexander was to be both enthusiastic ally and implacable enemy of Napoleon).
News of the new Russian ruler and his attitudes spread slowly. By 23 April, the Russian minister at Copenhagen was certain that the new Tsar would not risk war with Britain, but Nelson for one was not convinced. The British fleet had spent most of the time since the battle anchored just south of Copenhagen, much to Nelson’s annoyance. Parker was unwilling to risk the voyage to Russia while the Swedish fleet threatened his rear, and had remained inactive.
On 5 May, orders for his replacement reached the fleet. Parker was recalled, and Nelson given command of the fleet. Amongst his orders was a command not to let the Swedish and Russian fleets combine. The Swedish fleet had taken shelter in Karlskrona, on the south coast of Sweden. Nelson sent the commander of the Swedish fleet in which he stated he had ‘no orders to abstain from hostilities, should I meet the Swedish fleet at sea’ – in other words he would attack on sight. The Swedish fleet decided to remain firmly in port.
Having detached six ships of the line to watch Karlskrona, Nelson took the remaining eleven to Reval (modern Tallinn), where he hoped to find a Russian fleet. When he arrived on 14 May, he discovered that the fleet had escaped up the Gulf of Finland to the strongly defended Russian naval base at Kronstad, near St. Petersburg. He also discovered that negotiations to end the Armed Neutrality were underway. In order to avoid damaging the negotiations, Nelson withdrew from Reval on 17 May. Two days later, the Russian and Swedish trade embargoes were withdrawn. A month later Nelson was replaced as commander in chief, largely on grounds of genuine ill health.
The long term results of the battle of Copenhagen were unsatisfactory. Even before Nelson was replaced, the Danes were trading with the French. The British seizure of the Danish West Indies had helped stir up anti-British feeling. The main issue of free ships vs. the right of blockade had not been decided. Another British expedition had to be send to Copenhagen in 1807 to prevent the French gaining control of the Danish navy. Nelson’s hardest fought victory was also probably the least influential.
Nelson's first letter to the Crown Prince
Nelson's second letter to the Crown Prince
 Clowes, W.L., The Royal Navy, vol. IV, Chatham Publishing, 2003 (reprint). This is an invaluable reprint of this massive, detailed history of the Royal Navy. Volume IV covers minor operations of the American War of Independence, and the entire period from 1793 to 1802. At over 600 pages, and with more than 100 illustrations, this is a immensely valuable resource for anyone interested in naval history [SEE MORE]
 Nelson's Navy, Brian Lavery. A fascinating book that covers every aspect of life at sea in Nelson's navy, from ship building to the daily life of the sailors. If you have any interest in naval warfare, or in life at sea, then this book is essential for you.