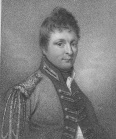
General Rowland Hill, 1782-1842
|
|
The siege of Burgos (19 September-22 October 1812) was the disastrous end to otherwise successful Salamanca campaign, and his failure outside Burgos forced Wellington to retreat back to the Portuguese border, ending the year almost where he had started it.
At the start of 1812 Wellington captured the key fortresses of Cuidad Rodrigo and Badajoz, allowing him to launch an invasion of Spain. His first target was Marmont's Army of Portugal, and after a month-long campaign inflicted a major defeat on him at Salamanca (22 July 1812). Marmont was wounded during the battle, and command passed to General Clausel, who was forced to retreat behind the Douro. Wellington soon abandoned the pursuit of Clausel and occupied Madrid, forcing King Joseph to abandon his capital and retreat towards Valencia, where Suchet had a third French army. Soult was also forced to evacuate Andalusia, and was also heading towards Valencia. If Joseph, Suchet and Soult united their armies they would have 85,000 men. Clausel still had 40,000 men in the Army of Portugal, and Caffarelli's Army of the North was also theoretically available. In contrast Wellington could count on 60,000 Anglo-Portuguese troops and an unknown number of Spanish soldiers. This included General Hill's detached force, which had been left in the south to watch Soult, and was marching to Madrid.
Wellington had moved to Madrid in the hope that this would convince the Spanish to unite their armies, but he was soon aware that this was unlikely to happen. At the same time Clausel managed to restore order in his army far quicker than Wellington had believed possible, and on 13 August he launched a counter-attack in the north. His main force pushed the Spanish out of Valladolid, while Foy's division was sent to lift the sieges of Toro, Astorga and Zamora. Toro was saved on 17 August and Zamora on 22 August, but Astorga surrendered on 18 August, two days before Foy would have arrived in the area.
Wellington decided to try and push the Army of Portugal as far away from the Douro as possible, and then return to Madrid to deal with Soult and King Joseph. He left Madrid on 31 August, taking the 1st, 5th and 7th Divisions, Pack's and Bradford's Portuguese divisions and Bock's and Ponsonby's dragoons, with the aim of joining Clinton's 6th Division, which had been left to watch Clausel. The rest of the army was left at Madrid to watch Soult, at first under Charles Alton, but later under Hill. Wellington's part of the army concentrated at Arevalo on 4 September. At this point Clausel's main force was at Valladolid.
Wellington crossed the Douro on 6 September and found Clausel drawn up as if he intended to defend Valladolid. This was actually a bluff, and all he was doing was giving his train time to escape and to allow Foy to move from a potentially dangerous position on the French right. Wellington decided not to risk an attack, and Clausel was able to withdraw on the following day. Clausel retreated towards Burgos, with Wellington pursuing rather slowly. On 16 September Clausel paused at Celada, but moved off early on the following morning before Wellington could attack. On 18 September Clausel passed Burgos itself, but did leave a garrison in the castle before moving further towards the Ebro.
The Siege
The siege of Burgos thus began on 19 September, when the 1st Division and Pack's Portuguese brigade surrounded the castle (Burgos itself fell without a fight). Wellington pushed his other three divisions past Burgos and onto a defensive position from where he could guard against any attempt to interfere with the siege. His performance so far had not been impressive - Clausel had been pushed back, but his army hadn't been damaged in any way, which was the whole point of Wellington's advance.
Burgos castle was located on a hill to the west of the city. The castle was almost overlooked from the north by the hill of San Miquel, which the French had planned to fortify strongly, but the money hadn't been available and only a limited hornwork had been built. At the centre of the castle was the donjon, which now contained the main powder magazines on the lower floors and an eight-gun battery on the roof, and the church of S. Maria la Blanca, which contained the main stores. There were two complete lines of defences on all sides, and a third line to the west, where the slopes of the hill were most gentle. The outer line of defences followed the original medieval walls, and hade been updated with shot-proof parapets, palisades and a 30ft wide ditch with a counterscarp. The inner defences were strong earthworks, effectively the equivalent of well built field works.
The garrison was commanded by the very able Brigadier General Dubreton. He had 2,000 men under his command - 1,600 infantry made up of two battalions from the 34th Line and one from the 130th, most of the rest artillerymen. He had eleven field guns, six mortars and howitzers and a number of 9, 12 and 16 pounders.
Wellington hadn't brought a proper siege train with him, and only had three iron 18-pounders and five 24-pounder howitzers (these were both inaccurate and ineffective against fortifications). Burgos would probably have fallen quite quickly if the Allies had been properly equipped with siege guns, but Wellington's guns were totally inadequate to the task. One of the big mysteries of the siege is why Wellington didn't immediately summon better guns, but the answer is probably that he never quite expected the siege to last for any length of time. Wellington was also short of engineers, with only five officers from the Royal Engineers and eight men from the Royal Military Artificiers with the army.
Wellington's first task was to capture the outlying hornwork of San Miquel, which would provide a good position for a gun battery. On the night of 19-20 September Pack's Portuguese attacked, without any artillery bombardment, but with limited support from 300 men who would provide musket fire and three light companies, who would attack the open rear of the fort. The main attack ended in total failure. The Portuguese reached the walls, but their ladders were too short, and they then retreated after suffering heavy losses. However the light companies found the rear of the fort only lightly guarded and were able to break in. The French garrison panicked and fled, despite still outnumbering the attackers. The Allies lost 421 dead and wounded in this assault, the French 198 men, including 60 prisoners. The French guns on the castle then opened fire, forcing most of the Allied troops to evacuate the hornwork. 300 men managed to hold on in the interior. Work began on the first gun battery on the night of 20-21 September and it was soon ready for two of the 18-pounders and three of the howitzers.
Before beginning a bombardment, Wellington decided to risk a direct assault on the outer line of defences. His target was a point at the north-western corner of the walls, where a hollow road allowed the attacking troops to get within sixty feet of the wall without being detected. 400 volunteers from the 1st Division were to make the main attack, supported by a second attack on the southern wall, to be carried out by cacadores from the 6th Division.
The attack, which was made on the night of 22-23 September, was a total failure. The Portuguese came under fire the moment they began to move, and didn't reach the walls. The troops from the 1st Division got to the wall, and even got their ladders up, but none were able to reach the top of the walls. The commanding officer of the assault was then killed, and the survivors fled. The force of 400 men had suffered 158 casualties and achieved nothing.
The next plan was to try and conduct a more regular siege, aiming at the western end of the castle, where the shallow slopes made it more vulnerable. A trench was dug to within sixty feet of the walls, and work then began on digging a mine. At the same time the guns on the hill of San Miguel opened fire, but with little impact.
The miners believed that they had reached the walls at noon on 29 September, but when the mine was detonated at midnight on 29-30 September it became clear that they had actually fallen a little short. Some of the stone wall collapsed, but the earthworks behind weren't touched. Even so the 300-strong storming party that had been gathered still attacked, hoping to use the collapsed stones to reach the top of the walls. Some did reach the top of the walls but were repulsed, but most ended up reaching the wrong part of the walls. This time the repulse only cost the Allies 29 casualties, but it had an impact on their morale.
Wellington still wasn't ready to give up. A second mine was constructed, to the south of the original one, and at the same time a new gun battery was built facing the western end of the castle. The three 18-pounders were moved into the new battery early on 1 October, but the French counter-battery fire was so effective that two of them were disabled before even opening fire and all three had to be withdrawn that night. A better placed battery was built, in a position less exposed to French fire, but even that was quickly knocked out by the French.
By 4 October Wellington was ready for another attack. The two working 18-pounders, which were now back in their original position, opened fire on the site of the original mine explosion, and rapidly created a sixty foot long breach. The second mine was detonated, and brought down 100 feet of the rampart. Wellington ordered the 2/24th Foot to attack, and they achieved one of the few clear successes of the siege, forcing the French to abandon the outer walls and retreat behind the second line of defences on the western end of the castle (the earthworks).
Preparations now began for an attack on the second line of defences. Saps were dug forward towards the new line, while the artillery fired on the inner walls and the junction between the second and inner lines. Dubreton wasn't willing to let the British work uninterrupted, and at 5pm on 5 October he launched a sortie, which hit the workmen in front of the northern breach, inflicting severe damage before being forced back after inflicting 142 casualties and taking 200 picks and shovels.
Work in the saps continued on 6-7 October, but with little success. Dubreton launched a second sortie on the night of 8-9 October, which undid most of their limited progress. One more the Allies lost heavily, suffering 184 casualties in the fighting. The French only suffered 33 casualties. Work on these saps almost stopped after this sortie.
By now Wellington was also running out of powder for his few guns. He was saved for the moment by Sir Home Popham, who had recently captured Santander, and now managed to transport 40 barrels of powder to Burgos. Popham also offered to move heavy guns, but Wellington turned them down. He didn’t finally agree to this until 2 October, and on 9 October Popham began to move two 24-pounders across the mountains towards Burgos. By 18 October they were at Reynose, only fifty miles from Burgos, but by then Wellington had decided to abandon the siege, and so they were sent back.
Wellington's main efforts after 9 October were in the north, where his few guns began to create a third breach, this time where the third line of defences met the second line, on the northern side of the castle). Unfortunately this time he didn't order an immediate assault, and the French thus had time to built new defences. At the same time a mine was built under the Church of San Roman, on the southern side of the walls. Wellington decided to combine these two lines of assault for his final attack.
The attack would start with the explosion of the mine. The 9th battalion of cacadores, supported by the 1st regiment of Asturias, would occupy the ruins, and a brigade from the 6th Division would wait in the nearby streets ready to take advantage of any opportunities that developed on that front.
In the west part of the Guard's Brigade would attack from the captured part of the defences towards the second line, hoping to take advantage of damage that had been done to the defensive palisades.
Part of the German brigade from the 1st Division was to attack the new third breach, which might get them into the inner defences.
Perhaps the oddest feature of the second and third attacks was how small they were going to be, involving only 300 Guards and 270 Germans.
Unsurprisingly this assault also failed. The mine detonated on time. The Germans managed to get over the outer defences, but only got into the gap between the inner and second lines, and came under such heavy fire that they had to retreat, after losing 82 out of 300 men. The Guards managed to reach the top of the second line of defences, but came under fire from the third line, and had to retreat after ten minutes, after losing 85 of their 300 men. The French only suffered 41 casualties in this attack. In both cases, a larger attack would probably have succeeded, but Wellington was probably overly influenced by the very heavy losses suffered at Ciudad Rodrigo and Badajoz, and didn't want to repeat the experience. Whatever his motives were, this final attack had failed.
By now the French were finally on the move. Souham had replaced Clausel as commander of the Army of Portugal, and his army now began to threaten the covering forces outside Burgos. Caffarelli had joined him with part of the Army of the North, so Wellington was now dangerously outnumbered - the French had around 50,000 men to face his 35,000. Soult, Suchet and King Joseph had finally made contact on 2 October, so the Allied army at Madrid was also now in some danger.
On 19 October the Guard's brigade and the King's German Legion moved to join the 5th and 7th Divisions, leaving one brigade from the 1st Division to blockade the north and western sides of the castle. The south and east was blockaded by Pack's Portuguese. On 20 October Wellington withdrew the remaining guns from the siege batteries, and on 21 October he ordered the siege to be abandoned.
The French suffered 623 casualties during the siege, including 304 dead. The British lost 509 dead and 1,555 wounded or missing.
The Retreat
Worse was to come for the Allies. Wellington's plans to threaten Soult and Joseph if they marched on Madrid failed, and by the time the siege ended it was clear that they French were about to threaten Madrid with some 60,000 men. Wellington was forced to begin a long retreat that only ended when he was back on the Portuguese frontier. On 23 October Souham's cavalry attacked the Allied rearguard (combat of Venta del Pozo and Villadrigo), but failed to take full advantage of their superior numbers. On 24 October Wellington paused on the line of the Carrion River, but his attempt to defend this position failed after the French easily captured Palencia. Elsewhere a second French attack was repulsed at Villa Muriel, but this didn't matter with the line of the river already crossed. Wellington attempted to take up a new position on the opposite bank of the Pisuerga, running upstream from Valladolid, with his left flank protected by the Douro, but this also had to be abandoned after the French managed to get across that river at Tordesillas. By the end of 29 October Wellington's entire army was on the south side of the Douro.
Wellington took up a new position facing the French bridgehead at Tordesillas. He was now given six days to rest, as Souham stopped at Valladolid and Caffarelli departed with his troops, heading back to deal with bad news from the north. This reduced Souham's strength to 40,000 men, making an attack on Wellington's new defensive position too risky.
Any chance of defending the Douro was ended by news from Madrid. Soult and King Joseph were finally on the move, advancing in two columns towards Madrid. On 24 October they reached the Tagus, which Hill had intended to defend. The French were planning to attack on 28 October, but Hill retreated on the night of 27-28 October. By the end of October his army had passed Madrid, heading towards a possible junction with Wellington. A rearguard action at the Puente Larga (30 October 1812), just to the south-east of the city delayed Soult's advance, and his cavalry didn't enter Madrid until 1 November. This allowed Hill to get over the difficult Guadarrama Pass without any incidents by 3 November.
By 4 November Hill and Wellington were only twelve hours apart. However at this point Wellington decided to continue his retreat from the Douro to Salamanca, and so Hill's route was altered, to avoid his moving too far to the north. The French had now got rather badly strung out, and Soult didn't reach Arevalo, on the road towards the Douro, on 6 November, by which time Hill was safely away to the west.
Wellington's new plan was to defend the same positions around Salamanca as at the start of the campaign. Both half of his armies began to move in that direction on 5 November and by the end of 8 June his army was back in a strong defensive position at San Cristobal, north of the Tormes and of Salamanca, while Hill was a little further to the eat, at Alba on the Tormes, although most of his troops were summoned to join Wellington.
Soult and Souham made contact on 7 November, and the French decided to concentrate their forces and try and force Wellington into accepting battle at Salamanca. The French advance guard appeared in front of his new positions on 10 November, and on 10-11 November Soult attacked Hill's position at Alba de Tormes, but without any success. The French eventually decided to try and cross the river further to the south of Alba, after briefly considering trying to cross to the north to try and catch Wellington.
The French needed several days to cross the river, finally making their move on 14 November. Soult's Army of the South was across by the end of the day and the Army of the Centre was following. Drouet had hoped to cross at Alba, expecting it to be evacuated, but Hill blew the bridge and left a garrison in the castle, forcing Drouet to move further south. Wellington was aware of the movement early in the morning, and ordered his entire army to cross to the south bank of the Tormes. By the morning of 15 November Wellington was in position on the Arapiles, the site of his victory at Salamanca, while the French were advancing towards him. Wellington was prepared to risk fighting a defensive battle if the French attacked his strong positions, but not to risk being outflanked. As a result most of the supplies were sent off towards Cuidad Rodrigo, unfortunately travelling along a more northerly route than the retreating troops were soon to take.
Soult had no intention of launching a frontal assault on Wellington's positions, and instead repeated Marmont's tactics of 22 July, but without repeating his mistakes of allowing gaps to open up in his line. By the early afternoon of 15 November Wellington knew that he wasn't going to get a chance to win a second battle of Salamanca, and so ordered a full retreat back to Ciudad Rodrigo.
This final stage of the retreat caused discontent on both sides. On the French side Soult was so determined not to repeat Marmont's mistakes that he missed every chance to attack Wellington. The Allies were thus allowed to escape without having to fight. Very heavy rain set in late on 15 November, making a pursuit more difficult. The French then abandoned any hope of defeating Wellington and split their forces. Soult was sent to press Wellington, while Joseph and the Army of Portugal moved to Salamanca.
On the British side the problems were caused by the terrible weather and by the decision to send the supplies along the wrong road. As a result what should have been a simple march turned into a near disaster which cost Wellington around 3,000 men and caused him to write an angry letter criticising his men. Soult's cavalry pressed the retreating British to a limited extent, and even captured General Paget, and he even managed to get some infantry up, although the resulting combat of San Munoz (17 November 1813) ended with an inconclusive artillery duel across the Huebra River. On the following day the French didn't attack, and once again the only problem for the British was a lack of food. On 19 November Soult retreated east, effectively ending the campaign, while the Allies almost reached Ciudad Rodrigo, and more importantly finally caught up with their supplies.
Although the Burgos campaign had ended in failure and a long retreat back to Portugal, and the French had returned to Madrid, the 1812 campaign had permanently weakened their position in Spain. Soult was never able to return to Andalusia, and large parts of Spain had been permanently liberated. In 1813 Wellington was able to complete the job, defeating the French at Vitoria and forcing them to retreat back to the Pyrenees.
 Salamanca 1812 - Wellington's Year of Victories, Peter Edwards. A look at Wellington's campaigns of 1812, from the sieges of Ciudad Rodrigo and Badajoz to the triumph at Salamanca, the failure at Burgos and the retreat back to Portugal at the end of a year that saw the French permanently forced out of large parts of Spain. A good account of this campaign, copiously illustrated with carefully used eyewitness accounts. [read full review]