|
|
|
|
The combat of Almaraz (18 May 1812) saw a detached British army under General Rowland Hill destroy a key French bridge over the River Tagus, making it much harder for Marmont and Soult to help each other.
In late April Wellington was presented with a series of captured dispatches from Marmont. One of them made it clear just how important the bridge over the Tagus at Almaraz was to his army, and that there was only one division, under General Foy, near enough to support the garrisons. Wellington had already considered an attack on the forts in February, but dismissed the idea because there were three French divisions in the area. Now he decided that the risk was worth it - he could easy detach a force large enough to defeat Foy, and if the bridge was cut, then Soult would struggle to send any help to Marmont during the upcoming Salamanca campaign.
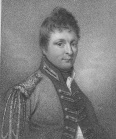
General Rowland 'Daddy' Hill was selected to command the expedition. Hill was warned to prepare for the mission on 24 April, it was mentioned in Wellington's dispatches on 4 May and the official orders were issued on 7 May. Hill was given Howard's and Wilson's British brigades and Ashworth's Portuguese brigade from the 2nd Division, one British cavalry regiment and Campbell's Portuguese cavalry brigade, a total of 7,000 men (probably not counting the engineers and artillerymen).
Hill reached the area of Almaraz early on 17 May. The last barrier between him and the key bridge was the heavily defended Pass of Miravete. His initial plan was to split his army into three. The Portuguese infantry and the artillery were to head along the main road towards the pass to distract the French. Wilson's brigade and the 7th Cacadores were to use a mountain path on the left to hit the key castle at Miravete from the rear. Howard's brigade was to use a similar path on the right and attack the forts defending the bridge.
It soon became clear that this plan wouldn't work. The mountain passes were much harder than expected, and neither flanking column was in place by dawn. The castle and the associated forts were also stronger than expected, and would have needed a regular siege.
Hill spent the rest of 17 May attempting to find another way to attack Miravete, but eventually gave up. His new plan for 18 May was bold but risky. He would use his artillery and part of his infantry to threaten an attack on the castle, while the bulk of the infantry used a gorge to pass by to the right and would then attack the river forts without artillery. Howard's brigade and the 6th Portuguese Line were chosen for this attack.
The French had around 1,000 men around Almaraz. 300, from the centre companies of the 39th Line, were at Miravete. Two companies from the 6th Léger and 39th Line were in Fort Napoleon, on the south bank of the river. The 400 men of the regiment de Prusse and one company of the 6th were in Fort Ragusa on the north bank of the river.
The false attack on Miravete began before 6am, when Hill and the infantry found themselves well placed in cover 300 yards from Fort Napoleon. It took some time for the rest of the column to catch up, and Hill decided to attack with the 900 that had already arrived. The later arrivals were ordered to attack the bridgehead instead.
The attack on Fort Napoleon began soon after six. After some problems caused by short ladders, the British managed to reach the top of the rampart and flooded into the interior of the fort. The French defenders fled towards the bridge-head and across the bridge. The defenders of the bridgehead didn’t stop much longer. By this point the middle pontoons of the bridge had already gone, although it isn't clear who sank them. Hill threatened Fort Ragusa from Fort Napoleon, and the garrison of the second fort also retreated.
Four grenadiers from the 92nd, who had arrived late, swam across the river and towed back some boats. This allowed Hill to occupy Fort Ragusa.
The British lost 189 men in the fighting - 2 wounded during the feint at Miravete, 32 killed and the rest wounded at Fort Napoleon.
French losses were much heavier. Over 250 prisoners were taken at Fort Napoleon, and the total losses were probably around 400.
On the morning of 20 May Hill used captured powder to destroy both forts and the bridgehead. The pontoon bridge was burnt, as were most of the supplies. Hill was then able to return to safety without any interference from Foy.
Both Soult and Marmont assumed that the attack on the bridges meant that they were about to be attacked by Wellington. As a result Soult was even more unwilling than usual to help his fellow Marshal when Wellington advanced towards Salamanca.
 A History of the Peninsular War vol.5: October 1811-August 31, 1812 - Valencia, Ciudad Rodrigo, Badajoz, Salamanca, Madrid, Sir Charles Oman Part Five of Oman's classic history of the Peninsular War starting with a look at the French invasion of Valencia in the winter of 1811-12, before concentrating on Wellington's victorious summer campaign of 1812, culminating with the battle of Salamanca and Wellington's first liberation of Madrid.