|
|
|
|
Despite the sinking of the Bismarck, there remained the spectre of a powerful German strike force breaking out into the Atlantic, as the Bismarck's sister ship, the Tirpitz, was nearing completion in Germany. In 1941 Britain was fighting alone and the success of the U Boat campaign was causing hardship as Britain depended on sea routes to supply the material it needed to prosecute a war against the Axis. U Boats could be attacked and contained to some degree by small destroyers and frigates but the battleships and cruisers of the Kriegsmarine were a different matter entirely. In January 1942 the Tirpitz became operational and left the Baltic for the shelter of the Norwegian fjords. The potential of what she could do to Britain's supply lines was an obsession with Prime Minister Winston Churchill and meant that six battleships (four British and two American) were kept in readiness should she make a dash for the North Atlantic. Therefore the Royal Navy and RAF were kept busy devising methods to take care of the great battleship - some looking at means to eliminate her while she lay at anchor, while others looked at the question of what to do if she sortied.
If the Tirpitz ventured out into the Atlantic Ocean, she would eventually need to seek refuge in the only port that could take her, St Nazaire, especially if she was unlucky enough to suffer damage as the Bismarck did. St Nazaire was the only port along the French Atlantic coast that was capable of accommodating that sort of warship. The enormous Normandie Dock was, at that time, the largest dry dock in the world and was completed in April 1932 to hold the great passenger liner Normandie, and remained at the centre of the shipbuilding facilities that sprung up around the town prior to World War Two. If the Kriegsmarine were denied its use, it would be unlikely that they would risk the Tirpitz in the North Atlantic and instead use her to target the Arctic Convoy routes.
In January 1942, Churchill asked the Armed Forces to once again look at the Tirpitz question and so the new Chief of Combined Operations, Lord Louis Mountbatten, who had taken over the role from Sir Roger Keyes (who had originated a similar raid in World War One on Zeebrugge), was asked to consider an operation against the Normandie Dock. This time a fresh approach was considered. It was known that March would see an unusually high spring tide, which would allow a shallow-bottomed vessel clear passage to approach the port of St Nazaire over the sand banks that dotted the Loire estuary rather than through the dredged and protected shipping channel. The current type of landing ships - converted cross-channel ferries - were unsuitable so whatever ship was used had to be light enough to make it through the estuary but be sturdy enough to carry a large amount of explosive. There was thus a slim chance that such an operation against the Normandie Dock could be mounted and so the planners at Combined Operations started on a draft. By 31 January they had drafted an initial scheme that, while having many uncertainties, could act as an initial framework to build the outline of an operation that was crucial to the war effort.
The initial draft saw the use of two obsolete destroyers that would be specially lightened. The first would be packed with explosives and carry a large team of commandos trained in demolitions. It would ram the outer gate (caisson) of the dry dock and the commandos would disembark and destroy as much of the surrounding facilities as they could. The destroyer would then blow up using time-delay fuses and the commandos evacuate on the second destroyer, which would act as an escort on the way in. The RAF would carry out a number of air raids on the surrounding area while this was going on to divert the enemy's attention. When the plan was presented to the Admiralty they reacted negatively, as they could not agree to the certain loss of one of their destroyers and the possible loss of a second, even though the Normandie Dock was a major target of their own choosing. What they did agree to was the use of the old Free French ship Ourangan as the ramming ship and a flotilla of motor launches and torpedo boats to carry the additional commandos in and to evacuate all the personnel out after the operation. While not perfect, it was now possible to put the operation to the Joint Chiefs of Staff for approval. The enthusiasm of the RAF was also waning, as they did not relish being given targets that they did not pick and the numbers of bombers eventually allotted to the operation fell well short of what was needed. Churchill himself had some misgivings about the operation but approval was eventually given on 3 March and the undertaking codenamed Operation Chariot, but the Joint Chiefs were not happy about using a French ship. This would require that French troops be used in the raid and that would mean approaching the leader of the Free French, General Charles de Gaulle. This would inevitably widen the number of people with knowledge of the operation and increase the risk of details leaking out. It was felt that t would be easier to find a suitable ship from within the Royal Navy, rather than risk a breach in security.
Lt Colonel Charles Newman was chosen to lead Commandos on the operation. Newman was a building contractor by profession and had been in the Territorial Army before the war (Essex Regiment). At 38 he seemed old to most of his subordinates but his leadership ability and the way he could relate to his men meant that he was popular and well respected. Given that Newman was its commanding officer, it was natural that the majority of the troops involved would come from No. 2 Commando, but many officers and men were drawn from other units to give them battle experience. The Commandos under went intensive training in the techniques of street fighting at night under No. 2 Commando's second-in-command Major Bill Copland and would have to provide protection squads for the demolition teams, secure and hold positions vital to the outcome of the raid and keep enemy forces at bay long enough for the demolitions teams to do their work.
All the soldiers that were to take part in the raid had broad experience in raiding techniques, but the St Nazaire raid would require the acquisition of demolition skills specifically tailored to the targets that awaited the force. In this regard, Combined Operations were lucky enough to locate Captain W H Pritchard of the Royal Engineers who was highly qualified as he had seen action in France that had included blowing bridges behind the retreating BEF, whose father was Dock Master in Cardiff and who had been an engineering apprentice in the dockyards of the Great Western Railway before the war. His expertise had been put to good use as he had been asked to look at a number of ports and methods by which they might be made unusable to the enemy. One of those was St Nazaire. He had concluded that aerial bombardment would not destroy the machinery required to put the dock out of action - that would only be accomplished by the precise placement of charges and the actual locations and methods were outlined in the report. Another sapper, Captain Bob Montgomery, who also had wealth of knowledge on the subject, had assisted in the production of the report and both officers were now tasked with helping Newman.
The demolition teams were drawn from 1, 3, 4, 5, 6, 9 and 12 Commando and were sent to Burntisland on the Firth of Forth to undertake specialised training in the destruction of dockyard installations. The teams were trained in the use of explosive charges and taught to identify the precise location of where to place the charges to gain maximum benefit. The teams were then taken to Rosyth dockyard to familiarise them with the general working and weak points of a dockyard and from there split into two separate groups and transported to either Cardiff or Southampton in order to practise their techniques on these two large commercial ports. The teams had to perform within set times, sometimes in the dark and sometimes with key members missing who had suddenly been deemed as casualties. In Southampton they practised on the great King George V Dry Dock, almost an exact replica of the Normandie Dock on which it was modelled. Lieutenant Stuart Chant and his men practised descending the dark metal stairs of the pumping chamber to set imaginary explosives against the vulnerable impeller pumps. Lieutenants Brett and Burtenshaw climbed into the hollow caisson to place charges, whilst Lieutenants Purdon and Smalley practised setting charges to demolish the winding house that opened and closed the gates. After a week the groups swapped round so that the teams could gain the widest experience possible to cope with unforeseen events.
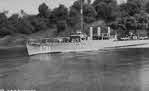
The Royal Naval contingent was led by Commander Robert Ryder who, even at the age of 34, had a great deal of seagoing experience, having served three years in submarines, commanded a schooner for three years during which it had sailed to the arctic, commanded the frigate HMS Fleetwood for six months and had a Q-Ship torpedoed out from under him and spent four days clinging to a wooden chock. At the time he had been assigned to a desk job in a stately home in Southern England having lost his last ship in a collision in thick fog. His task was to organise for, and ultimately implement the plan to land 200 Commandos in St Nazaire, get an aging destroyer to the port and make sure it rammed the southern caisson of the dry dock and withdraw the survivors back to Britain.
To help cause confusion and delay the German response, Campbeltown was altered to resemble a German destroyer of the M�we class. This required the removal of two of her four smoke stacks and the modification of the other two that included cutting them at an oblique angle and enlarging the forward one to almost twice its original size, while the rear stack was shortened slightly. To give some extra protection to the crew, extra steel plates and splinter mats were welded to certain areas of the ship and two parallel rows of plating were welded along the decks to give some shelter to the commandos as they lay in the open on the final run into the port. Her armament was also beefed up with the original 4in gun being replaced by a rapid-firing 12pdr and eight 20mm Mark I Oerlikon cannons being added on elevated platforms. All unnecessary equipment and stores were stripped away from her to make her as light as possible and when she left for St Nazaire, she had just enough fuel and water to make the trip. Campbeltown drew just eleven feet of water on this journey, but there was one vital addition to her in the forward compartments - a massive charge with four-and-a-quarter tons of high explosive. The explosive punch was organised by Lt Nigel Tibbits who decided to use twenty-four Mk. VII depth charges, each weighing 400lbs. The charges were grouped together in a steel tank and then covered in concrete. The long-delay pencil fuses were inserted, connected by cordtex (a fuse that detonated instantaneously) and primed to explode after an eight-hour delay.
The remainder of the naval force was made up of smaller craft that came in three types. Most were Fairmile 'B' motor launches, armed in a variety of ways with some even having torpedoes. It was the most common type of launch made in Britain during the war with some 560 being made at over seventy individual shipyards. They were of wooded construction, 112 feet long, 19.5 feet across the beam and powered by two 600hp Hall-Scott petrol engines giving a maximum speed of 20 knots. Eight came from Lt Commander F N Wood's 28 Motor Launch Flotilla, while another four came from 20 Motor Launch Flotilla, led by Lt Commander W L Stephen. All these craft had their armament modified to give additional firepower. The single Hotchkiss 3-pdr was replaced by two 20mm Oerlikon canons mounted fore and aft, as well as two 0.303in Lewis machineguns mounted on the bridge. The twelve craft were augmented just before the raid by another four motor launches from 7 Motor Launch Flotilla that were armed with two 18in torpedo tubes, one either side of the funnel. While they received Lewis guns, there wasn't enough time to install Oerlikons so they kept the 3-pdr Hotchkiss guns. The second type of craft was MGB 314. This came from 14 Motor Gun Boat Flotilla and was a Fairmile C class launch. Some twenty-four were built and while they were slightly smaller than the B class, they were powered by three 850hp Hall-Scott engines, which while propelling them to a greater top speed (26 knots) shortened their cruising range considerably. Even though MGB 314 had extra fuel tanks, she was still towed to a position very close to the target to conserve her fuel for the journey home. The C class were well armed with two 2-pdr guns fore and aft and two powered twin 0.50in heavy machineguns amidships. MGB 314 was also equipped with radar and an echo sounder and was the natural choice to become the command ship having both Ryder and Newman on board as she made the run up the Loire Estuary to St Nazaire. The third type of craft was MTB 74 commanded by Sub Lt R Wynn. This was a specially modified Vospers 70-foot motor torpedo boat that had her torpedo tubes mounted forward instead of amidships with the intention of firing specially modified torpedoes over the anti-torpedo net that surrounded the Scharnhorst as she lay in Brest harbour. These would sink to the bottom and then detonate under the ship. Both Scharnhorst and Gneisenau escaped from Brest before the operation could be mounted but the craft was drafted into Operation Chariot as her speed (almost 40knots from being 40-foot shorter than the other boats and having three 1,250hp super-charged Packard and two Ford V8 engines) might well prove useful.
Zuckschwerdt's command was composed of the 280th Naval Artillery Battalion under Kapit�n zur See Edo Dieckmann whose headquarters was at Ch�moulin Point. His battalion consisted of some twenty-eight guns of varying calibres, from 75mm to the great 240mm railway guns at La Baule. There was also the 22nd Naval Flak Brigade commanded by Kapit�n zur See Karl-Conrad Mecke whose headquarters was in St Marc. His brigade consisted of three battalions under Korvettenkapit�n Thiessen (703rd), Korvettenkapit�n Koch (705th) and Korvettenkapit�n Burhenne (809th). The three units had forty-three guns between them, mainly 20mm and 40mm but with a few 37mm cannons, and covered the waters closer to the estuary and the port itself as well as defending the area against air attack. Mecke also commanded the numerous searchlights, which lit the river or the sky to illuminate targets for the guns. There were four large 150mm searchlights and a large number of smaller 60mm searchlights as backup for the smaller-calibre quick firing guns. Finally, there was the Harbour Command under Korvetenkapit�n Kellermann who looked after the close defence of the dockyard with guard companies armed with small arms and light machineguns, as well as the harbour defence boats that patrolled the river and its mouth.
While not immediately concerned with its defence, there were the naval technicians, industrial workers and U-Boat maintenance groups that were employed in the port itself, as well as ships' crews and workers from the Todt Organisation. All of these were capable of bearing arms and defending the port. Further afield was the corps headquarters of General Ritter von Prager and his 333rd Infantry Division garrisoned this part of the coast. The division had been formed back in January 1941 and was made up to a large extent of Polish troops. It was to be transferred to the Eastern Front in early 1943 where it would be badly mauled and effectively cease to exist as a fighting unit and be disbanded. It had arrived from Brittany early in 1942 and was to cover the coast from St Nazaire to Lorient. The division's 679th Infantry Regiment was headquartered just west of La Baule and as it had not been placed on immediate alert, it took time for it to mobilise to respond against the attack.
While the Normandie Dock was undoubtedly seen as an important asset, the fact that the U-Boats were the main weapon against the British at that time rather than the Luftwaffe (which was engaged in the war against the Soviet Union), meant that most Germans considered the U-Boat pens as the most vital target within the port. The massive concrete structure provided a safe haven for the U-Boats of the 7th Submarine Flotilla and part of the 6th, which at the time was gradually being transferred to St Nazaire. The defences of the port were planned in the expectation that any landing would be directed against the U-Boat pens rather then the Normandie Dock and were thought to be more than adequate to repel any attack. The day before the raid, Admiral D�nitz, Flag Officer, U-Boats, visited St Nazaire and asked Kapit�nleutnant Herbert Sohler, who commanded the 7th Submarine Flotilla, what he would do if the British landed in the port. 'It would be out of the question for the English to enter the harbour' replied Sohler. Little did he know that at that moment, the British force was in the Bay of Biscay and heading in the direction of St Nazaire.
On 23 March, HMS Atherstone and Tynedale arrived in Falmouth, the two 'Hunt' class destroyers being there to act as escorts to the force as they made their way to the mouth of the Loire. Late in the afternoon of 25 March, Campbeltown arrived in port and caused a stir among veterans as were modified (and Germanic) outline was silhouetted against the setting sun. The ship had a new master, the previous captain being considered too old for the raid and was replaced by Lt Commander Stephen Beattie. This suited Ryder well as Beattie and he knew each other from way back when they were both cadets on the training ship HMS Thunderer. After everyone had arrived, a formal briefing was conducted in which everyone learnt in detail of what the target was and what he or she would be required to do. It was obvious that from the odds they faced, many in the raiding party would not return. An opportunity was given for any who wished to remain behind could do so without any recrimination or loss of honour, but none came forward to drop out. The objectives of the raid, in order of priority, were thus:
The journey to St Nazaire would be made in the company of the two destroyers, Tynedale and Atherstone and would be made in a sub-hunting formation to keep the cover story going when near to home base and to fool enemy spotter aircraft when in the Bay of Biscay. Near the entrance of the Loire, the two destroyers would leave the flotilla and the force would adopt battle formation. MGB 314 with its radar and echo sounder would be in the lead, guiding the force across the mudflats and shallows. On either side of the gun boat would be the motor torpedo boats ML 160 and ML 270 that would fire their torpedoes at any vessel interfering with the force. After that would be Campbeltown with two columns of motor launches on either side and to the rear, the port column landing its Commandos at the Old Mole, while the starboard column would head for the Old Entrance. Two more motor torpedo boats (ML 446 and ML 298) would cover the rear and MTB 74, with its erratic momentum would try and keep station, waiting for an opportunity to torpedo the lock in the Old Entrance. After landing the troops, the craft would wait in the river until the demolition tasks had been completed as far as possible and re-embarkation of the Commandos would take place from the Old Mole. The crew of Campbeltown would be picked up from around the Old Entrance after they had evacuated the ship. The four torpedo carrying launches (160, 170, 298 and 446) would provide additional capacity for embarking troops once the Commandos were embarking. The operation had been scheduled to take place on the night of the 28 / 29 March, the night of the highest tides in the Loire but Ryder felt that the force was ready to go and not wanting to lose the good weather decided to go a day early. The small force therefore set out on the afternoon of 26 March.
Soon after the encounter with U-593, the force ran into a fleet of French fishing trawlers. It was believed that the Germans often put observers aboard these vessels with radios to report on any British movements and Ryder had decided to sink any such vessels that they came across but the number of vessels made impossible to sink them all and so Ryder decided to sink just two of them after taking off their crews. The French fishermen assured him that there were no German observers aboard any of the vessels. As the day wore on, the weather gradually worsened and the sky became grey and overcast. Just after midday, the force was told that reconnaissance photos had picked up five German destroyers leaving St Nazaire and who might be encountered on the run into the port. Fortunately, the destroyers had put to sea before the force arrived and were patrolling the submarine lanes near the coast in response to U-593's message about a possible mine-laying operation. At 18.30 one of the launches (ML 341 under Lt D Briault) developed a fault with the port engine and it was decided that ML 446 (under Lt Falconar) would take off its party of Commandos. This took sometime to complete and ML 446 finally caught up with the rest of the force just as they had reached the entrance to the Loire estuary. ML 341 was left to make it back to Britain on her own.
The force then continued towards the French coast and with two more gradual changes of course, came into line with St Nazaire. From here the force would move direct to the port and just after 20.00 the two escorting destroyers parted company with the raiders to set up a standing patrol. MGB 314 was cast off from Tynedale to advance under its own power whereupon Commander Ryder and Lt Col Newman boarded the boat, which became their headquarters. The force assumed battle formation and sped up to 12 knots for the run into the port. There was one more rendezvous to make before St Nazaire however. The submarine HMS Sturgeon, under Lt Commander Mervyn Wingfield, was waiting for the force at Point Z to act as a navigational beacon as the run into St Nazaire had to be carried out along a precise course over mud flats and sand banks. At 22.00 Sturgeon's light was spotted straight ahead - the force was exactly on time and on course. The final run into their own 'valley of death' could now begin.
Ahead, the bombing was becoming sporadic, with often a few or even a single plane making bombing runs. Kapit�n zur See Mecke had started to become suspicious - the bombing raid was just not developing as it should, with hordes of bombers dropping tons of high explosive but a few planes here and there releasing their ordnance. He alerted all units to be on their guard and followed this up again at midnight and again at 01.00 with warnings to be alert for either parachute landings or an attack from the sea. He also ordered the AA guns to cease fire and searchlights to be extinguished. Meanwhile the raiding force was getting closer and closer to the port, passing over the mud flats and sand banks that twice caused the Campbeltown to lightly ground but did not affect her forward momentum. At 01.20 they slipped passed the Les Mor�es Tower, when a searchlight pierced the blackness behind them and swept the river, just as suddenly going out. The force was now less than two miles from the target and still apparently undetected. While their luck had held amazingly well, it could not last.
In fact the force had been spotted a few minutes earlier by a lookout at St Marc who contacted the Harbour Commander's headquarters reporting that a force of some seventeen vessels was headed up the channel. The sighting was dismissed out of hand as no vessels were expected. The sighting was passed onto Mecke's headquarters, and the staff there contacted the Harbour Commander's headquarters as well, receiving the same reply. After all this had occurred, Mecke himself was told of the sighting and at 01.20 signalled all units in the St Nazaire area to beware of a landing. This set in motion plans to counter an enemy landing that had enemy troops, ship's crews, harbour defence vessels, shore defences and reinforcements moving to thwart such an attack. As the force moved ever closer to the target, searchlights on both banks of the river came to life and started to probe the dark waters for the vessels. They quickly locked onto the grey destroyer and at first sight, the Campbeltown resembled on of the huge M�we-class destroyers with a German flag fluttering on her mast. This caused some confusion and delay in the German gunner's reactions, despite the force having come out of the night unexpectedly. What should they do? A couple of gun crews fired some light cannon shells low over the force as a warning and the ships were challenged by signal stations on both banks. Leading Signalman Pike was prepared for this and quickly replied to the challenge with a 'Wait', followed by the call sign of a torpedo boat known to the raiders. This was followed by a signal prefixed 'Urgent' and a message 'two craft damaged by enemy action, request permission to proceed to harbour without delay.' The Germans stopped firing, confused as to what to do. After something of a delay, the Germans started firing again, hesitantly at first, but with the heavier guns on the north gradually joining in with Dieckmann's batteries at Ch�moulin Point and Point de l'Eve. Pike started signalling again, 'You are firing on friendly ships'. Again the firing stopped in confusion, no doubt encouraged by the fact the British had not so far, fired back. By now the Campbeltown was entering the mouth of the River Loire itself and leaving the heavier guns behind her.
At this point, Commander Beattie ordered the men gathered on the open bridge into the covered wheelhouse as he felt it was becoming too 'hot'. The sides of the wheelhouse were plated and so gave some protection from smaller calibre weapons, expect for a slit in the front to give forward visibility. He planned to go to full speed and hit the caisson at twenty knots but could not as yet see anything as a searchlight dead ahead were impairing his vision. The helmsman next to him was shot dead, as was the quartermaster who leapt forward to take control. Tibbets, the demolition expert, then stepped forward to guide the ship as Beattie concentrated his gaze forward waiting for the moment that MGB 314 would veer off to starboard and allow the Campbeltown a clear run at the Normandie Dock. The main gun received a hit from a large calibre weapon that killed the crew and Commandos around it, the hit momentarily blinding Beattie, but recovering, he caught sight of the curved jetties of the south entrance. The Campbeltown passed the Old Mole with the lock gates a mere few hundred yards away. The motor gunboat then veered off and Beattie announced 'stand by to ram'. Everybody in the wheelhouse braced themselves for just ahead was the low black strip of steel that was the entrance to the Normandie Dock. Campbeltown hit the anti-torpedo net but the 1,000 tons of onrushing warship tore through it and hit the massive steel caisson with a low groan and shuddered to a halt. The time was 01.34 and Campbeltown had reached her target just four minutes late.
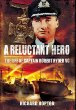 A Reluctant Hero: The Life and Times of Robert Ryder VC, Richard Hopton. A biography of the naval commander at the St Nazairre raid, who after a pre-war career dominated by sailing ships (he sailed home from China in a yacht built for the task and was the naval commander on the British Graham Land Expedition), he had a fairly distinguished wartime career, which included the raid on St. Nazairre, Dieppe and the D-Day Landings. [read full review]
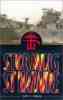 Dorrian, James Storming St Nazaire , Leo Cooper, London, 1998
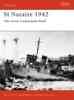 Ford, Ken St Nazaire 1942: The Great Commando Raid , Osprey Publishing, Oxford, 2001, Campaign Series No. 92.
 Lucas Phillips, C E The Greatest Raid of All , Heinemann, London, 1958
 'The Raid on Saint-Nazaire' After the Battle , No. 59, pp. 1 - 23.