Battle of Solferino, 24 June 1859
Background and the Advance to Battle
Terrain
The Fight at Solferino
The Fight in the South
The Fight in the North - San Martino and Madonna della Scoperta
Defeat and Retreat
Books
The battle of Solferino (24 June 1859) was the decisive battle of the first phase of the Second War of Italian Unification and was a hard fought French and Piedmontese victory that defeated an Austrian counterattack and forced Franz Josef to retreat back into the Quadrilateral fortresses of north-eastern Italy. The carnage of the battle also helped convinced Napoleon III that there was little advantage to be gaining from continuing with the war and he began peace negotiations.
Background and the Advance to Battle
The war began with an Austrian invasion of Piedmont, but they failed to take advantage of their early superiority in numbers to defeat the Piedmontese before the French could arrive. By 12 May the French were present in large numbers, and the two armies faced each other in the area north of Alessandria. The first battle of the war, at Montebello (20 May 1859) encouraged the Austrians to look south, and the Allies took advantage of this by moving their army left (27-29 May), to attack the weaker Austrian right wing around Vercelli and Novara. The Piedmontese launched a covering attack at Palestro (30-31 May 1859), and repulsed a weak Austrian counterattack. Feldzeugmeister Franz Count Gyulai, the Austrian commander, finally realised what had happened, and after spending 1 June planning to attack towards Novara realised that he had been outmanoeuvred and ordered a retreat to the Ticino and Lombardy. The Allies followed, and on 3 June, while the Austrians were deciding which side of the river to defend, the French captured a river crossing (battle of Turbigo, 3 June 1859). By the end of the day MacMahon's II Corps was already across the river.
The first truly decisive battle of the war came on 4 June (battle of Magenta, 4 June 1859). This was a badly handled encounter battle in which neither high command played any significant role. The higher quality of the French soldiers was decisive and the Austrians suffered a defeat that forced them to begin a retreat out of Lombardy and back towards the Quadrilateral, their network of fortifications in Venetia. The Austrians also reorganised their army. Gyulai resigned on 16 June, and on 18 June Franz Josef took personal command of the army. This was a bold step - he would win the credit for any victories, but a defeat could lower the prestige of the monarchy across his unwieldy empire. Gyulai's large 2nd Army was split into two four corps armies. Feldzeugmeister Count Wimpffen was given command of the 1st Army (II, III, IX and XI Korps), and General der Kavallerie Count Schlick was given 2nd Army (I, V, VII and VIII Korps). The reorganised army pulled back to the Mincio on 20-21 June 1859, while the Allies advanced to the Chiese. The Piedmontese army made up the left wing of the Allied force, with the French in the centre and right.
As the allies advanced towards the Mincio they expected the Austrians to try and defend the river. What they didn't realise was that Franz Josef and his advisors had decided to launch a counterattack. Franz Josef wanted to catch the Allies while they were crossing the Chiese. The Emperor and some of his advisors believed that the Allies were still around Montechiaro, on the Chiese. The Austrians planned to use the 2nd Army to pin the Allies in front while the 1st Army crossed the plains and attacked from the south. The result of these respective misapprehensions was that the two armies unexpectedly ran into each other almost half way between the Chiese and the Mincio.
At the end of 23 June the Austrians had advanced to the positions they would occupy when the battle started. VIII Korps was on the right, at Pozzolengo. V Korps was next in line, at Solferino. I Korps was just to the south at Cavriana. First Army formed the Austrian left and was strung out from west to east, with IX Korps close to Medole, III Korps next at Guidizzolo and XI Korps a bit further to the south-east. The Austrians had around 130,000 men engaged at Solferino, with slightly more men on their left.
The Allies moved east on the morning of 24 June. Four Piedmontese divisions were on the left, in the area between the ridge and Lake Garda. I Corps (Baraguey) was in the centre, advancing along the ridge towards Solferino. II Corps (MacMahon) was to his right, heading for Cavriana. On the right IV Corps (Niel) was advancing from Medole towards Carpenedole-Guidizzolo, with III Corps (Canrobert) following begin. The Imperial Guard was in reserve.
As a result of these movements the Piedmontese ran into VIII Korps and part of V Korps. I Corps clashed with V Korps at Solferino. II Corps fought I Korps. In the south Niel's IV Corps found it self up against IX, III and XI Korps. Canrobert's III Corps was further to the south and many of his men missed the battle.
The overall course of the battle was quite simple. In the north the Piedmontese made a number of piecemeal attacks on the Austrians, each of which failed. The Austrians only retreated when the battle had been lost elsewhere. In the south the situation was reversed, and Niel held off a much larger Austrian force. The key part of the fight came in the centre, where after a day of hard fighting the French broke the Austrian centre around Solferino. This defeat forced the entire Austrian army to retreat.
The French had around 90,000 men at Solferino, the Piedmontese had around 40,000, for a total of 130,000. The two sides were thus very equally balanced.
Terrain
The battlefield was split into three. In the centre, running across from west to east was a ridge of higher ground. Solferino itself was close to the highest point on the ridge, and sits at the eastern foot of a hill, with a walled building complex on the hill top, as well as a tower known as the Spia d'Italia. To the north is an area of rolling hills that run up to Lake Garda, to the south is a large level plain, the Campo di Medole. Solferino village was a very strong defensive position.
The Fight at Solferino
The most intense fighting took place in the middle of the field, around Solferino. Here some 55,000 French troops from Baraguey d'Hilliers' I Corps, MacMahon's II Corps and the Imperial Guard clashed with Stadion's V Korps, Clam Gallas's I Korps and Schwarzenberg's III Korps. This battle fell into two parts, with MacMahon and Schaafsgottsche fighting a separate battle just to the south of the Solferino ridge.
Baraguey d'Hilliers' I corps left Castiglione at 3am. At around 5am his leading division ran into Stadion's outposts on the heights west of Solferino. Ladmirault's Division, aided by Florey on his right, pushed the Austrians back to the ridges just to the west of Solferino. The Austrian Bils and Puchner Brigades held the French up just west of Solferino until around 10am, but were then forced back into the village. The Austrians now held Monte di Cipressi (the buildings on the top of the hill west of Solferino) and the cemetery on the lower ground to the north. Stadion also had a brigade deployed to the north.
A fierce battle now developed west of Solferino. Baraguey d'Hilliers' was an impatient commander, and committed his men before their artillery had arrived. A series of French attacks were repulsed at great cost. An attack by two divisions was repulsed before 11am, while a third division was repulsed around 11am.
While these attacks were being repulsed the French artillery reached the battlefield. The French finally made a properly organised attack with good artillery support at around 2pm, and this time both the cemetery and the high ground was captured. By 2.30 Stadion's men were retreating. They headed east, along the northern side of the ridge, allowing the French to advance along the southern edge of the high ground. Solferino town fell and Baraguey d'Hilliers' men continued to advance east, taking advantage of the collapse of the Austrian centre.
MacMahon's II Corps also began to move at 3am, moving parallel to Baraguey d'Hilliers. He also ran into the leading Austrian troops at around 5am, this time elements from Schwarzenberg's corps. The fighting here didn't start until around 8.30am, when Schönberger's Division attacked MacMahon's line. This attack was repulsed, as were a number of Austrian attacks to exploit the gap between MacMahon and Niel's IV Corps to the south.
At around 2pm MacMahon went onto the offensive, capturing San Cassiano, south of Solferino. They were held up just to the south east by the Prinz von Hesse. Hesse was only forced to retreat after the Imperial Guard joined the offensive. The French advanced towards the 1st' Army's Headquarters at Cavriana (also threatening Franz Josef, who was at the same village). Parts of Stadion's V Korps, Clam Gallas's V Korps and Zobel's VII Korps attempted to stem the French attack, but without any great determination. Hesse evacuated Cavriana at around 3.30pm, and the French captured the village at 4.30.
MacMahon's II Corps vs Austrian VII Korps at San Cassiano - hard battle, by 2pm La Motterouge's division and Guiard cavalry break Austrian line, threatene HQ of 1st Army at Cavriana, east of San Cassiano. The main fighting was ended by a heavy storm in the early evening, although the Austrians continued to suffer casualties as they came under fire from the new rifled French artillery.
The fighting around Solferino was very costly on both sides. The French lost 1,025 dead, 4,852 wounded and 997 missing, with 4,000 of those casualties in Baraguey d'Hilliers' corps. The Austrians lost 9,326 men, half of them in Stadion's corps.
The Fight in the South
In the south Niel's IV Corps, with some help from Canrobert's III Corps (21,000 men at the start, 36,768 eventually) faced three Austrian corps - III (Schwarzenberg), IX (Schaafsgottsche) and XI (Weigl), with 53,999 men. As was so often the case during this war, the Austrians wasted their numerical advantage and attacked piecemeal, allowing Niel to hold off much larger forces.
The fighting began at Medole, where Niel's leading troops forced ten Austrian infantry companies and their supporting cavalry to retreat. The Austrian infantry pulled back to Rebecco at around 7am, while the cavalry moved towards Ceresara. The Austrian cavalry commander found that the rest of his men had already left the area, and instead of staying to support the fight he headed off in an attempt to find them.
As Niel advanced east from Medole he ran into elements from three Austrian corps. Schaafsgottsche's IX Korps was present in strength. Schwarzenberg's III Korps was also involved, although part of this corps was engaged with MacMahon to the north. Finally four of the five brigades of Weigl's IX Corps arrived later in the morning. Niel was outnumbered by around two to one, but the Austrians failed to take advantage of their numerical advantage and didn’t launch a coordinated attack. Niel also made good use of his rifled artillery, forming a Grand Battery on his left flank, where it helped guard the gap between his corps and MacMahon. Although the Austrian attacks were uncoordinated, they came close to success on several occasions.
By mid-afternoon the Austrian attacks had been fought off and Niel had finally received more reinforcements from Canrobert. At the same time Solferino had fallen and the Austrian centre was in retreat. Franz Josef ordered Graf Wimpffen, the commander of First Army, to launch an attack north into the flank of the advancing French. Just as Wimpffen was preparing for this attack Niel launched an attack on his positions around Guidizzolo. Although this attack failed, it did disrupt Wimpffen's preparations and the Austrian counterattack never materialised. Soon after this the storm broke over the southern part of the battlefield, ending the battle.
The French lost 660 dead, 4,012 wounded and 566 missing on the right, most of them in Niel's corps, which lost 552 dead, 3,552 wounded and 501 missing. Perhaps unsurprisingly this triggered something of a feud between Canrobert and Niel which lasted well beyond the war. Austrian casualties on their left were higher, at 9,796.
The Fight in the North - San Martino and Madonna della Scoperta
In the north four Piedmontese divisions with nearly 39,000 men faced Benedek's VIII Korps and part of Stadion's V Korps, a total of 28,558 men. This time it was the Piedmontese who wasted their numerical advantage and launched a series of piecemeal attacks. On 23 June Victor Emmanuel had his own head quarters at Lonato, while his staff officers were with Napoleon III at Monitchiari. This split continued on 24 June.
The railway ran through Lonato, along the southern shore of Lake Garda and on to Peschiera. On the 24 June the Piedmontese advanced on the left of the French. Fanti's 2nd Division was on the right, closest to the French, but some way behind the other three divisions. Durando's 1st Division was next, advancing south-east towards Madonna della Scoperta (north-east of Solferino). Cucchiari's 5th Division and Mollard's 3rd Division moved east along Lake Garda following the railway, then turned south at Rivoltella and headed south towards San Martino and Pizzolengo. Mollard's division was in front, with Cucchiari some way behind and their scouts some way ahead.
Two separate but rather similar battles developed - one at Madonna della Scoperta and one at San Martino. In each case the Austrians held a strong position based around buildings on a hill and the Piedmontese attacked piecemeal, each attack being repulsed. Eventually they organised full strength attacks, which came after the Austrians had been defeated at Solferino, and the Austrians carried out a fighting retreat.
Madonna della Scoperta
Madoona della Scoperta was defended by two brigades from Stadion's V Korps. This was a similar position to San Martino, with the Austrians defending a hilltop settlement. The Piedmontese also attacked piecemeal. Durando's 1st Division arrived at around 5.30am. His first attacks were made by the Savoia Brigade, but all of these failed. The village finally fell to the Granatiere Brigade (the Royal Guard), but by this time Stadion had begun to withdraw in response to the Austrian defeat at Solferino. This threatened Benedek's position at San Martino, and helped contribute to his decision to withdraw.
San Martino
San Martino was defended by Benedek's strong VIII Korps. Benedek was one of the best Austrian corps commanders, with a rare ability to motivate the rank and file. He was also helped by the piecemeal nature of the Piedmontese attacks, with brigades thrown in as they arrived. The fighting began when Mollard's advance guard, commanded by Raffaele Cordorna (father of the First World War commander), ran into Brigade Lippert at Pontecello, a walled farm near to San Martino. Cadorna withdrew under Austrian pressure, and Benedek took up a strong position around San Martino church. Brigade Lippert formed the right and Brigade Reichlin the Austrian left.
Mollard decided to launch an attack with the Cuneo Brigade, the only troops then available to him, instead of waiting for the rest of his division to arrive. His aim was to drive the Austrians off before they could take a firm grip on the high ground. The attack, which began at around 9am, began well and the Piedmontese captured the lower parts of the hill. They were then pushed off by an Austrian counterattack led by Brigade Berger.
By around 10am Cucchiari's full division had arried, and launched a two-brigade attack. This too made some progress, but the Austrians had gathered massed gun battery on the ridge. The advancing Italians were hit by case fire from thirty guns. Cucchiari's division broke and fled, and couldn't be stopped until it reached Rivoltella.
Mollard's second brigade had now arrived, but he decided not to risk another attack until Cucchiara could restore the morale of his division. Reinforcements were also expected from Fanti's 2nd Division, which sent Brigade Aosta. The fighting resumged at around 4pm. This time Mollard's Brigade Pinerolo formed the right, and Brigade Aosta the left. Brigade Cuneo formed the reserve. At the same time the Austrian defeat around Solferino had forced Benedek to send Brigade Reichlin to cover his left. This attack also failed to take the hill, but this time the Piedmontese were able to secure a position half way up the hill.
The Austrians were finally forced to retreat around sunset. Benedek had received orderes to retreat, and he was now faced with a five brigade attack, with Pinerolo and Aosta attacking in the centre, Cucchiari's men on the Italian left and the Piemonte brigade, coming from Madonna della Scoperta, the right. Benedek carried out a skilful retreat, but his decision to head east towards Milan, instead of south-east towards the main Austrian army, had a big impact on the Austrian decision not to resume the battle on the following day.
The fighting around San Martino was very costly. The Piedmontese suffered 691 dead, 3,572 wounded and 1,258 missing. Benekek lost 2,615 men, making him the most successful Austrian commander on the day.
Defeat and Retreat
The loss of Solferino village and the collapse of their centre meant that the Austrians had lost the battle. The Allies were unable to mount a proper pursuit, and the Austrians were able to get back across the Mincio. The Austrians had lost 22,000 men in the fighting, but the Allies hadn't done much better, suffering around 17,000 casualties. Neither supreme commander had much impact on the battle, although Napoleon III had been more effective, making some effort to concentrate in the centre of the field. Franz Josef and the Austrian high command hardly ever appear in accounts of the battle and their few orders were unrealistic and could rarely be carried out. The higher quality of the French infantry was also an important contribution to their victory, helping them to hold on against superior forces in the south and push the Austrians out of their strong defensive positions in the centre.
Military operations continued for a couple of weeks after the battle of Solferino. The Piedmontese laid siege to Peschiera, while the French prepared to besiege Mantua. However the carnage at Solferino, combined with the increasing possibility of German intervention had convinced Napoleon III that there was little to be gained by a costly continuation of the war. His aide-de-camp visited the Austrians at Verona on 6 July, and an armistice was agreed on 8 July. Napoleon III and Franz Josef met at Villafranca on 11 July and agreed to a peace deal. France would get Lombardy, which it would then give to Piedmont. Austria would keep Venetia and the fortresses at Mantua and Peschiera. Victor Emmanuel understood the political reasons for this deal, although many Italians felt betrayed. By the time the armistice was turned into a full peace treaty early in 1860 Piedmont's gains had expanded to include part of the Papal States, Tuscany, Parma and Modena, and more was to come. In 1860 Garibaldi led his famous Thousand to Sicily, where they captured Palermo, and after receiving reinforcements seized the rest of the island. They then crossed to the mainland and took Naples. The Kingdom of Naples crumbled, and by the end of 1860 had become part of the soon to be proclaimed Kingdom of Italy.
Only Venetia and Rome were left outside Italy. Venetia was gained in 1866, during the Austro-Prussian War (Third War of Italian Liberation). Rome took a little longer. Garibaldi made two marches on the city, in 1862 and 1867, each one ending in defeat. Napoleon III was determined to keep Rome out of Italian hands, but the Franco-Prussian War of 1870 meant that he was no longer able to intervene. A short Fourth War of Italian Liberation followed and by the end of 1870 Rome had become the capital of the Kingdom of Italy.
The battle of Solferino had one other long lasting effect. Henri Dunant, a Swiss businessman, saw the carnage and the plight of the wounded after the battle. This inspired him to call the Geneva Conference of 1863. This saw the foundation of the International Red Cross and the adoption in the following year of the first Geneva Convention, an attempt to limit the horrors of war.
Books
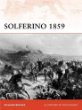 Solferino 1859: The Battle for Italy's Freedom, Richard Brooks
. The battle of Solferino was the main event in the Franco-Austrian War of 1859, a key moment in the unification of Italy, and the first battle to be decided at least partly by the extensive use of the railway and steamships and rifled artillery. It also led directly to the foundation of the Red Cross, but despite these claims to fame it has since been overshadowed by the American Civil War and Franco-Prussian War. Brooks' volume is an excellent single-volume account of the entire campaign, and will be of value to anyone with an interest in nineteenth century warfare [
see more].
How to cite this article:
Rickard, J (11 February 2013), Battle of Solferino, 24 June 1859 , https://www.historyofwar.org/articles/battles_solferino.html
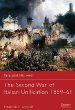 The Second War of Italian Unification 1859-61, Frederick C. Schneid. Focuses on the three separate conflicts that made up the Second War of Italian Unification (the Franco-Austrian War, Garibaldi's invasion of the kingdom of Naples and the invasion of the Papal State), the conflict that saw the creation of the Kingdom of Italy. [read full review]